Mastering the UAV Aerial Survey Workflow From Start to Finish
Building The Foundation For A Flawless Survey
Before the rotors even start spinning, the real work happens on the ground. At this stage, you’re not just ticking off items on a checklist—you’re translating fuzzy client ideas into precise, technical goals that steer every aspect of the mission.
When you invest time in strategic thinking and risk assessment now, you’re avoiding headaches later. Skipping this step often means unexpected surprises in the field, data gaps, and expensive re-flights.
Defining Concrete Project Objectives
Clients will often say, “We need a map of our site.” But what does that really mean? Your job is to ask the right questions so you can select the correct tools, sensors, and flight parameters.
Key questions to nail down include:
- Deliverable Type: Orthomosaic, DEM, 3D model, or classified LiDAR point cloud?
- Required Accuracy: Do they need centimeter-level survey-grade precision or is meter-level “pretty good” enough?
- Data Resolution: Will a 2 cm GSD reveal fine cracks, or is a 10 cm GSD ideal for a broad overview?
Once you’ve clarified these points, you’ll have the blueprint for your flight plan, equipment list, and processing workflow.
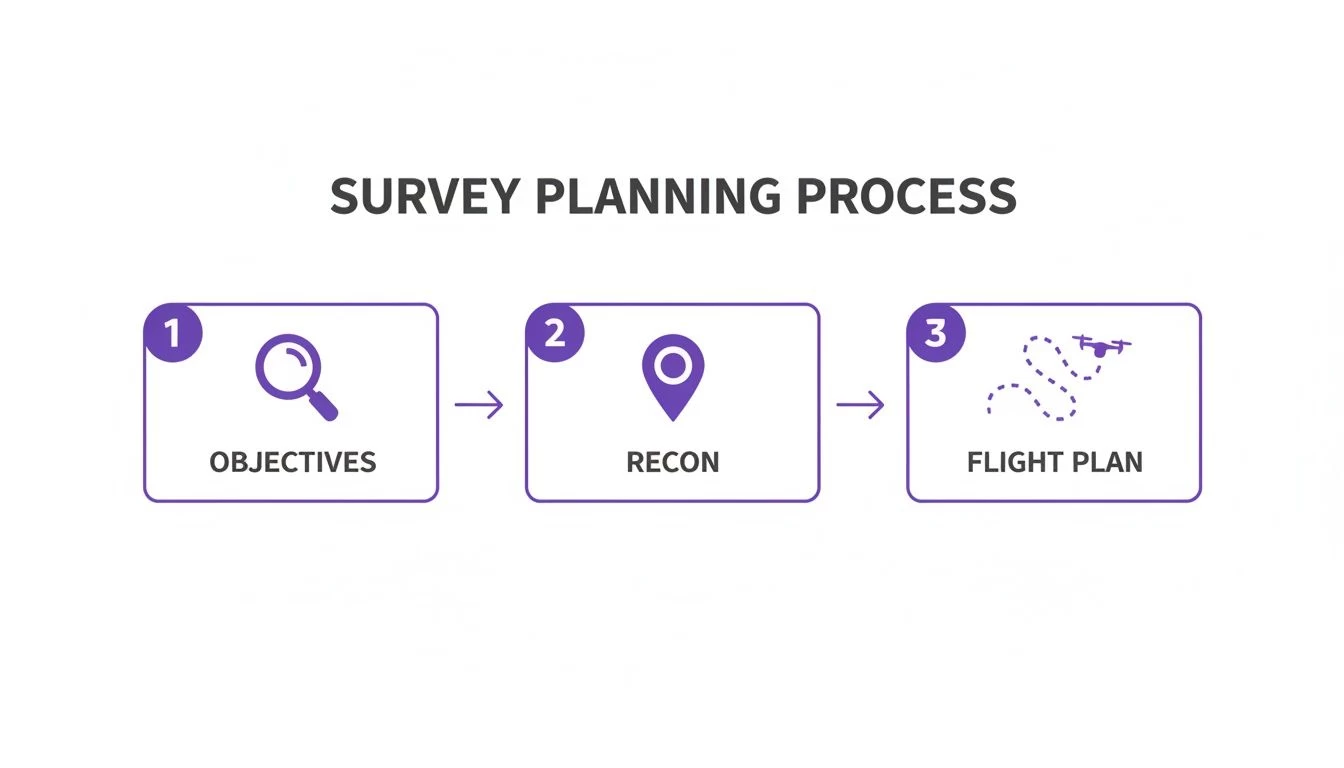
This diagram highlights how clear objectives feed directly into both reconnaissance and final flight planning, creating a smooth, logical workflow.
Conducting Thorough Site Reconnaissance
With objectives in hand, it’s time to walk—or virtually tour—the site. Automated planners can draw flight lines, but only an on-site visit reveals hidden risks.
During recon, pay special attention to:
- GPS Dead Zones: Urban canyons or thick foliage can drop your RTK fix.
- Reflective Surfaces: Pools of water or mirrored buildings will trip up your photogrammetry stitching.
- Airspace & Ground Hazards: Power lines, nearby helipads, public access areas, and radio towers all demand early identification.
A critical part of reconnaissance is also understanding the local regulatory environment. This includes federal aviation rules, local ordinances, property access rights, and any notifications needed for nearby residents or businesses.
Market Snapshot
North America continues to lead the UAV aerial survey sector, capturing a 34.12% share in 2025 with a valuation of USD 14.08 billion. In fact, the U.S. market alone is expected to reach USD 15.47 billion by 2026. You can dive deeper into these trends in the full report.
Matching Your Sensor To The Survey Goal
Not sure which sensor or platform fits your project like a glove? Use the matrix below to match common survey objectives with the right gear.
| Project Goal | Recommended Sensor | Ideal UAV Type | Key Considerations |
|---|---|---|---|
| High-Resolution Orthomosaic | 20 MP RGB Photogrammetry Camera | Multirotor with RTK/PPK | 2 cm GSD, 80% overlap, ground control points |
| Digital Terrain Modeling | UAV-Mounted LiDAR Scanner | Hybrid VTOL or Fixed-Wing VTOL | Pulse rate, flight altitude, vegetation penetration |
| Vegetation Health Analysis | Multispectral Camera | Fixed-Wing | Calibration panels, consistent lighting |
| 3D Structural Reconstruction | RGB + GNSS Geotagging | Hybrid VTOL | Nadir & oblique imagery, 70% sidelap |
| Thermal Leak Detection | Thermal Infrared Array | Multirotor | Sensor warm-up time, ambient temperature control |
Use this practical guide to ensure your hardware choices align with client deliverables and on-site realities.
Wrapping Up Pre-Flight Planning
This planning phase isn’t optional—it’s the backbone of any professional UAV aerial survey. A robust roadmap cuts out guesswork, guarantees regulatory compliance, and ensures the first flight meets client expectations, saving time and money while building your reputation for precision.
Designing Your Flight Plan for Precision Data
A great flight plan is the difference between clean, usable data and a digital mess that’s headed for the bin. This is the stage where you translate your project goals into specific instructions for the drone, defining the parameters that directly control the quality of your final data. Honestly, getting this right is non-negotiable for any successful aerial survey.
Key parameters like altitude, speed, and image overlap aren't just numbers you punch into an app; they are the fundamental controls for your data’s resolution and the integrity of the final model. A plan that’s perfect for a wide-area map will fail spectacularly on a linear inspection, and vice-versa. You have to understand why you’re choosing certain settings.
Altitude, Overlap, and GSD: The Big Three
The relationship between your flight altitude, image overlap, and Ground Sample Distance (GSD) is the absolute core of mission planning. GSD is a critical metric that tells you the real-world size of a single pixel in your images. A lower GSD means higher resolution, but it forces you to fly lower, which ramps up flight time and the number of photos needed.
- Flight Altitude: This directly controls your GSD. Flying lower gives you a smaller (and better) GSD but also a smaller image footprint on the ground, meaning more flight lines are needed to cover the same area.
- Image Overlap: This is what ensures your photogrammetry software has enough common points between adjacent photos to stitch them together accurately. The standard starting point is 75% frontal overlap and 70% sidelap, but for complex sites with lots of vertical structures or vegetation, you’ll often need to bump those numbers up.
- UAV Speed: Flying faster covers ground quicker, but it can introduce motion blur, especially at lower altitudes or in poor light. It's a constant trade-off between efficiency and image quality.
Think of it as a balancing act. For a construction site needing a GSD of 2 cm/px to pick out fine details, you'll be flying low and slow with high overlap. But for a preliminary topographic map of a huge rural area, a GSD of 10 cm/px might be perfectly fine, allowing you to fly higher and faster, making the mission far more efficient.
Matching Flight Patterns to Project Goals
The shape of your survey area dictates the best flight pattern. Using the wrong one is inefficient at best and can leave you with critical data gaps at worst.
Scenario 1: The Sprawling Solar Farm
Picture a 100-acre solar farm project. The client wants a high-resolution orthomosaic to document panel installation and a DEM to check the site’s drainage. The area is massive and relatively open.
- Objective: Consistent GSD and complete, gap-free coverage.
- Best Pattern: A Grid or Double-Grid pattern is your best bet. A standard grid ensures even coverage, while a double-grid (flying the grid pattern twice, perpendicular to the first pass) is far superior for creating detailed 3D models of the panel arrays because it captures them from more angles.
- Parameter Choice: To lock in a consistent 2.5 cm GSD, you'd set a fixed altitude (say, 250 feet AGL), maintain a steady speed, and use high overlap (80% front/75% side) to avoid any data holes between the panel rows.
Scenario 2: The Narrow Pipeline Corridor
Now, switch gears to a 10-mile pipeline inspection. The area of interest is long and skinny. The main goal is a visual inspection of the right-of-way, not a broad topographic map.
- Objective: Maximum efficiency and sharp linear detail.
- Best Pattern: A Corridor flight pattern is the only logical choice here. This involves creating a single, long flight path with just enough width to cover the pipeline and its immediate surroundings.
- Parameter Choice: Trying to fly a grid pattern here would be a colossal waste of time and batteries. The corridor mission focuses all the data capture right where it’s needed, on the target.
A well-designed flight plan captures only the necessary data. It's tempting to over-capture "just in case," but that dramatically inflates your processing time and storage costs without adding any real value to the final product.
Handling Large Missions and Battery Swaps
For large-scale projects like that solar farm or pipeline, you’re definitely going to need more than one battery. This introduces the challenge of keeping the flight seamless. Thankfully, modern flight planning software has this sorted by letting you plan missions that automatically pause when the battery runs low.
When the drone returns to home for a battery swap, the software remembers exactly where it left off. Once you’ve swapped the battery, you just hit resume, and the drone flies back to its last waypoint to continue the mission. This feature is absolutely essential for ensuring there are no gaps in your dataset, which could completely ruin the final stitched model.
For more detailed strategies, you can explore our complete guide on how to choose the best flight planning software for your needs. Planning for these swaps ahead of time—including picking safe and accessible landing spots along your route—is a true mark of a professional operator.
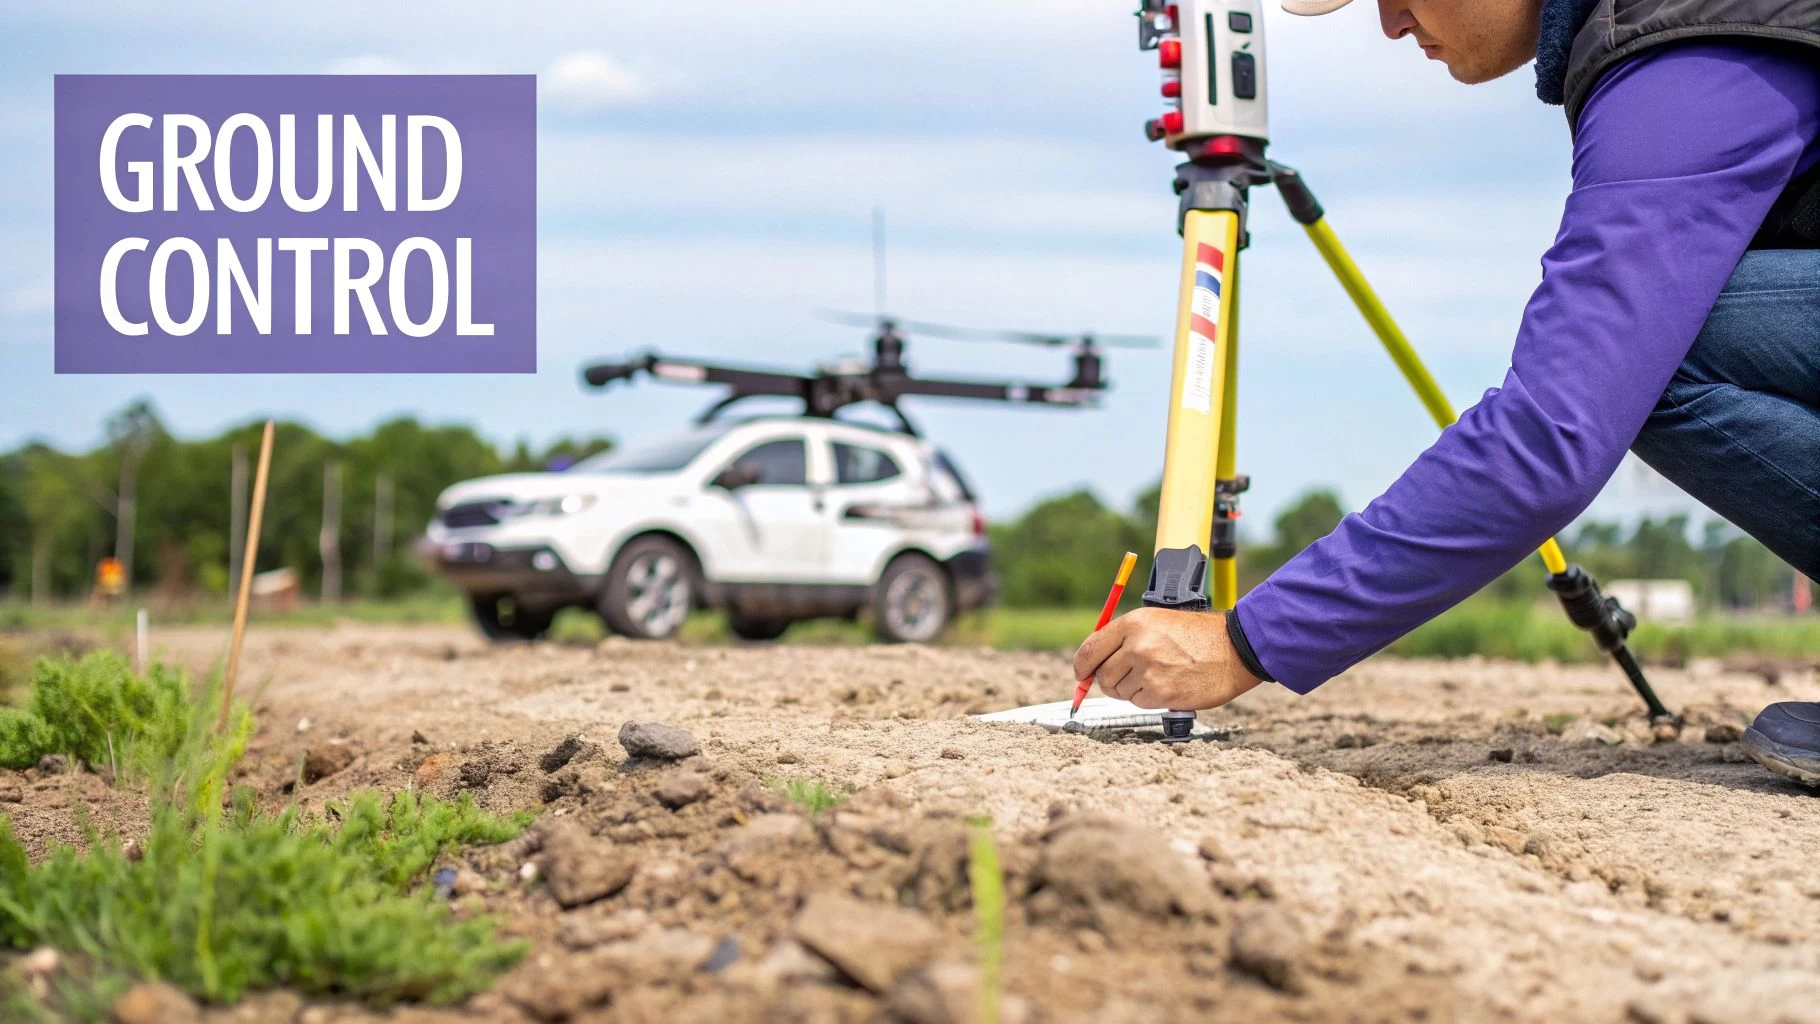
Achieving Survey-Grade Accuracy with Ground Control
A razor-sharp, high-res orthomosaic looks fantastic, but for professional survey work, pretty pictures don't cut it. Clients in construction, engineering, and earthworks are paying for verifiable accuracy—the certainty that a point in your digital model corresponds precisely to a point in the real world. This is where ground control separates a nice aerial photo from a survey-grade deliverable.
Without it, your model only has high relative accuracy. This means measurements within the model are consistent. A stockpile that's 10 meters long will measure as 10 meters in the data. The problem? The entire model could be floating several meters away from its actual geographic location. That’s poor absolute accuracy, and it's a deal-breaker for any serious project.
Placing Ground Control Points Effectively
Ground Control Points (GCPs) are the physical anchors that tie your aerial data to a known coordinate system. Getting their placement right is both an art and a science, demanding that you think like a surveyor and a photogrammetrist at the same time.
A classic rookie mistake is just peppering GCPs around the perimeter of the site. Sure, it defines the boundary, but this often leads to a "doming" or "bowling" effect in the middle of your 3D model, where the accuracy takes a nosedive. A robust, uniformly accurate model requires a more thoughtful layout.
- Spread Them Out: Distribute your GCPs in a grid-like pattern that covers the entire site, not just the edges. Make sure you get at least one near the center.
- Vary the Elevation: If your site has significant vertical relief—think quarries, landfills, or multi-level construction sites—place GCPs at the highest and lowest points. This is critical for helping the software correctly model those vertical changes.
- Use Clear, Unambiguous Targets: Your GCP targets need to be unmistakable from your flight altitude. The classic checkerboard or "X" patterns are popular for a reason: their center point is easy to identify with sub-pixel precision.
As a rule of thumb, a standard photogrammetry job needs a bare minimum of five GCPs—one in each corner and one in the middle. For bigger or more complex sites, you should be aiming for eight to ten GCPs to lock in that accuracy across the entire map.
The Rise of RTK and PPK Drones
In the last few years, drones equipped with Real-Time Kinematic (RTK) or Post-Processed Kinematic (PPK) have been a genuine game-changer for the ground control workflow. These systems use a ground-based base station to correct the drone's own GPS location data, either as it flies (RTK) or after the mission is complete (PPK).
The result is a set of image geotags that are accurate down to just a few centimeters right out of the camera. This drastically improves the model's absolute accuracy from the get-go and often allows you to achieve survey-grade results with far fewer GCPs.
When GCPs Are Still Non-Negotiable
So, does an RTK drone make GCPs obsolete? Not so fast. While you can certainly get away with a less dense network, using at least a few ground points is still considered best practice for verification and quality control.
Here’s when traditional ground control remains a must-have:
- For Total Confidence and QA/QC: Using three to four GCPs as independent checkpoints is the gold standard for validating RTK/PPK data. You don't use them to process the model; you use them to check it. This provides a crucial, defensible quality assurance step that clients and engineers will demand.
- In GPS-Challenged Environments: Flying in urban canyons or next to a dense tree line? Your drone might temporarily lose its RTK fix. A few well-placed GCPs ensure the model stays locked to ground truth, even if the drone's positioning data had a momentary wobble.
- When Flying a Non-RTK Drone: If your drone is running on standard GPS, a full set of ground control points is the only way you’re going to hit survey-grade absolute accuracy. Period. There's no substitute here.
Ultimately, the most robust and defensible workflow for any high-stakes UAV survey is combining the incredible efficiency of an RTK/PPK drone with the rock-solid reliability of a few well-placed GCPs.
Executing Flawless Data Capture in the Field
With a solid flight plan loaded and your ground control points set, the real work begins. This is where all that careful preparation pays off, but only if you maintain discipline on-site. The success of your entire survey now comes down to how well you manage your gear, the environment, and the data flow in real-time.
You can have the best plan in the world, but it can all be undone by a simple oversight in the field. Rushing a pre-flight check or using the wrong camera settings can wreck an entire dataset. That means a frustrating, expensive trip back to the site to do it all over again.
The Mission-Critical Pre-Flight Checklist
Before that drone ever leaves the ground, a hands-on, physical check is absolutely non-negotiable. This isn’t about the automated checks in your app; it's about verifying the hardware and settings that directly affect your data quality. Think of it as your final line of defence against common mistakes.
Your pre-flight routine must always include these checks:
- Verifying Camera Settings: Switch your camera to manual focus and lock it to infinity. Don't trust autofocus on a long survey mission; it can drift, leaving you with batches of soft images that are useless for photogrammetry. Lock down your exposure settings (ISO, aperture, shutter speed) too, so you get consistent brightness across the board.
- Confirming Sensor Calibration: Make sure the drone’s IMU and compass are properly calibrated. This is especially important if you've traveled a long way to get to the site. A dodgy IMU calibration is a fast track to data alignment headaches later.
- Achieving a Solid GPS Lock: Just because the controller gives you the green light, don't launch immediately. Give it a minute and wait for a solid lock on at least 10-12 satellites. If you're using an RTK-enabled aircraft, you need to see a "FIX" status, not just a "FLOAT." That's the only way to guarantee centimetre-level accuracy in your geotags.
This isn't just about ticking boxes; it's a disciplined approach that makes sure your equipment is ready to perform.
Adapting to Dynamic Site Conditions
No survey site exists in a perfect bubble. Weather is always a factor, and a good pilot knows how to adapt on the fly to protect the integrity of the data. One of the biggest things that can ruin a photogrammetry mission is inconsistent lighting.
On a day with scattered clouds, for instance, shadows will constantly be moving across your site. This creates a nightmare for post-processing software, which will struggle to match features in a sunlit image with the same features captured moments later in deep shadow.
The gold standard for most photogrammetry flights is a high, thin overcast sky. It gives you bright, diffuse light with minimal shadows. If you have no choice but to fly in direct sun, do your best to fly the whole mission while the sun is at a consistent angle. This helps you avoid long, moving shadows that can hide ground features and trip up the software.
Smart In-Field Data Management
The job isn't done when the drone lands. A few minutes checking your data before packing up can save you from the dreaded re-flight. After a battery swap or at the end of the mission, pop the SD card into a tablet or laptop for a quick visual inspection of the images.
Here’s what to look for:
- Blurry Images: Check for any motion blur (a sign you were flying too fast) or focus problems.
- Over/Under Exposure: Scan for "blown-out" white areas or shadows that are so dark they've lost all detail.
- Gaps in Coverage: Quickly scroll through the image set to make sure the camera was firing correctly and you haven't missed any passes.
This simple spot-check is your chance to catch a corrupted SD card or an incorrect camera setting while you're still on-site. A quick re-flight of a small section is a whole lot better than coming back another day. True professional data capture isn't just about the flight; it's about confirming you have what you need before you leave.
To dive deeper, check out our complete guide on best practices for flight data acquisition. Mastering this final step is what separates a good pilot from a truly reliable professional.
From Raw Data to Actionable Client Deliverables
Once your drone lands and the batteries are on the charger, the second half of the UAV aerial survey kicks off. This is where the digital magic happens, transforming thousands of individual images or millions of LiDAR points into the precise, actionable insights your clients are paying for.
This post-processing stage is less about flying skill and more about computational power and a meticulous eye for detail. For many of us, this part of the job is just as rewarding as being out in the field.
The raw data itself, whether it's a folder of JPEGs or a raw LAS file, holds immense potential but is practically useless on its own. It's the processing workflow that unlocks its value, turning abstract data points into tangible assets.
The Photogrammetry Processing Pipeline
For photogrammetry projects, the workflow follows a series of distinct computational steps. Each stage builds upon the last, progressively refining the data into a cohesive and accurate model of your survey site.
The first and most critical step is photo alignment. This is where the software analyzes the geotags and visual information in every single image, identifying thousands of common tie points between overlapping photos. It uses this information to figure out the precise position and orientation of the camera for each shot, creating a sparse point cloud and camera location map.
If you get a poor alignment at this stage, it's a major red flag. It usually points to issues with image quality or not enough overlap during the flight.
Following a successful alignment, the software gets to work on the dense point cloud. This process is far more computationally intensive, as it triangulates the position of millions—or even billions—of points to create a rich, detailed 3D representation of the site. The quality of this cloud directly impacts everything that comes after.
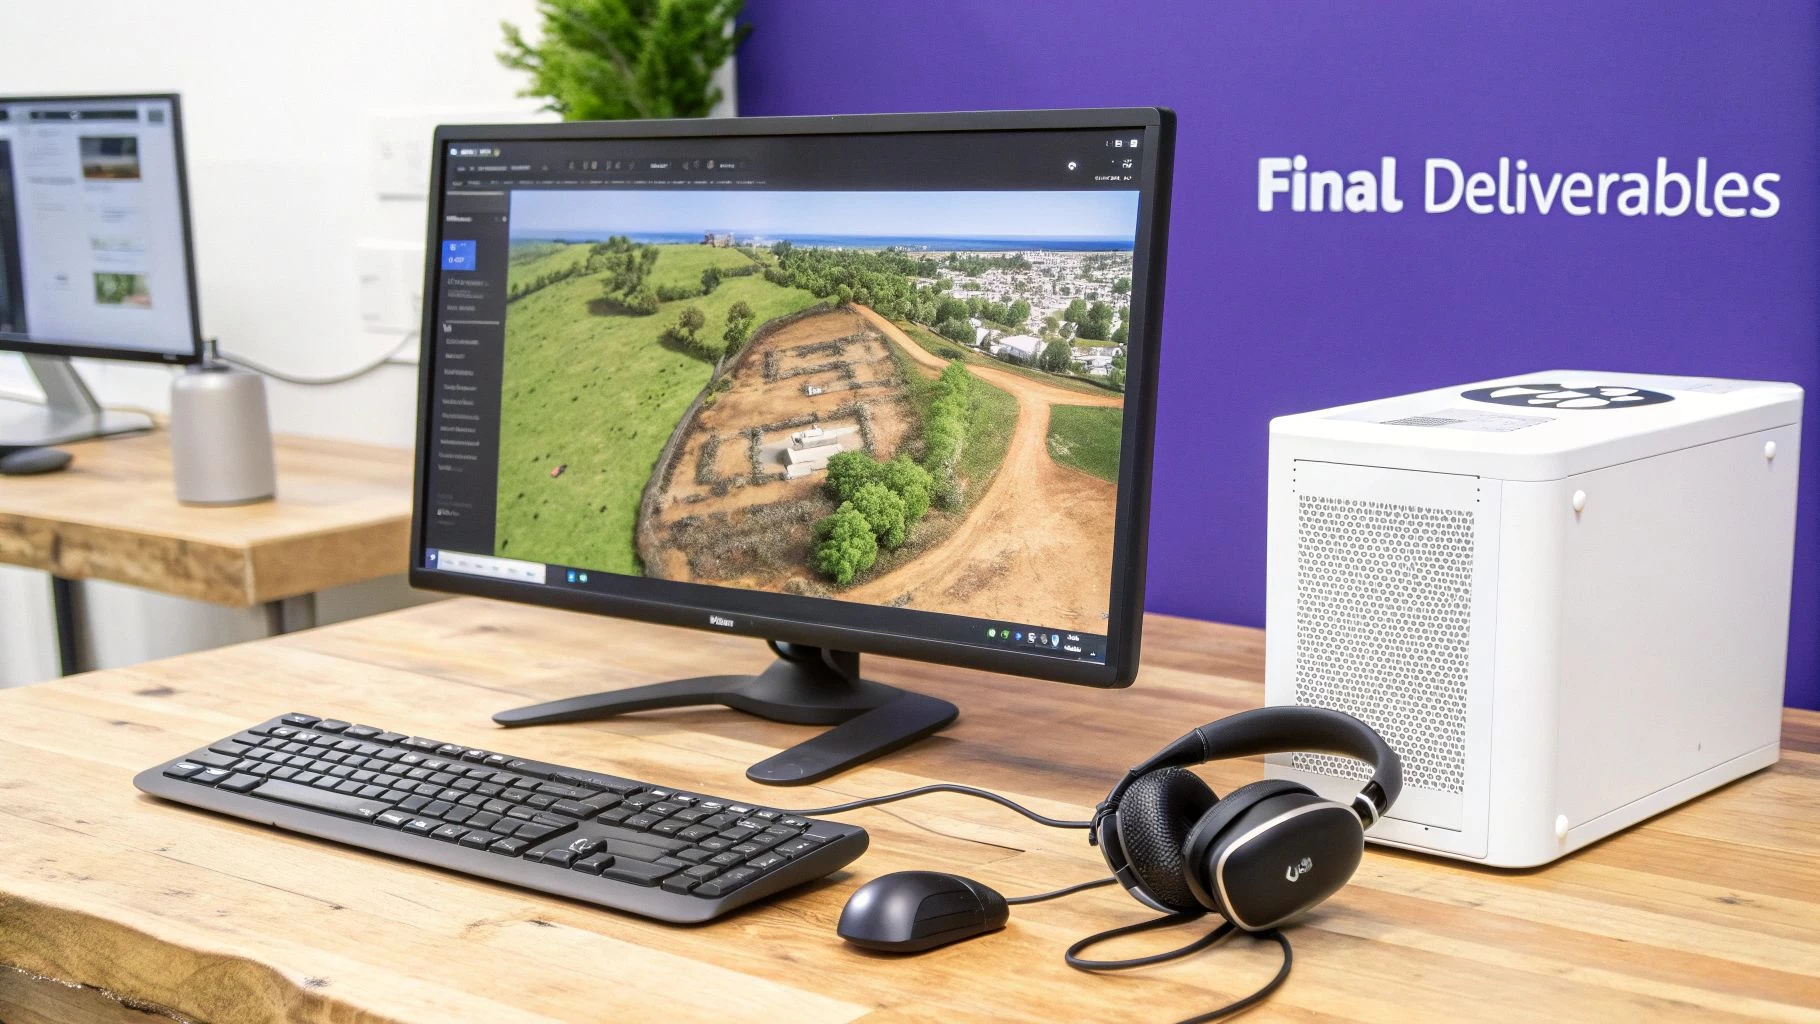
Building The Final Outputs
From that dense point cloud, you can generate the core deliverables your clients need:
- 3D Textured Mesh: This creates a photorealistic, solid model of the site by draping the original image textures over a 3D polygonal surface. It's perfect for visual inspections and stakeholder presentations.
- Digital Surface Model (DSM): Think of this as a raster grid where each pixel's value represents the elevation of the first surface the drone's sensor saw—including buildings, trees, and vehicles.
- Orthomosaic Map: An orthomosaic is a single, geometrically corrected aerial image of the entire site. Unlike a standard satellite photo, it has a uniform scale and is free of distortion, which means you can take accurate measurements directly from it.
Processing LiDAR Point Clouds
If you've flown a LiDAR mission, your starting point is already a point cloud. So, the post-processing workflow here is less about creation and more about refinement and classification.
The main job is point cloud classification. This is an automated or semi-automated process where software algorithms analyze the geometric properties and return intensity of points to classify them into distinct categories. Common classifications include ground, vegetation (low, medium, high), buildings, and power lines.
A properly classified cloud is essential for creating accurate Digital Terrain Models (DTMs) by filtering out all non-ground points.
The real power of a LiDAR survey is revealed after classification. By isolating only the 'ground' points, you can generate a "bare-earth" DTM. This is incredibly valuable for hydrological analysis, contour mapping, and site planning in vegetated areas where photogrammetry would really struggle.
Quality Assurance: The Final Gatekeeper
Before any data goes to a client, it absolutely must pass a rigorous Quality Assurance and Quality Control (QA/QC) check. This is where you validate your model's accuracy against the ground truth you established back in the field.
You'll import the coordinates of your checkpoints—those GCPs you set aside for verification—and compare their known locations to their locations within your processed model. Your software will then generate an accuracy report, showing the Root Mean Square Error (RMSE) for the X, Y, and Z dimensions. This report is your proof of accuracy and is often a required part of the final client deliverable.
For a deep dive into this, check out our complete guide on best practices in aerial drone mapping.
This entire workflow is fueling a rapidly expanding market. The global commercial aerial surveying service market, driven heavily by UAVs, was valued at USD 4.22 billion in 2025 and is projected to hit USD 6.13 billion by 2034.
These figures, which you can explore more on IntelMarketResearch.com, really highlight the immense demand for the high-quality data and deliverables produced through these detailed processes. It just goes to show how vital turning raw data into client-ready insights has become.
Streamlining Your Ops to Scale the Business
Pulling off a complex UAV aerial survey is one thing. Building a profitable, scalable business around that skill is a whole different ball game. As you grow from being a top-notch pilot to a successful business owner, your focus has to shift from just capturing perfect data to mastering your entire operational workflow.
If you're not careful, the admin work that comes with growth will absolutely bury the fieldwork.
Those manual processes that worked fine for your first few jobs—the spreadsheet for client info, a simple calendar for scheduling, random folders stuffed with compliance docs—start to fall apart. Every hour you spend on admin is an hour you're not flying, processing data, or out there winning your next project.
Your Central Command Center
To really scale up, you need a central command center for your entire operation. This is where integrated drone operations platforms come in. Think of them as the brain of your business, connecting every piece of the survey workflow into one smooth system. This isn't just about saving a bit of time here and there; it's about building a professional, repeatable, and scalable machine.
Imagine managing every single aspect from one dashboard:
- Client Management: Keep track of all project details, communications, and deliverables without having to sift through endless email chains.
- Team & Fleet Management: Schedule your pilots, assign the right aircraft for the job, and stay on top of maintenance logs automatically.
- Compliance & Safety: Whip up risk assessments in minutes and log flight hours to maintain a perfect audit trail for the authorities.
This unified approach gets rid of data silos and dramatically cuts the risk of critical info slipping through the cracks—a classic growing pain for drone service providers.
A professional operation builds client confidence. When clients see organized scheduling, clear reporting, and consistent safety documentation, they see a reliable partner, not just a pilot with a drone. That level of professionalism is a massive competitive advantage.
From Manual Chaos to Automated Efficiency
The real magic of an operations platform is how it automates the repetitive, soul-crushing tasks that eat up your day. It’s about creating solid workflows that guarantee nothing gets missed, from pre-flight risk assessments all the way through to post-flight client invoicing.
For instance, a new survey request can automatically kick off a checklist for airspace checks, equipment assignment, and pilot scheduling. This systematic approach ensures every project is handled with the same high standard of safety and professionalism, which is absolutely vital for scaling your business.
This kind of operational efficiency is non-negotiable in today's market. The aerial survey drone market was valued at USD 7,687.1 million in 2026 and is projected to skyrocket, showing just how much businesses are leaning into specialized surveying. You can read more about the trends shaping the aerial survey market to see why operational excellence is the key to grabbing a piece of that growth. By automating the backend, you free up your most valuable asset—your own time—to focus on delivering incredible data and growing your client list.
Common Questions from the Field
What’s the Right Image Overlap for My Survey?
This is a classic question, and the honest answer is: it depends.
For most standard photogrammetry jobs, like a straightforward stockpile measurement or a basic topo of a relatively flat site, a 75% front overlap and 70% side overlap will get the job done reliably. This gives the software plenty of common points to stitch together an accurate map.
But what if you're flying a complex site? Think steep quarries, dense city blocks, or a project where you need a hyper-detailed 3D model. In those cases, you’ll want to bump that up to 80-85% overlap. That extra data is your insurance policy against gaps, weird artifacts, and other headaches in the final deliverables. Don't skimp here—you'll thank yourself during processing.
How Much Does Weather Really Matter for Survey Accuracy?
A lot. Weather is one of those variables that can make or break a survey mission. Flying in high winds is a huge red flag; the drone will struggle to stick to its flight lines, which leads to inconsistent data and blurry photos. Nobody wants that.
The perfect day for a survey flight? Bright and overcast. That diffuse, even light is exactly what you want. It kills the harsh shadows that can hide important ground features and throw off the photogrammetry software. Flying in rain or fog is an absolute no-go. It’s bad for the data and even worse for your expensive gear.
Can I Really Get Survey-Grade Results Without GCPs?
This is where your equipment makes all the difference. If you're using a standard drone without RTK or PPK, you can create a model with excellent relative accuracy—meaning everything is measured correctly in relation to everything else within the model. But its absolute accuracy, how it lines up with the real world, will be way off.
To get true, verifiable, survey-grade results, Ground Control Points (GCPs) are non-negotiable.
Even with a high-end RTK/PPK drone that can hit centimeter-level accuracy with few or no GCPs, the best practice is always to place a few checkpoints. Using them as an independent verification is what separates the pros from the amateurs and gives your clients ultimate confidence in the data.
Ready to streamline your entire drone operation—from client management to flight logging? Dronedesk is the all-in-one platform designed to make your UAV aerial survey business safer, more compliant, and incredibly efficient. Start your free trial today at https://dronedesk.io.
 Part 107 Test Tips to Pass With Confidence →
 How to Pass the FAA Drone Written Test First Time →
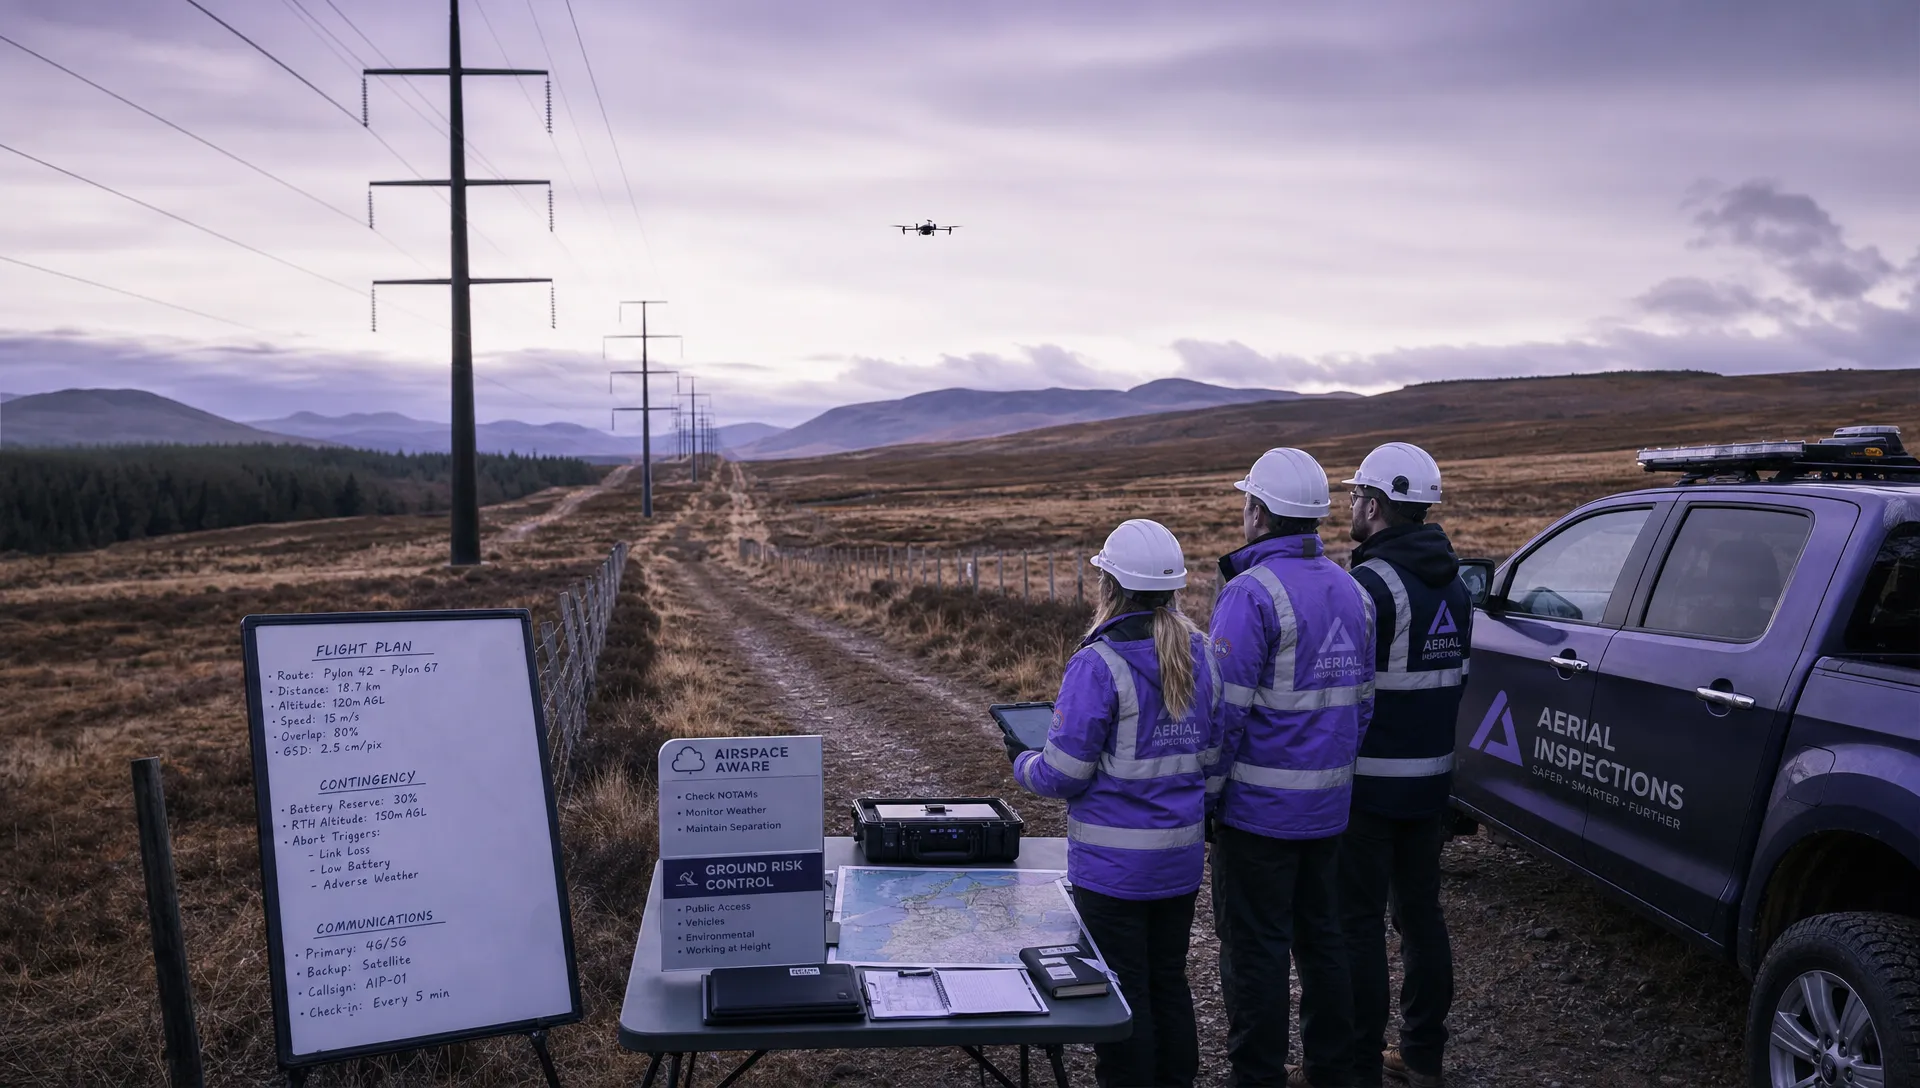 What a BVLOS Flight Means for Risk and Compliance →
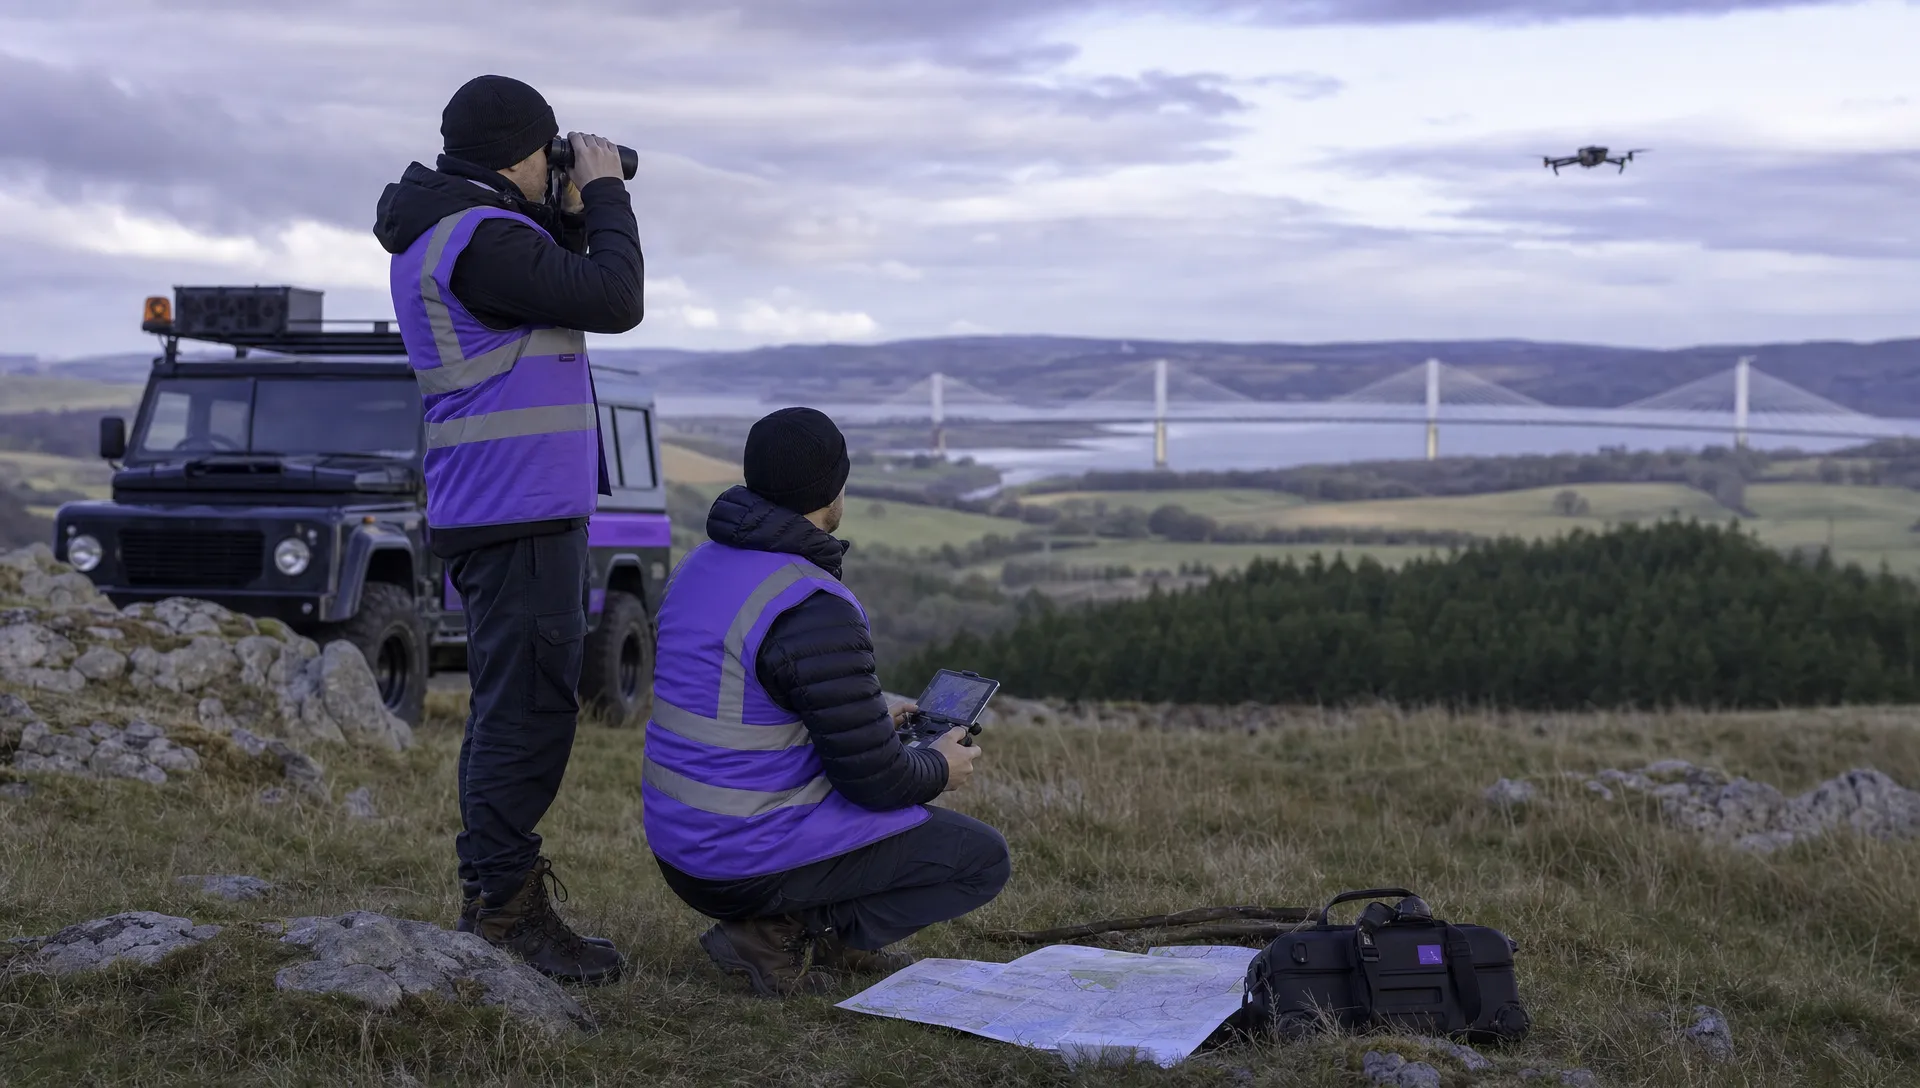 Drone VLOS Rules Explained for Commercial Teams →
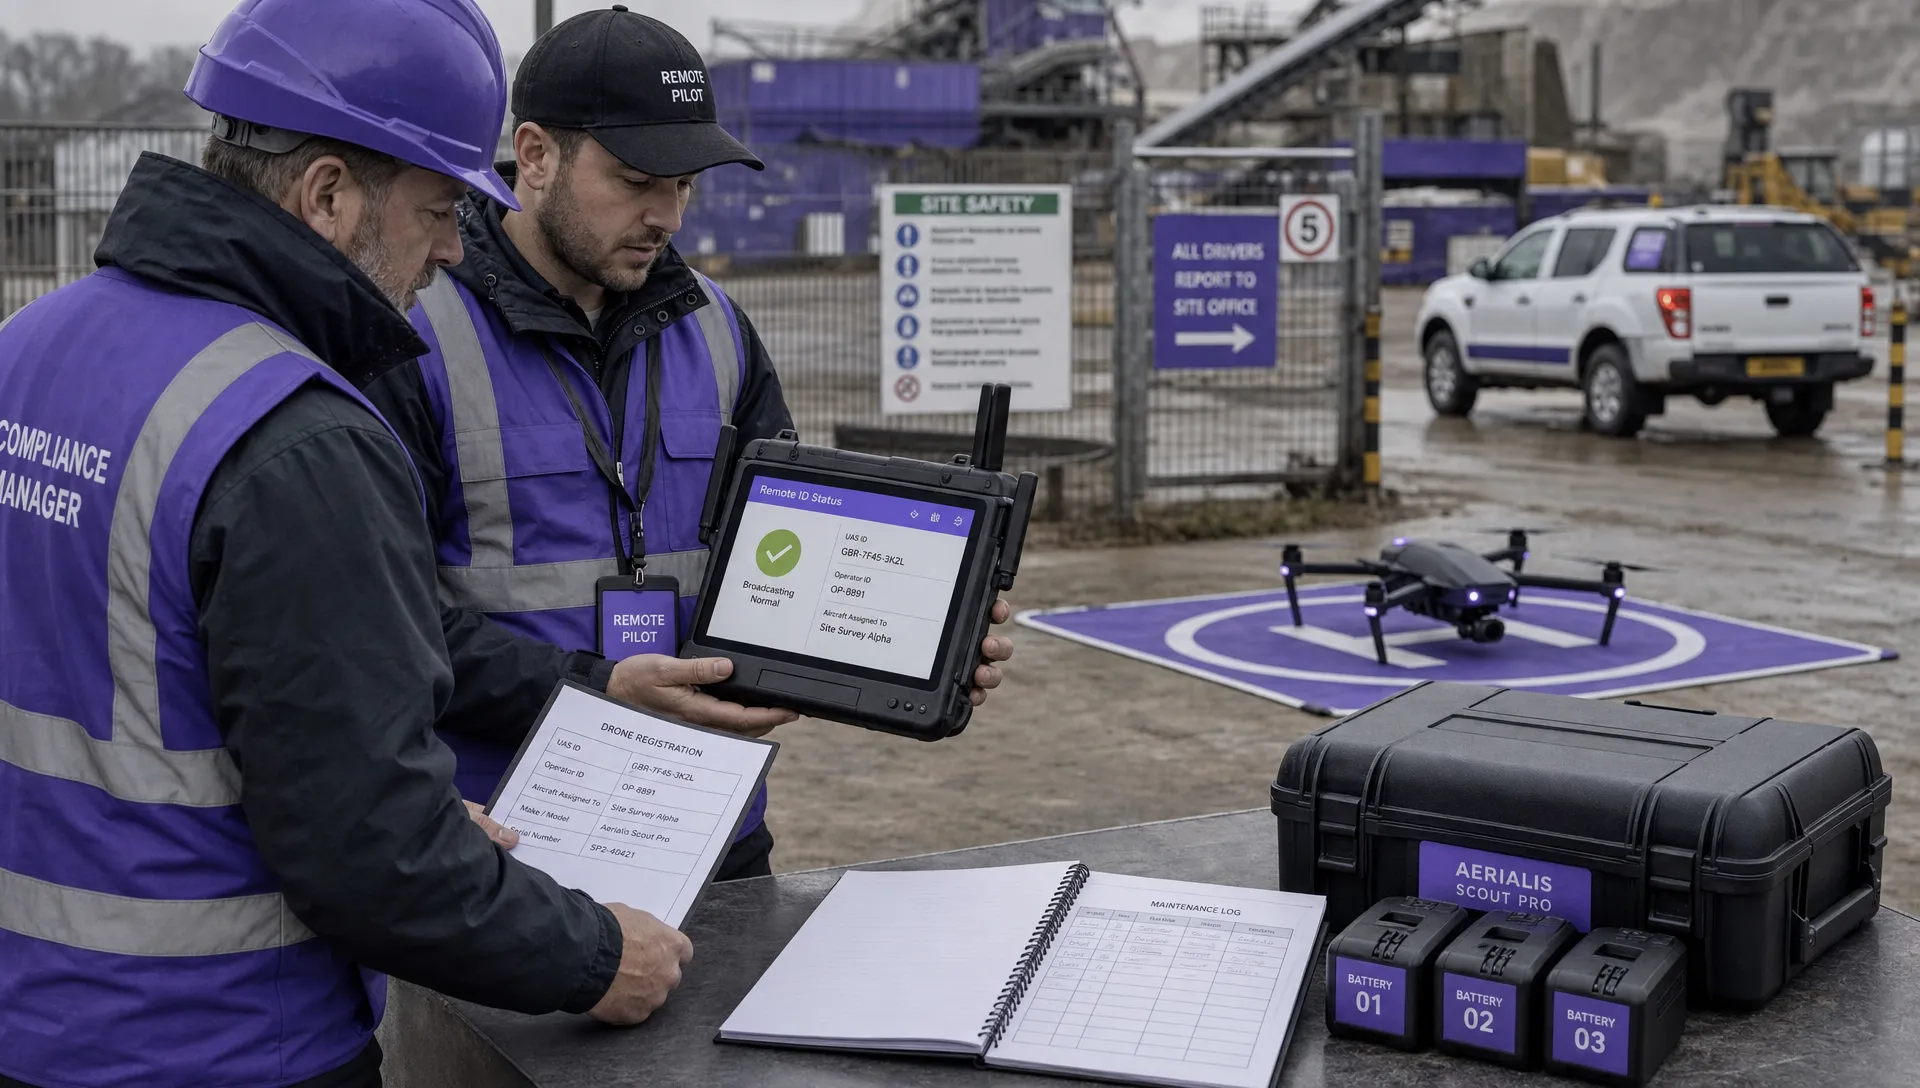 FAA Remote ID Rule Explained for Commercial Pilots →
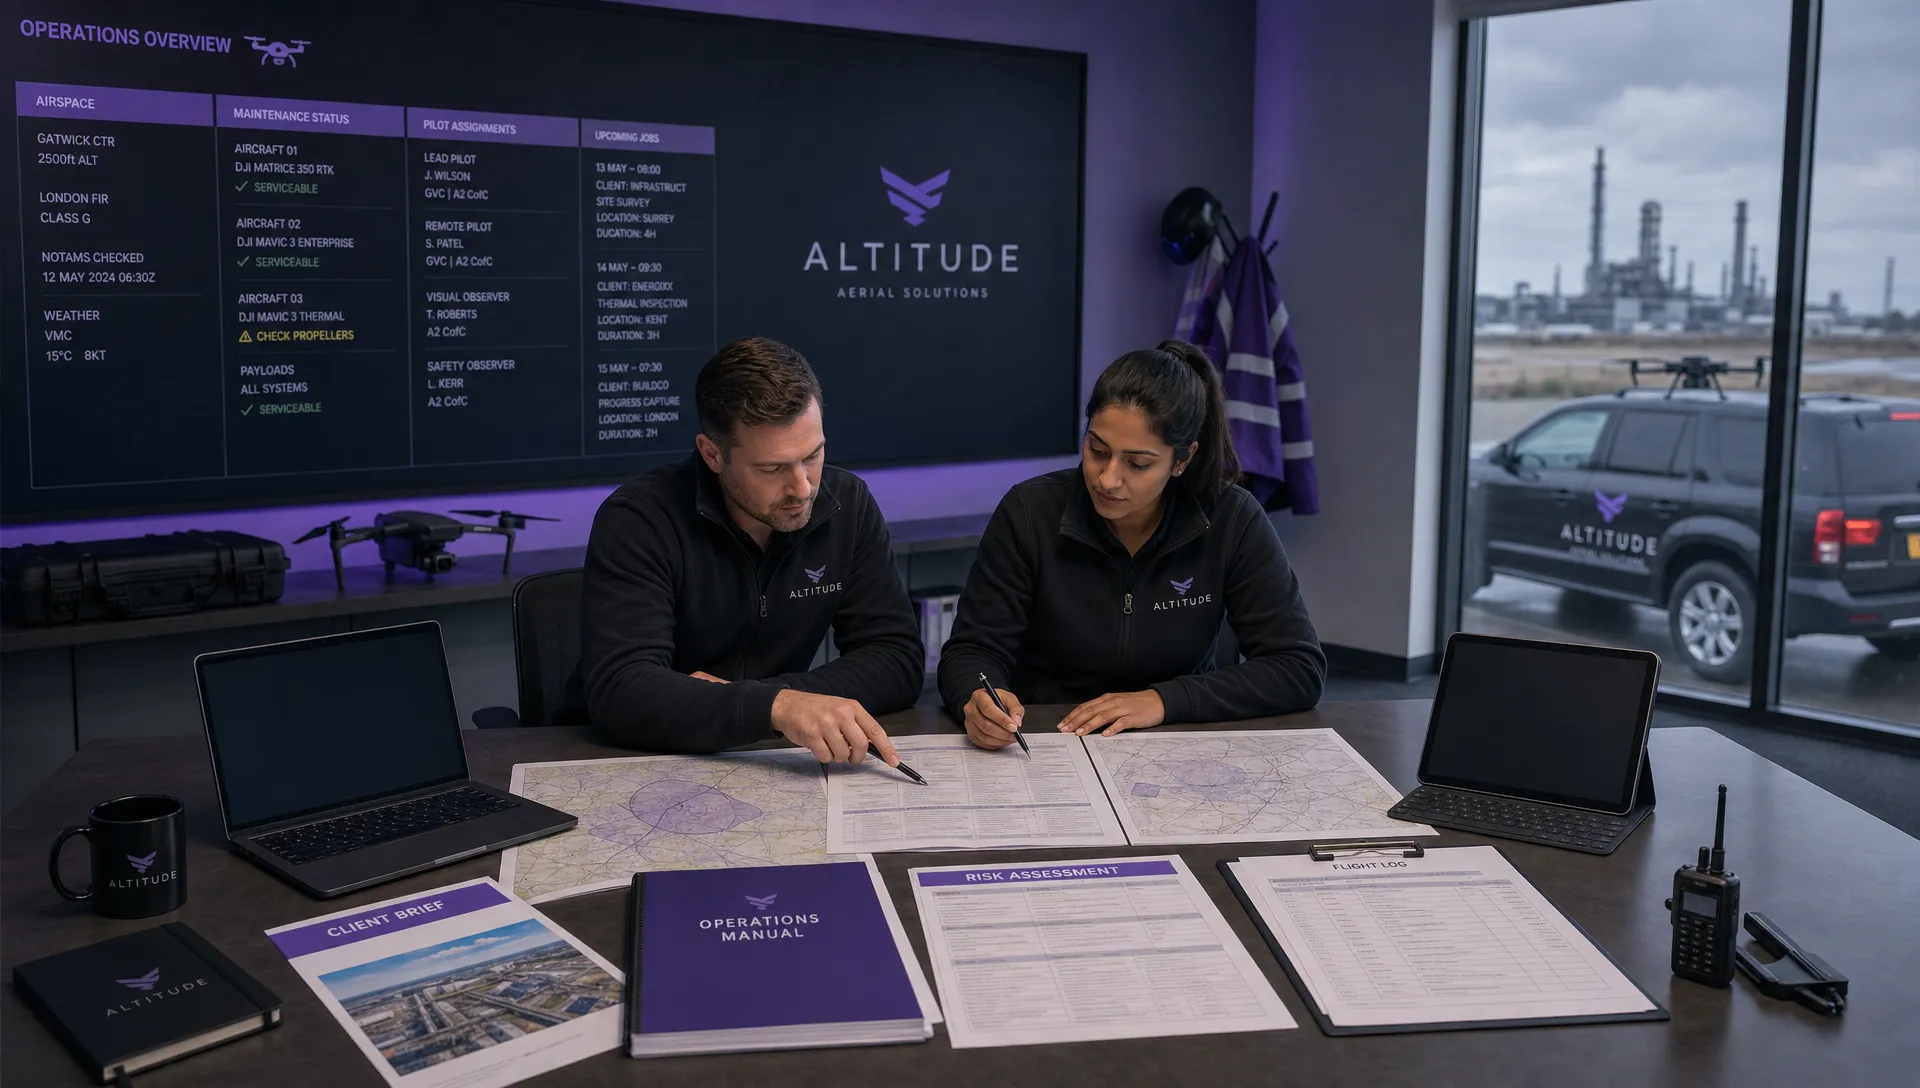 Drone Legal Requirements for Commercial Operations →
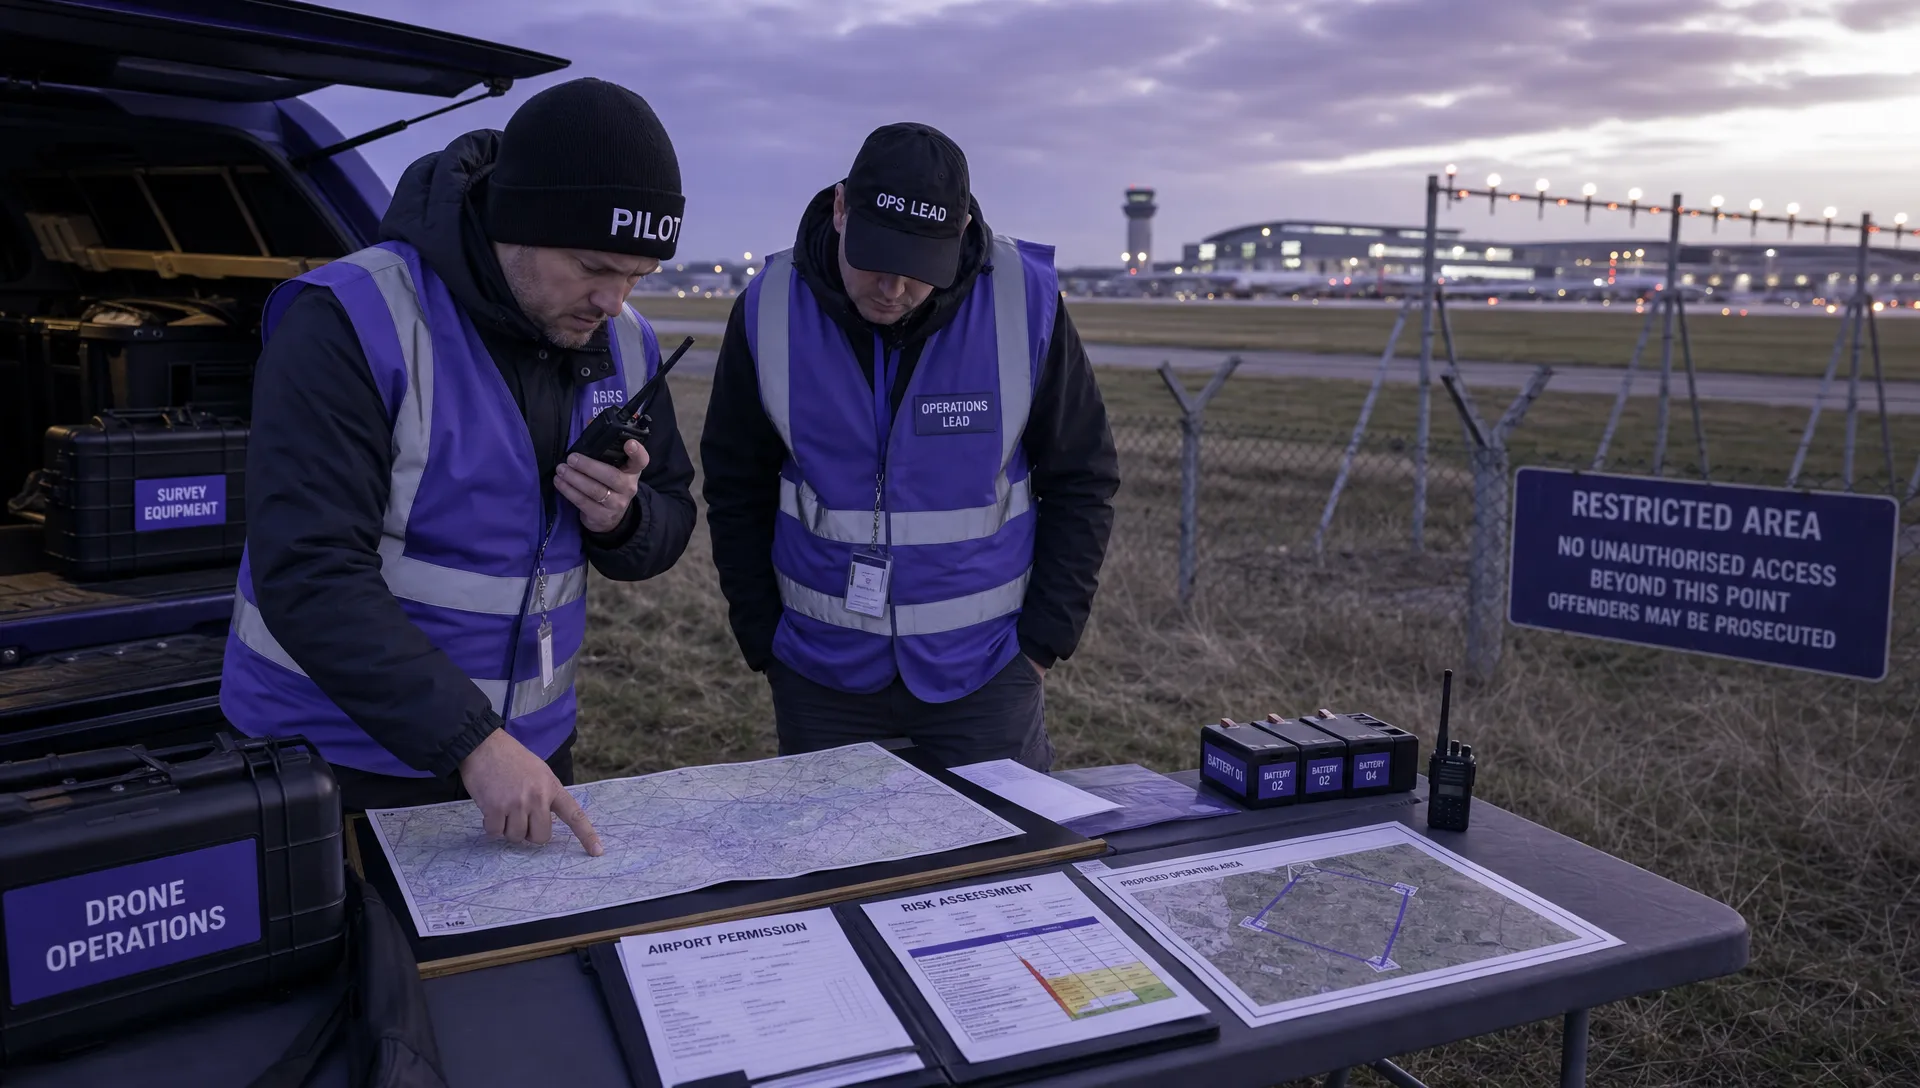 Drone Near Airport Rules Explained for Safer Planning →
 International Drone Regulations Every Global Team Should Know →
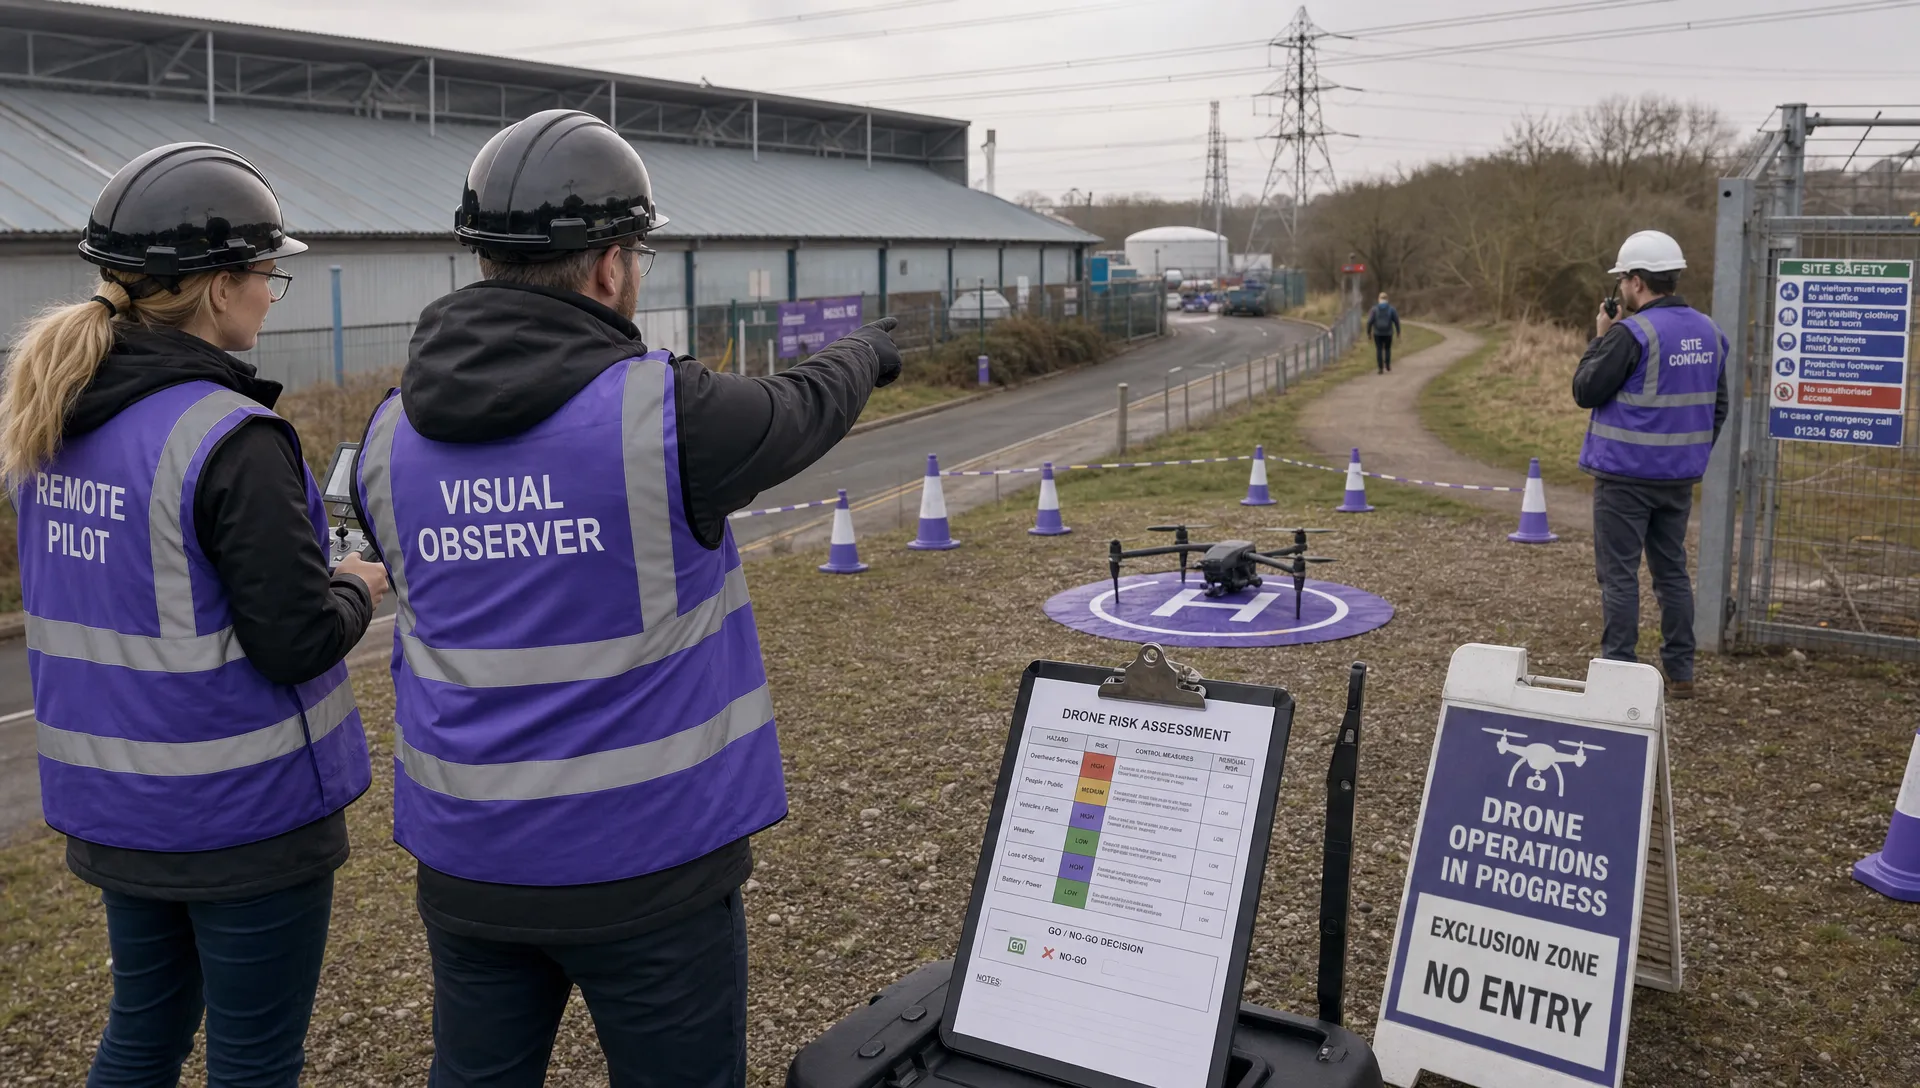 Drone Flight Risk Assessment Example for Safer Missions →
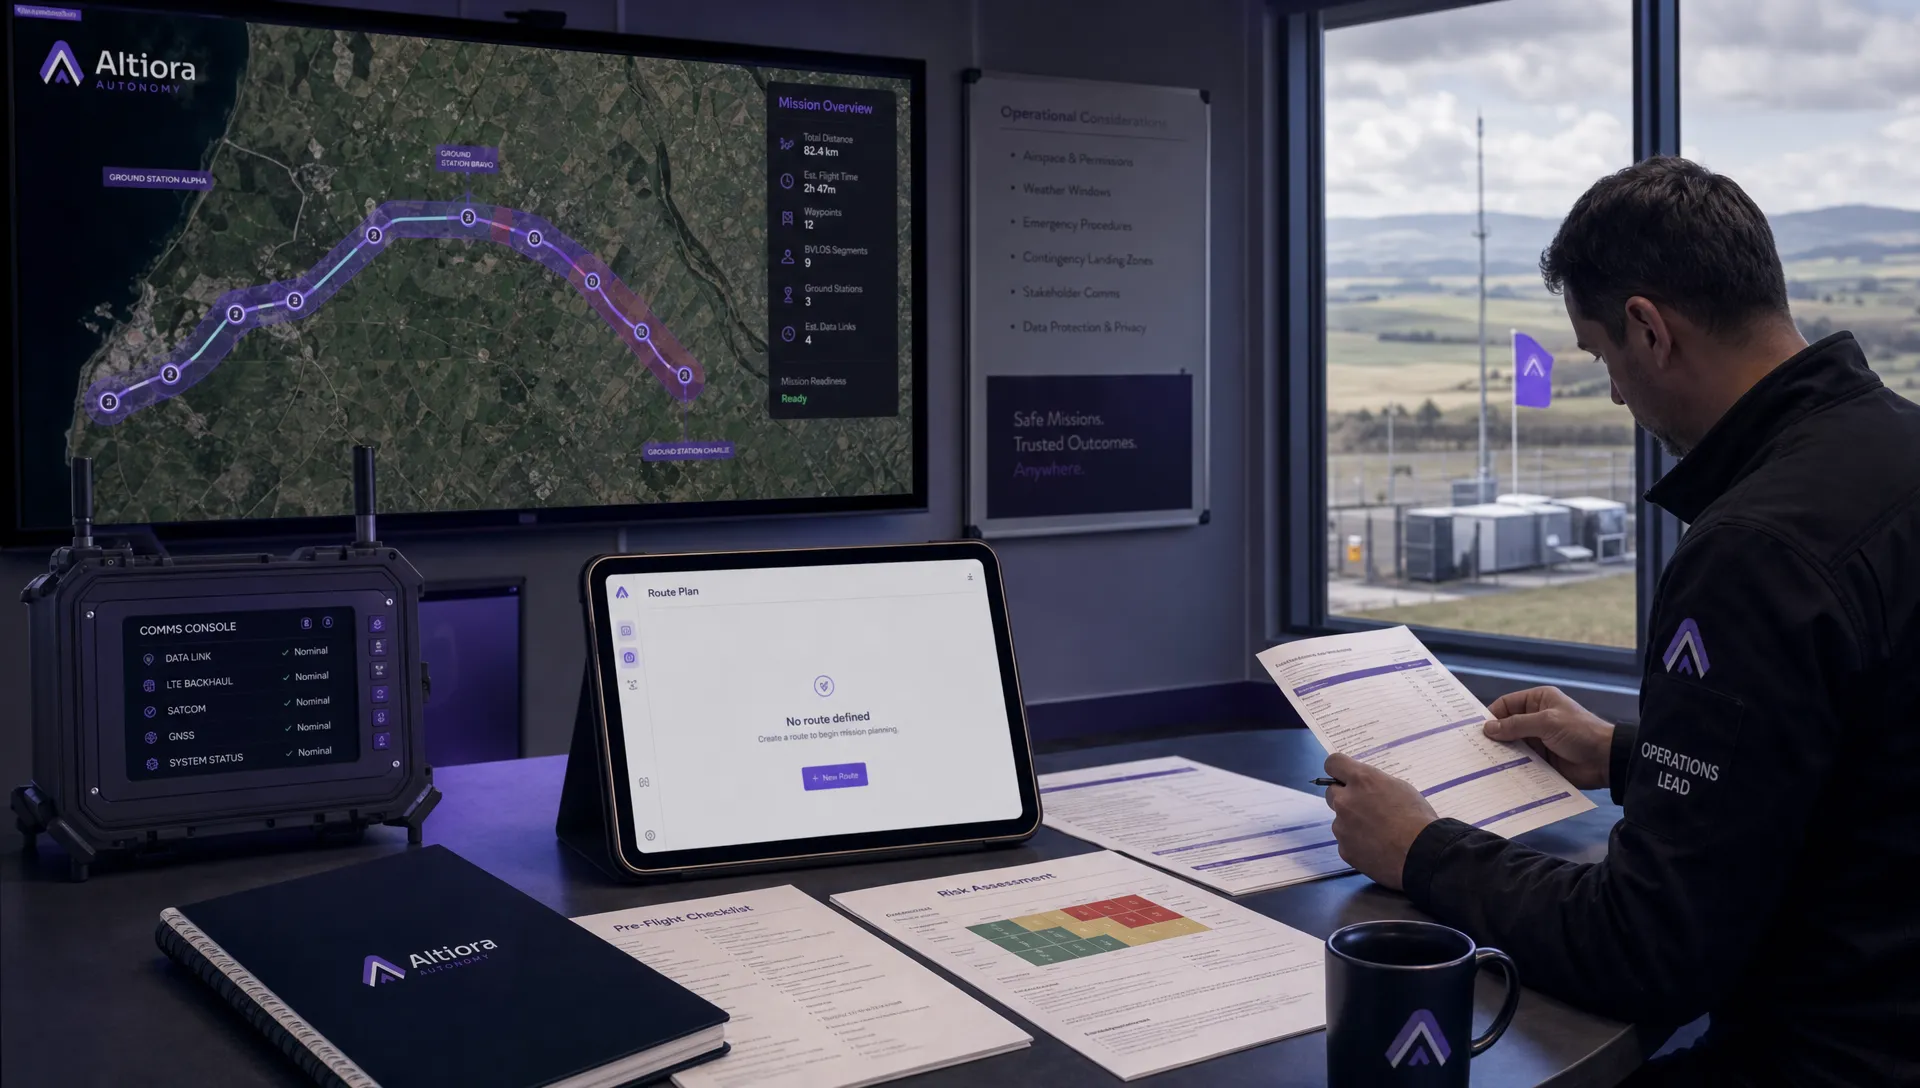 Beyond Visual Line of Sight Explained for Operators →