A Guide to Modern Aerial Drone Mapping
At its core, aerial drone mapping is about creating a precise digital twin of a real-world site. Using automated UAV flights, we capture hundreds of high-resolution images or laser scans and then stitch them together into incredibly detailed 2D maps and 3D models.
Understanding Aerial Drone Mapping
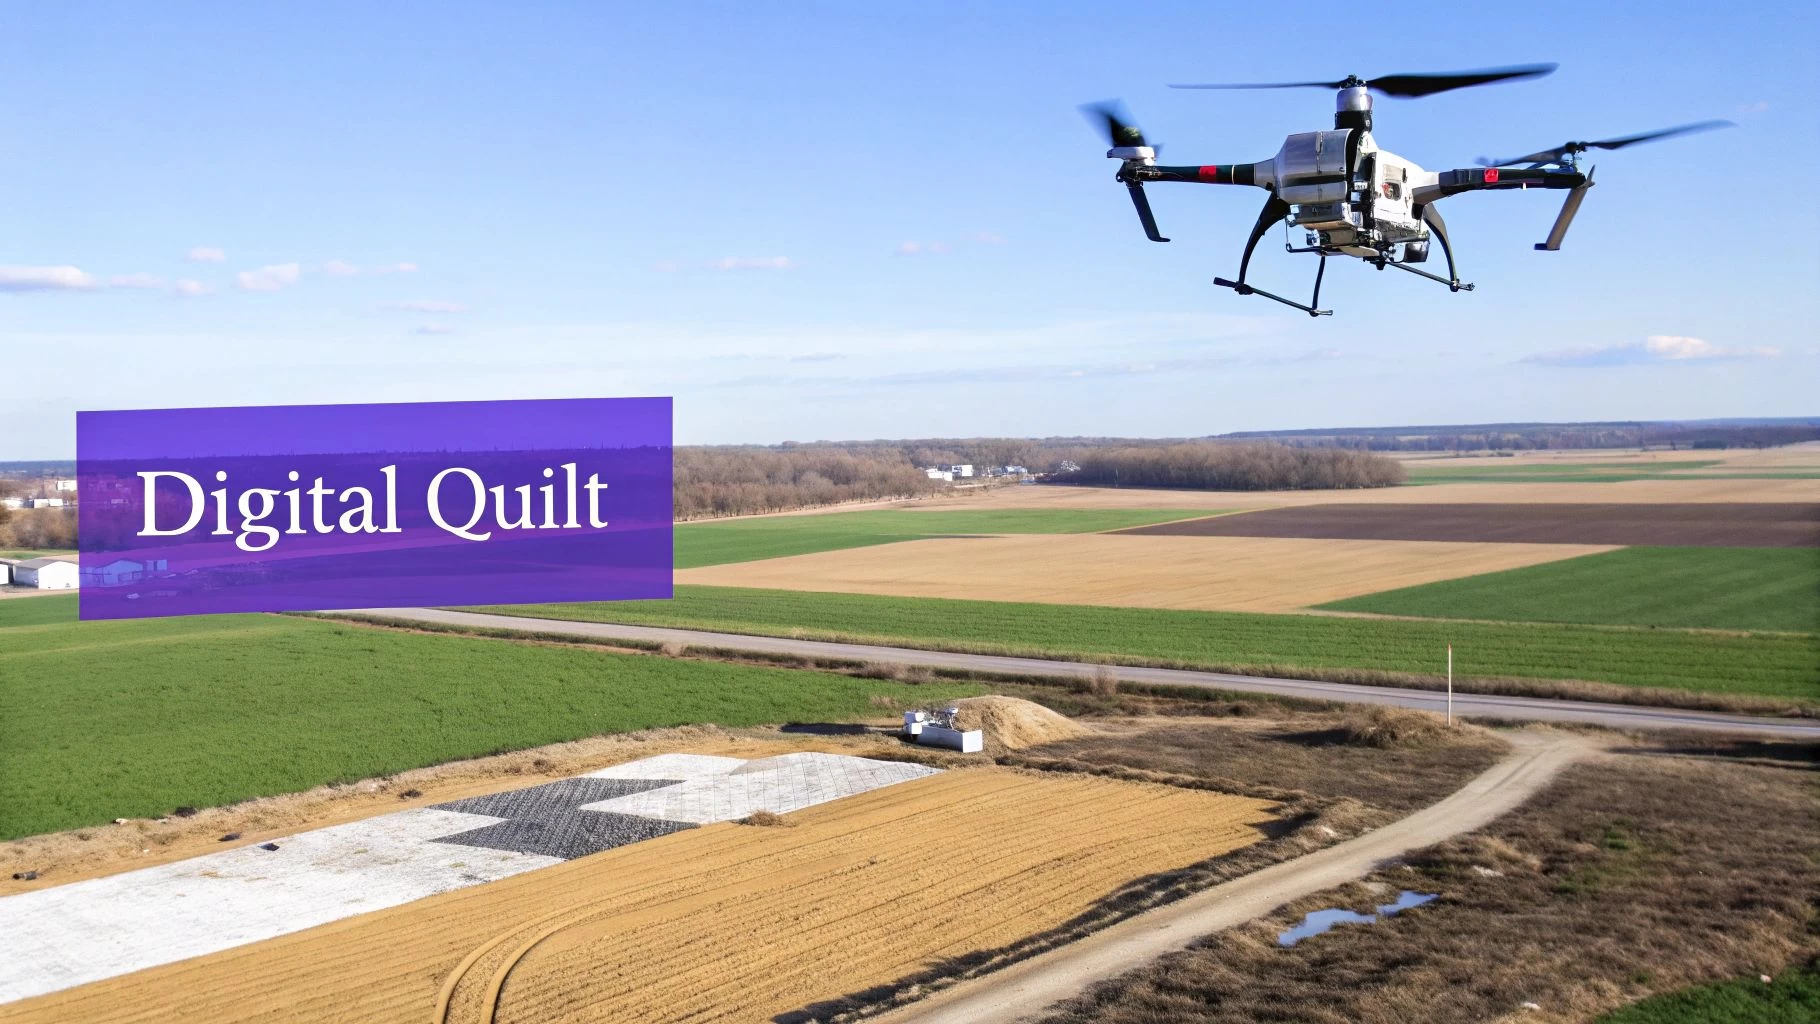
Imagine a digital quilt where each photo acts as a patch, stitching together into a complete, measurable picture of a landscape.
That's a pretty good way to think about it. Each individual image, carefully overlapped and aligned with its neighbors, comes together to form a single, unified map that's ready for serious measurement and analysis.
The process usually breaks down into a few key stages:
- Mission planning is where you define the survey boundaries, flight altitude, and how much the images should overlap.
- Data capture is the fun part—running the pre-programmed flight to automatically grab all the imagery with precision.
- Processing is where the magic happens, as powerful algorithms align and stitch the photos into orthomosaics and point clouds.
- Quality checks are vital for verifying the accuracy of the final map, often using ground control points or RTK data.
So, why go to all this trouble? It’s simple: drone mapping saves a huge amount of time, cuts costs, and makes job sites much safer by keeping boots off the ground.
Key Benefits of Drone Mapping
- Speed: Cover massive areas in a matter of minutes, not days.
- Cost savings: We're talking reductions of up to 90% compared to traditional survey methods.
- Safety: Massively improve site safety by reducing the time people spend in potentially hazardous zones.
Market Growth and Adoption
Aerial drone mapping isn't just a niche tool anymore; it's become the dominant application in the commercial drone world. It’s completely changing the game in industries like construction, mining, agriculture, and infrastructure management, with market analyses consistently showing it as the top drone use case globally.
The numbers back this up. The global drone mapping market is growing at a healthy 17.1% CAGR and is expected to hit USD 6.7 billion by 2035, mostly driven by huge demand from construction and geospatial sectors. The cost savings are a massive factor—sometimes slashing traditional surveying expenses by up to 90%—but the safety improvements are just as critical. You can learn more about this growth from the folks at FutureMarketsInc here.
Bringing Data To Life
Once the processing is done, these maps and models aren't just pretty pictures; they become actionable digital assets. Teams can use them for everything from calculating stockpile volumes and monitoring site progress to inspecting critical infrastructure. This data provides a foundational layer for more advanced analytics and integrates perfectly with project management platforms like Dronedesk.
Mapping Workflow Overview
A typical drone mapping job follows a straightforward five-stage workflow, which keeps things consistent and reliable.
- Mission Planning: This is where you set your goals, flight altitude, image overlap, and safety buffers. Good planning is everything.
- Data Acquisition: The drone flies the automated mission, capturing the data while maintaining consistent parameters.
- Data Processing: Raw images are transformed into usable outputs like orthomosaics, 3D meshes, or point clouds.
- Quality Assurance: The final outputs are checked against control points to confirm their accuracy meets project standards.
- Delivery: The final, georeferenced maps are exported and delivered to clients, often through interactive online platforms.
This structured approach is the backbone of any successful mapping operation, ensuring you get reliable, repeatable results every single time, whether you're working in construction, agriculture, or environmental monitoring.
With this foundation in place, you’re ready to dig into the two main technologies that power drone mapping—photogrammetry and LiDAR—and figure out which tool is the right one for your next project.
Photogrammetry vs. LiDAR: Picking the Right Tool for the Job
At the heart of any drone mapping mission, you'll find one of two core technologies capturing the data: Photogrammetry or LiDAR. Both are brilliant at creating detailed digital versions of the real world, but they go about it in completely different ways. Getting your head around the differences is the key to picking the right approach for your project.
You can think of photogrammetry a bit like a digital artist meticulously crafting a masterpiece. It uses a high-resolution camera to snap hundreds, sometimes thousands, of overlapping photos from various angles. Specialised software then pores over these images, finds common points, and uses some clever triangulation to build a 3D model that's packed with vibrant, true-to-life colour and texture.
On the other hand, LiDAR (which stands for Light Detection and Ranging) is more like a super-precise, high-tech measuring tape. It fires out millions of laser pulses at the ground and measures the exact time it takes for each one to bounce back. This creates an incredibly accurate "point cloud"—a dense digital cloud of 3D data points that perfectly maps out the terrain and every feature on it.
Getting to Grips with Photogrammetry
The real magic of photogrammetry is in its ability to capture photorealistic detail. Because it all starts with photographs, the final products like orthomosaic maps and 3D models look just like the real thing, colours, textures, and all. This makes it a fantastic choice for visual inspections, creating slick marketing materials, or any map where what you see is just as important as the measurements.
It’s also incredibly accessible. The barrier to entry is pretty low since the main bit of kit you need is a good quality camera drone. Most professional drones you’d buy today, like the DJI Mavic 3 Enterprise, are already set up perfectly for photogrammetry, which makes it a really cost-effective option for a huge range of jobs.
But it’s not without its weak spots. Photogrammetry needs good light to work, so flying at night or on really overcast days is a no-go. It also gets a bit lost when trying to map surfaces that don't have many distinct features, like a sandy beach or a field of snow. And, crucially, it can't see through trees to map the ground hidden under a thick canopy.
LiDAR: The Precision Instrument
This is where LiDAR really shines. Its major strengths are its incredible accuracy and its uncanny ability to see through vegetation. Those laser pulses can find tiny gaps between leaves and branches to hit the ground below, allowing you to create stunningly accurate Digital Terrain Models (DTMs) that show the true bare earth. For anyone in forestry, flood risk analysis, or projects needing spot-on ground data, this is an absolute game-changer.
LiDAR doesn't just see the surface; it measures it with millions of laser points, providing a level of structural detail and accuracy that photography alone cannot match. This makes it the gold standard for engineering-grade surveys and complex topographical mapping.
Because LiDAR is an 'active' sensor—meaning it creates its own light—it couldn't care less if it's day or night, giving you much more flexibility in your operations. The raw data you get is a point cloud, which is a direct, unfiltered measurement of the environment.
The main things to weigh up with LiDAR are the higher cost and the sheer volume of data you have to deal with. LiDAR sensors are a lot pricier than cameras, and crunching through those massive point cloud datasets requires some serious computing power and a bit of specialist know-how.
Photogrammetry vs LiDAR Key Differences
So, how do you choose? It really boils down to what your project needs. Neither technology is universally "better" than the other; they're just different tools designed for different jobs. If visual context is king, photogrammetry is your go-to. If absolute accuracy and ground penetration are non-negotiable, LiDAR is the clear winner.
This table breaks down the main distinctions to help you decide.
| Attribute | Photogrammetry | LiDAR |
|---|---|---|
| Primary Output | Visually rich orthomosaics, 3D meshes | High-density point clouds, DTMs |
| Accuracy | High, but can be affected by light/texture | Extremely high, direct measurement |
| Cost | Lower initial equipment investment | Higher initial equipment investment |
| Vegetation Penetration | None, captures the top of the canopy | Excellent, maps the ground beneath trees |
| Lighting Needs | Requires good ambient light | Can operate in day or night conditions |
| Best For | Visual inspections, construction progress, marketing | Forestry, engineering, corridor mapping |
Ultimately, understanding these differences empowers you to select the technology that will deliver the best possible data for your specific goals, ensuring your drone mapping project is a success from the start.
The Drone Mapping Workflow: A Step-by-Step Breakdown
Great aerial mapping isn't magic; it’s the result of a solid, repeatable process. Nailing this workflow means every flight generates the high-quality, accurate data you and your clients demand. It’s best to think of it as a five-stage blueprint that breaks a complex job into a series of clear, manageable steps.
Following this structure helps you dodge common errors, boost your efficiency, and deliver dependable results, flight after flight. Each stage builds on the one before it, creating a chain of quality that begins long before the drone ever takes off.
Stage 1: Mission Planning
This is where the magic really happens. Before your drone even comes out of its case, you need to lock down the project's goals and parameters with crystal clarity. Rushing this step is the fastest way to get bad data, forcing you into costly and frustrating re-flights.
A solid pre-flight plan always covers:
- Defining the Survey Area: Pinpointing the exact project boundaries on a map. No guesswork here.
- Setting Flight Parameters: Dialing in the right flight altitude, speed, and camera angle for the job.
- Calculating Overlap: For photogrammetry to work its magic, you need plenty of overlapping images. A minimum of 75% front overlap and 65% side overlap is a good rule of thumb to make sure the software can stitch everything together perfectly.
- Airspace & Risk Assessment: Doing your due diligence on airspace restrictions, obstacles, and potential hazards. This is a non-negotiable part of any professional operation.
Getting this foundation right sets the stage for the entire project. It's the bedrock of a successful mission.
Stage 2: Data Capture
With your flight plan ready to go, it’s time to fly. In this stage, the drone executes the automated mission you’ve programmed, systematically flying a grid pattern to gather images or LiDAR scans. The name of the game here is consistency—the drone has to maintain a steady altitude and speed to ensure the data is uniform across the entire site.
Even though the flight is automated, the pilot in command is never just a spectator. You’re actively monitoring the drone, the weather, and the surrounding airspace to keep the operation safe and compliant. For a deeper dive, check out our guide on improving your drone data collection techniques.
This is the moment your plan becomes reality. The precision of that automated flight directly impacts the accuracy of your final map, making it a pivotal point in the workflow.
This flowchart gives you a great visual comparison of the workflow for both photogrammetry and LiDAR.
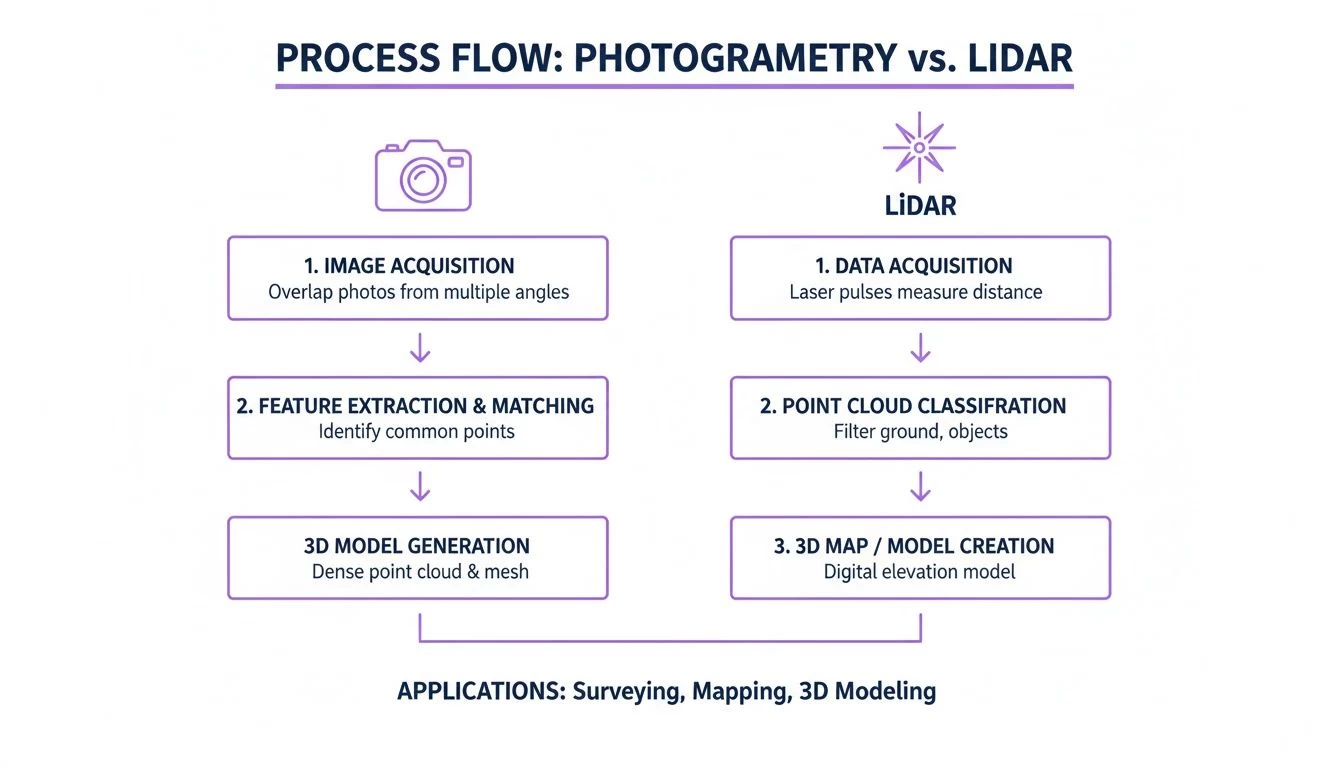
As you can see, both technologies follow a similar path, but the engine under the hood is completely different. One is stitching photos, the other is interpreting laser returns.
Stage 3: Data Processing
Once the drone is back on the ground, the real number-crunching begins. This is where your raw data—whether it's thousands of photos or a massive point cloud—gets turned into something genuinely useful. Specialised software takes over, aligning all the data points and generating the final models and maps.
The key deliverables you'll typically get from this stage include:
- Orthomosaic Maps: Think of this as a single, massive, geometrically corrected aerial photo of your entire site. It’s a high-resolution, distortion-free map.
- Digital Surface Models (DSM): This is a 3D model showing the elevation of everything on the ground—not just the terrain, but also buildings, trees, and other features.
- 3D Point Clouds: A dense cluster of millions of tiny 3D data points that collectively represent the shape of the surveyed area.
Be prepared for this step to take a while. It’s computationally heavy work that can take hours, depending on how much data you collected.
Stage 4: Quality Assurance
A map is only as good as its accuracy. The quality assurance (QA) step is absolutely essential to verify that your data meets the project's standards. This isn't just a quick look-over; it's a detailed check for any gaps, distortions, or other visual glitches.
Most importantly, you need to confirm the map's spatial accuracy. This is typically done by comparing your model to Ground Control Points (GCPs)—highly accurate, known coordinates measured on the ground beforehand. Alternatively, using an RTK/PPK-enabled drone can bake that high accuracy right into the data from the start.
Stage 5: Data Delivery
The final piece of the puzzle is getting the finished products into the hands of your client or project team. This usually means exporting the data in industry-standard formats (like GeoTIFFs, LAS files, or OBJs) that play nicely with their CAD or GIS software.
More and more, we're seeing this data delivered through cloud platforms. This gives clients the power to view, measure, and collaborate on the maps and models directly in their web browser, making the insights instantly accessible to everyone who needs them.
Choosing the Right Drone Mapping Equipment and Software
Let’s be honest, your final map is only ever going to be as good as the tools you use to create it. Putting together the right kit is all about knowing the trade-offs between different bits of hardware and software, and making sure everything you choose actually fits your project goals—and your budget. Get this right, and you're building a foundation for top-quality, reliable data.
It all starts with picking the right drone. The aircraft you fly will pretty much define the scale and type of jobs you can take on without tearing your hair out.
Selecting Your Drone and Sensors
Your first big decision is a classic one: multirotor or fixed-wing?
Multirotor drones, like the workhorse DJI Mavic 3 Enterprise, are the Swiss Army knives of the drone world. They're versatile, relatively easy to fly, and absolutely brilliant for detailed inspections or mapping smaller, more complex sites. Their party trick is the ability to hover and zip around in tight spaces, which is perfect for capturing those tricky oblique shots of buildings and other vertical structures.
Fixed-wing drones, on the other hand, are the marathon runners. They’re built for endurance and gobbling up huge areas of land. Think of them as small airplanes; they fly faster and stay in the air longer, making them the clear winner for massive agricultural surveys or long corridor mapping projects. They do need a bit more room to take off and land, but their efficiency over hundreds of acres is simply untouchable.
Beyond the drone, the sensor is what really does the work. For most photogrammetry jobs, a high-resolution camera is non-negotiable. A sensor with 20 megapixels or more is pretty much the standard these days for producing crisp, detailed orthomosaics. For more specialized gigs, you might find yourself needing a multispectral sensor for agricultural health analysis or a thermal camera for heat-loss inspections.
The choice between multirotor and fixed-wing isn't about which is "better." It's about picking the right tool for the job. A construction site manager needs the nimbleness of a multirotor to navigate the site, while a land surveyor mapping a 500-acre farm needs the sheer efficiency of a fixed-wing.
Building Your Software Stack
Once you've sorted your hardware, you need a solid software stack to plan missions, crunch the data, and deliver the final product. This usually means getting three different types of software to play nicely together, creating a seamless workflow from the field to the office.
A complete software toolkit usually includes:
- Flight Planning Apps: These are your mission control. You draw a box around your survey area on a map, punch in parameters like altitude and image overlap, and the software creates the perfect, automated flight path for your drone to follow. Easy.
- Processing Engines: This is the heavy-lifting software that turns a folder full of raw images into something meaningful. Powerful platforms like Pix4D or Agisoft Metashape stitch thousands of photos together to create your orthomosaics, point clouds, and 3D models.
- Analysis and Delivery Platforms: After all the processing is done, this is where you or your clients can actually view, measure, and analyze the data. These platforms often have tools for calculating stockpile volumes, overlaying design plans, and tracking how a site changes over time.
Picking the right software is a massive step that directly impacts how efficient you are and the quality of what you hand over to your clients. To help you navigate the options, we've put together a deep dive into the top choices on the market. You can find out more in our guide to the best drone mapping software.
Ultimately, getting these tools to work together effectively is how you build a custom setup that can grow with your business.
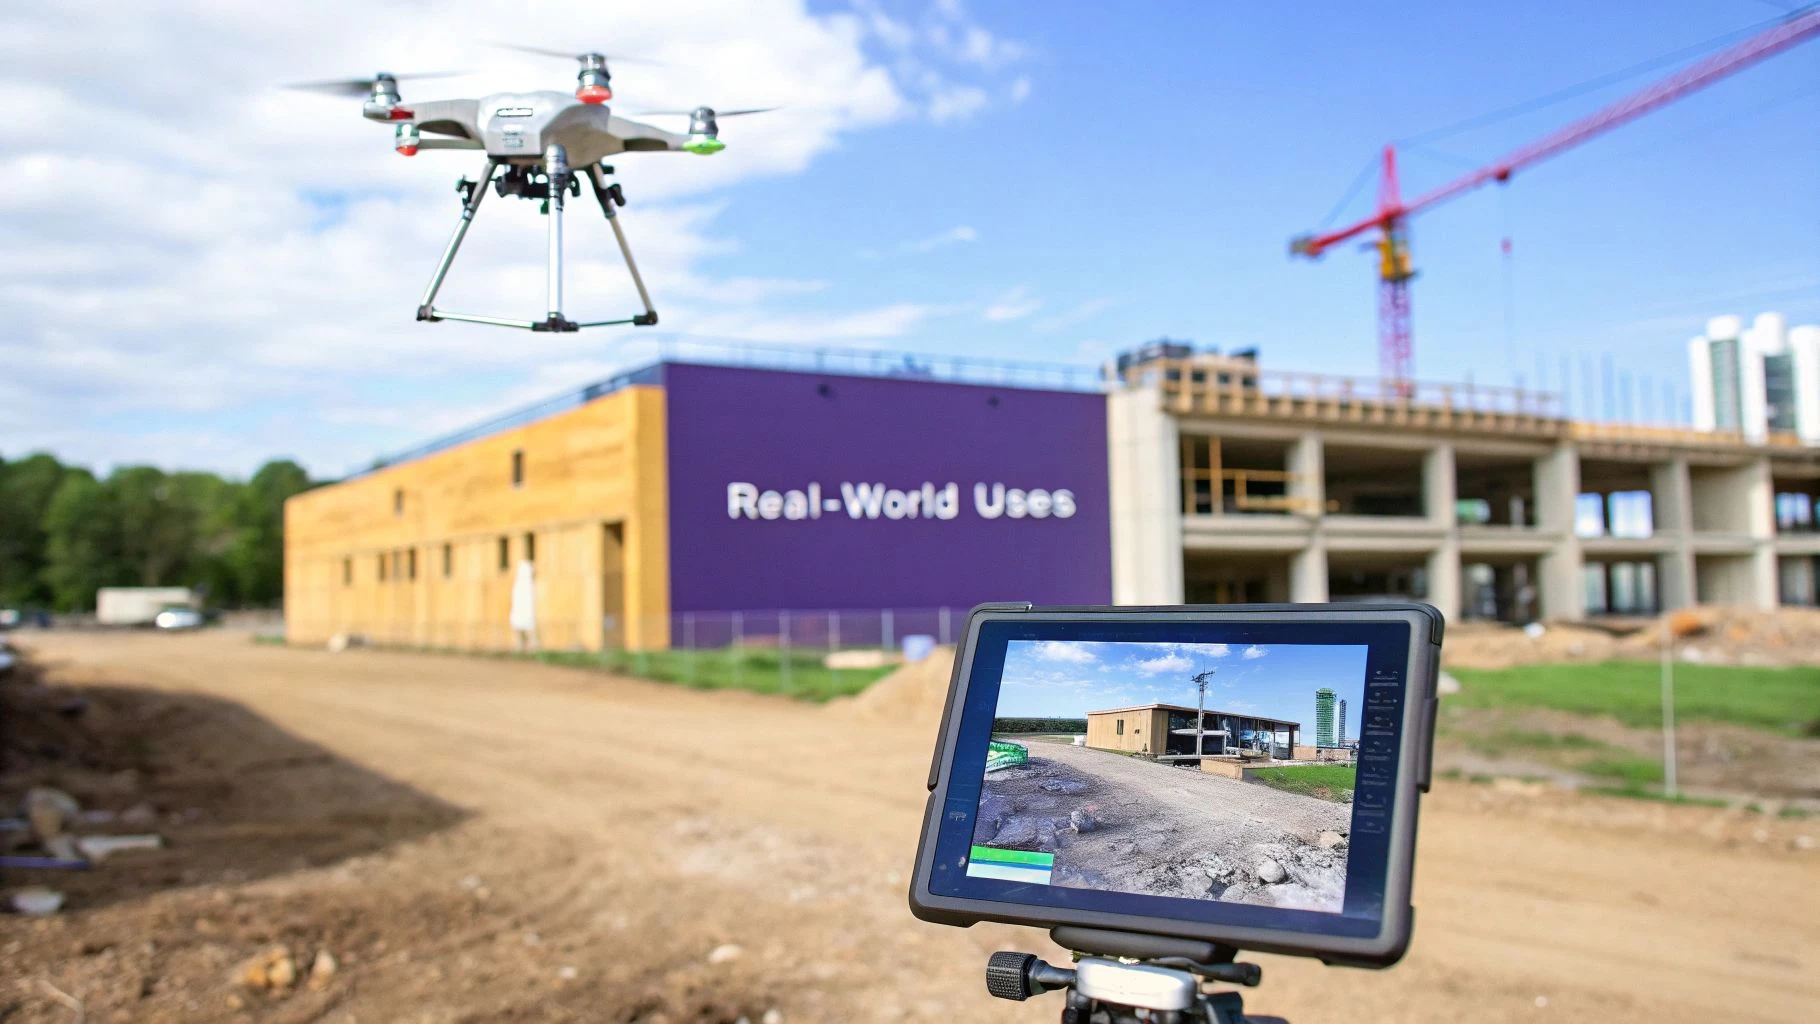
How Drone Mapping Is Used in the Real World
Theory is one thing, but the real power of aerial drone mapping comes alive when it’s solving tangible problems on the ground. This technology is delivering serious value across countless industries, turning complex challenges into straightforward, data-driven solutions.
From sprawling construction sites to precision agriculture, drone data provides a clear, actionable perspective that was once impossible or just too expensive to get your hands on.
The applications are as diverse as the landscapes they cover. But they all share a common thread: turning physical spaces into digital assets to help people make smarter, faster, and safer decisions. This isn't just about pretty pictures; it's about providing the critical intelligence that keeps projects on budget and ahead of schedule.
Construction Site Management and Progress Tracking
Construction is arguably where drone mapping has made its biggest splash. A modern job site is a dynamic, constantly changing environment, and keeping track of every moving part with old-school methods is a logistical nightmare.
Drones give you a weekly "bird's-eye view," creating high-resolution orthomosaic maps that act as a single source of truth for the entire project team. Stakeholders can overlay design plans directly onto the latest site map to instantly spot problems, check that work is on track, and fix issues before they balloon into costly rework.
Problem: A project manager needs to verify that earthwork contractors have moved the right volume of soil. Traditionally, this takes days of manual surveying. Solution: A 20-minute automated drone flight captures the entire site. The resulting 3D model is used to calculate stockpile volumes and cut/fill measurements with centimetre-level accuracy. Outcome: The verification process is cut from two days to just two hours, saving thousands in survey costs and heading off payment disputes.
Surveying and Topographic Mapping
For land surveyors, drone mapping represents a monumental leap in efficiency. Traditional terrestrial surveying is a painstaking process that involves walking a site for hours on end with GPS rovers and total stations.
Now, a single surveyor can capture hundreds of acres of detailed topographic data in a single afternoon. When you combine this with Ground Control Points (GCPs) or an RTK-enabled drone, the resulting digital elevation models and contour maps achieve survey-grade accuracy. This meets the tough requirements for engineering and design projects and frees up surveyors to focus on data analysis and client deliverables instead of just fieldwork.
Precision Agriculture and Crop Health
In farming, success is measured in yield. Aerial drone mapping gives farmers an incredible tool for monitoring crop health and optimising resources across huge fields.
Using drones kitted out with multispectral sensors, farmers can generate detailed vegetation health maps (like NDVI maps). These maps are like an X-ray for crops, revealing subtle signs of stress from pests, disease, or irrigation issues long before they’re visible to the naked eye.
This targeted insight allows for precision treatment:
- Spot-spraying pesticides only where needed, cutting down on chemical usage and costs.
- Optimising irrigation systems to fix dry patches without overwatering healthy areas.
- Applying fertiliser variably based on the specific needs of different zones in a field.
This data-driven approach leads directly to higher yields, lower operational costs, and more sustainable farming. The market reflects this value, with projections showing the commercial drone sector ballooning to USD 1,755.97 billion by 2035. This explosive growth is driven by applications just like these, which can cut traditional survey costs by 50-70% and slash project timelines from weeks to mere days. You can discover more insights about this rapidly growing market and its key applications.
Integrating Mapping Into Drone Operations Management
Growing a drone mapping operation from a side hustle into a full-blown professional service takes more than just being a great pilot. You can be a wizard with photogrammetry or LiDAR, but if the back-office is a mess, you'll never scale. It’s the behind-the-scenes logistics that really decide if you're profitable or just busy.
This is where the technical craft of mapping crashes into the hard reality of running a business. Juggling client calls, scheduling missions, tracking expensive gear, and making sure every flight is by the book—it's a lot. Try to run that on a patchwork of spreadsheets and emails, and you're asking for trouble. It's a fast track to missed deadlines, costly mistakes, and serious compliance headaches.
Get it all in one place to grow
If you want to turn complex mapping jobs into a profitable, scalable business, you absolutely need a single source of truth. A dedicated platform brings every part of your operation under one roof, creating a solid foundation you can build on. Think of it as mission control for your entire business, not just for your drones.
This kind of system is critical for:
- Client and Project Management: Keeping all job details, client chats, and deliverables neatly filed in one spot.
- Smart Scheduling: Planning and assigning missions to your team and equipment without the usual chaos.
- Asset Tracking: Keeping a close eye on flight hours and maintenance for your specialised mapping drones and pricey sensors.
- Compliance on Autopilot: Automatically checking airspace, managing risk assessments, and making sure flight logs are always ready for inspection.
Solid operational software is the engine of a successful mapping service. By getting the admin on autopilot, you're free to do what you do best: capturing incredible data and keeping clients happy.
A professional mapping service stands on two pillars: technical skill in the field and operational excellence in the office. If you drop the ball on the office side, it doesn't matter how good you are with a drone—you'll never be able to grow.
Building a Compliant and Efficient Operation
This integrated way of working is how you build a real drone mapping enterprise. Platforms like Dronedesk are built from the ground up to handle the unique madness of commercial drone work. They give you the tools to plan, fly, and document every project with precision, time after time. For a deep dive, check out our full guide on drone operations management.
By bringing everything into one system, you lay down a clear path to building a business that's compliant, efficient, and professional. You stop being a person doing a bunch of jobs and start becoming a well-oiled machine, ready for whatever comes next. This operational backbone is what gives you the confidence to take on bigger clients, tackle more complex projects, and earn a reputation for being the best in the business.
A Few Common Questions About Drone Mapping
Even after you've got the workflow down, it's natural to have a few questions when you start digging into the technical side of drone mapping. Let's tackle some of the most common ones that come up for new pilots and their clients.
What Is the Best Drone for Mapping?
Honestly, there's no single "best" drone for every job. The right choice really comes down to what you're trying to accomplish.
For smaller, more intricate sites like a construction project or a detailed building facade inspection, a multirotor like the DJI Mavic 3 Enterprise is a brilliant all-rounder. But if you’re looking at surveying hundreds of acres of farmland, a fixed-wing drone is going to be far more efficient and has the flight time to match.
The most critical piece of the puzzle is the sensor. No matter what, you'll want a camera with at least a 20-megapixel sensor to get the kind of high-quality data needed for good photogrammetry.
How High Should I Fly for a Mapping Mission?
Flight altitude is always a balancing act between how much ground you can cover and the level of detail you need. Go higher, and you'll map the area much faster, but your final map will have a lower resolution. Fly lower, and you'll capture incredible detail, but it will take more time and create massive data files.
A good starting point for most projects is somewhere between 200 to 400 feet (that's about 60 to 120 meters). This usually strikes a nice balance. Always double-check what your flight planning software suggests and, of course, stay within local aviation rules.
Does My Drone Need RTK for Accurate Maps?
Real-Time Kinematic (RTK) is a game-changer for GPS accuracy, often getting you down to centimetre-level precision right out of the box. While you don't absolutely need it for every job, an RTK-enabled drone dramatically cuts down on the time you'd otherwise spend setting up Ground Control Points (GCPs). That's a massive time-saver on site.
For any survey-grade work where precision is everything, RTK is pretty much a must-have. For jobs where high relative accuracy is good enough, you can still get great results with a non-RTK drone and a few strategically placed GCPs.
How Much Image Overlap Do I Need?
This one is huge. Getting enough overlap between your photos is absolutely essential for the photogrammetry software to stitch everything together properly. Too little overlap is probably the number one reason why processing fails or models come out looking warped.
As a rule of thumb, here’s what to aim for:
- Front Overlap: At least 75% overlap between one photo and the next along your flight path.
- Side Overlap: At least 65% overlap between adjacent flight lines.
Stick to these numbers, and you'll give the software more than enough common reference points to build a seamless, accurate map. It's the foundation of any solid mapping project.
Ready to pull your entire drone mapping workflow together? Dronedesk integrates mission planning, flight logging, asset tracking, and compliance into one powerful platform, freeing you to focus on delivering exceptional data. See how it works at https://dronedesk.io.
 International Drone Regulations Every Global Team Should Know →
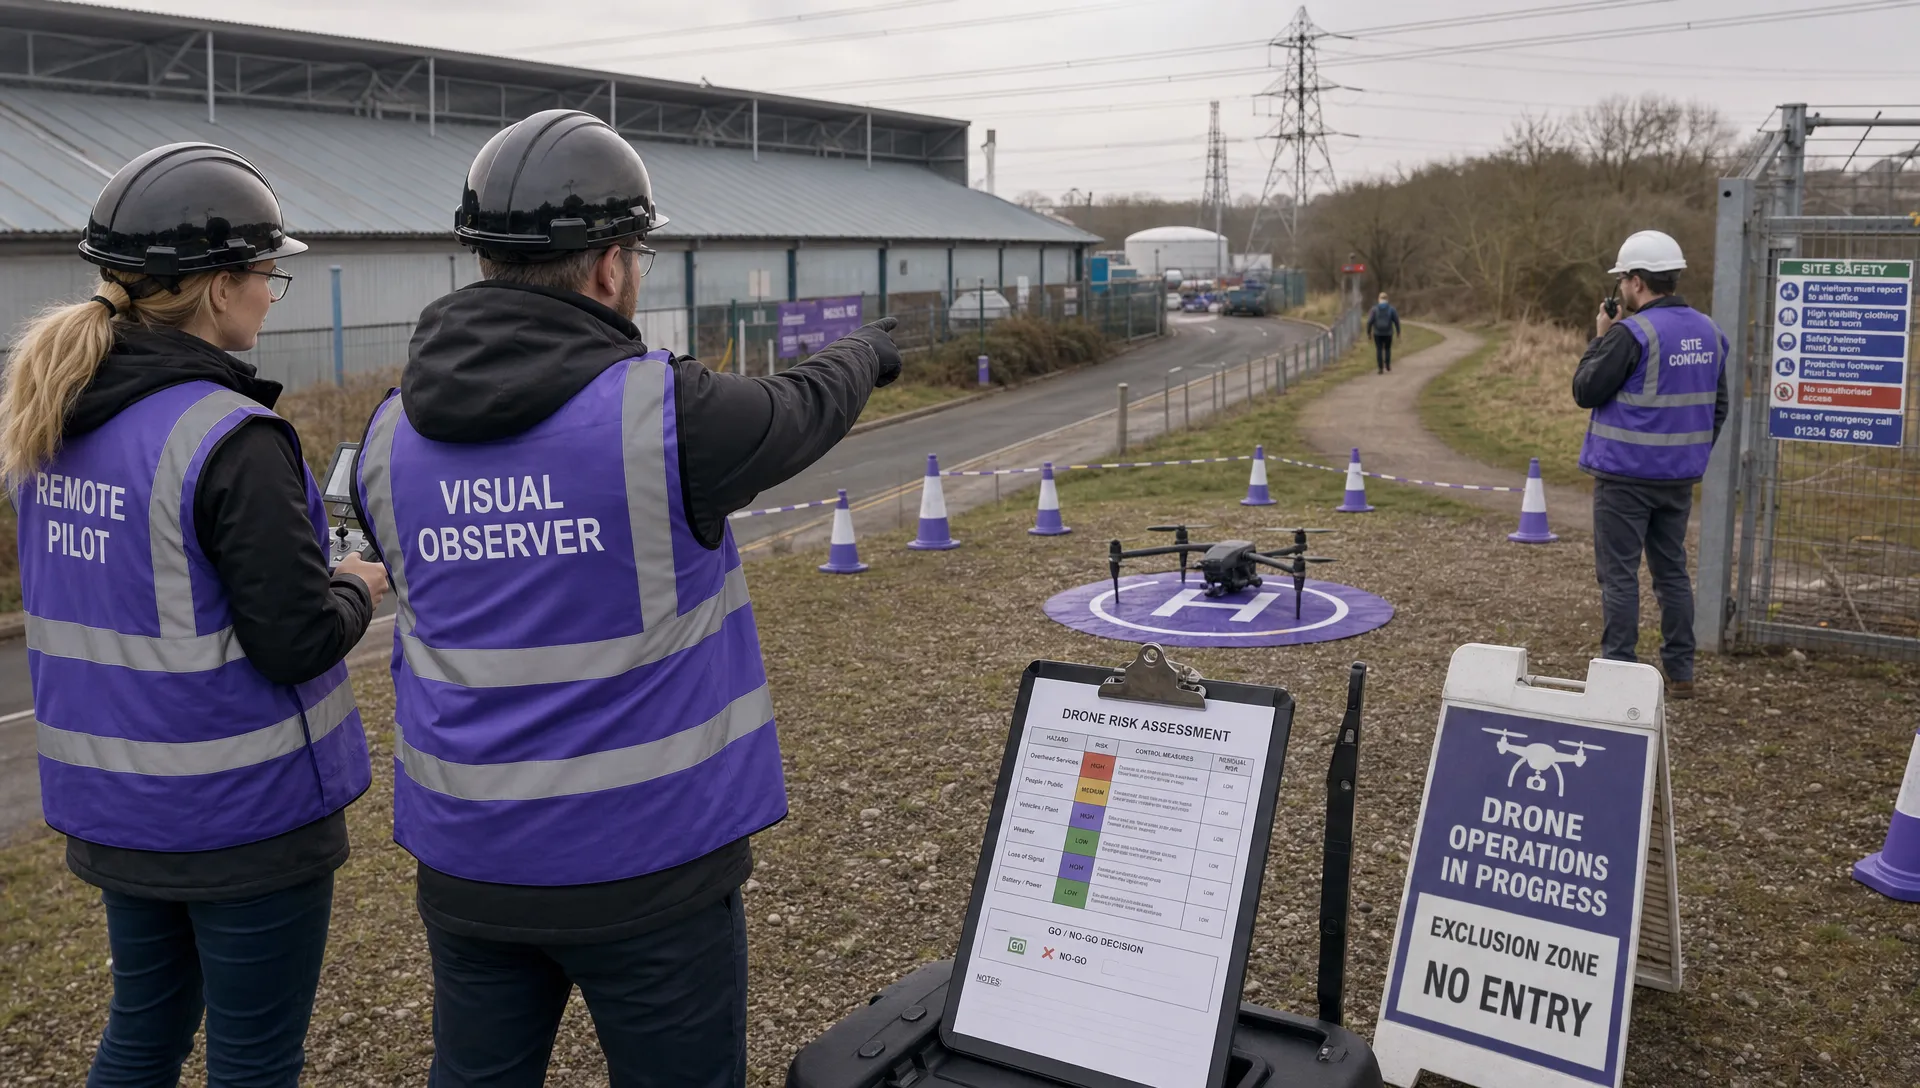 Drone Flight Risk Assessment Example for Safer Missions →
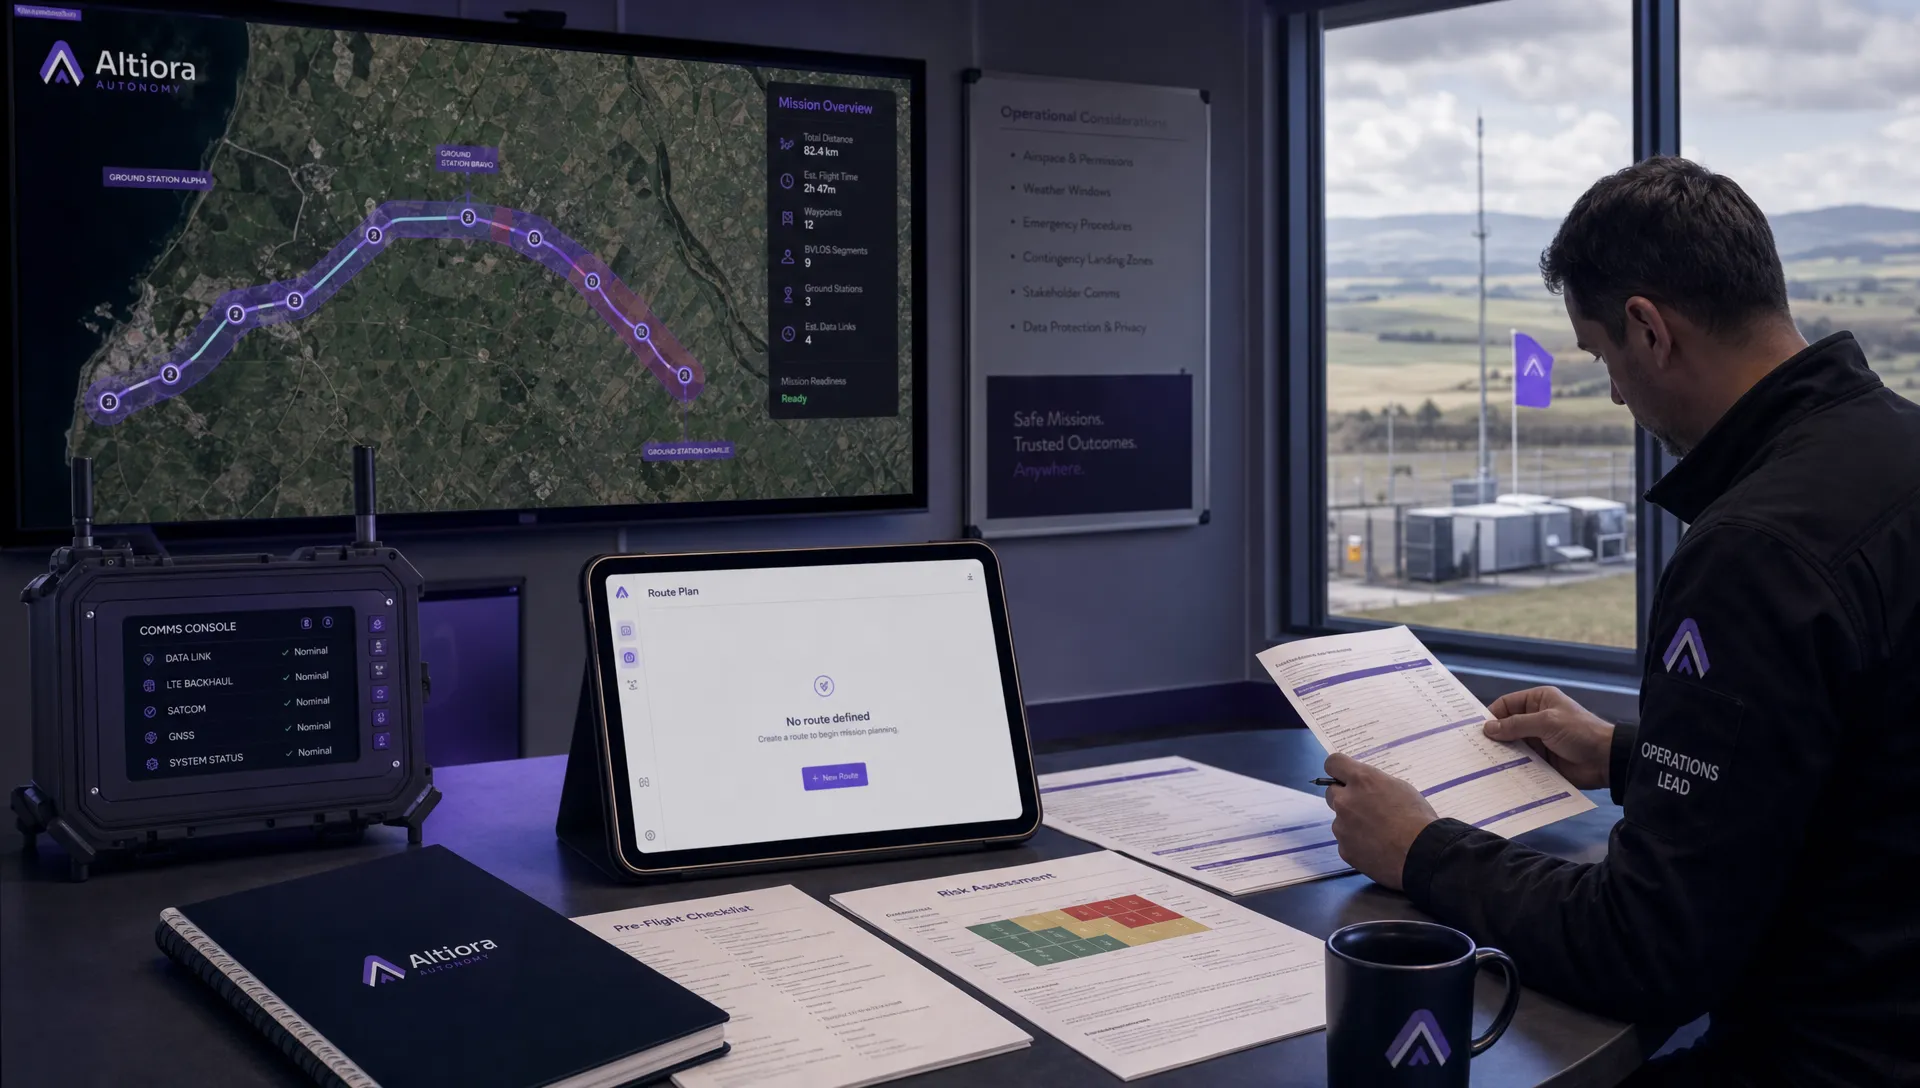 Beyond Visual Line of Sight Explained for Operators →
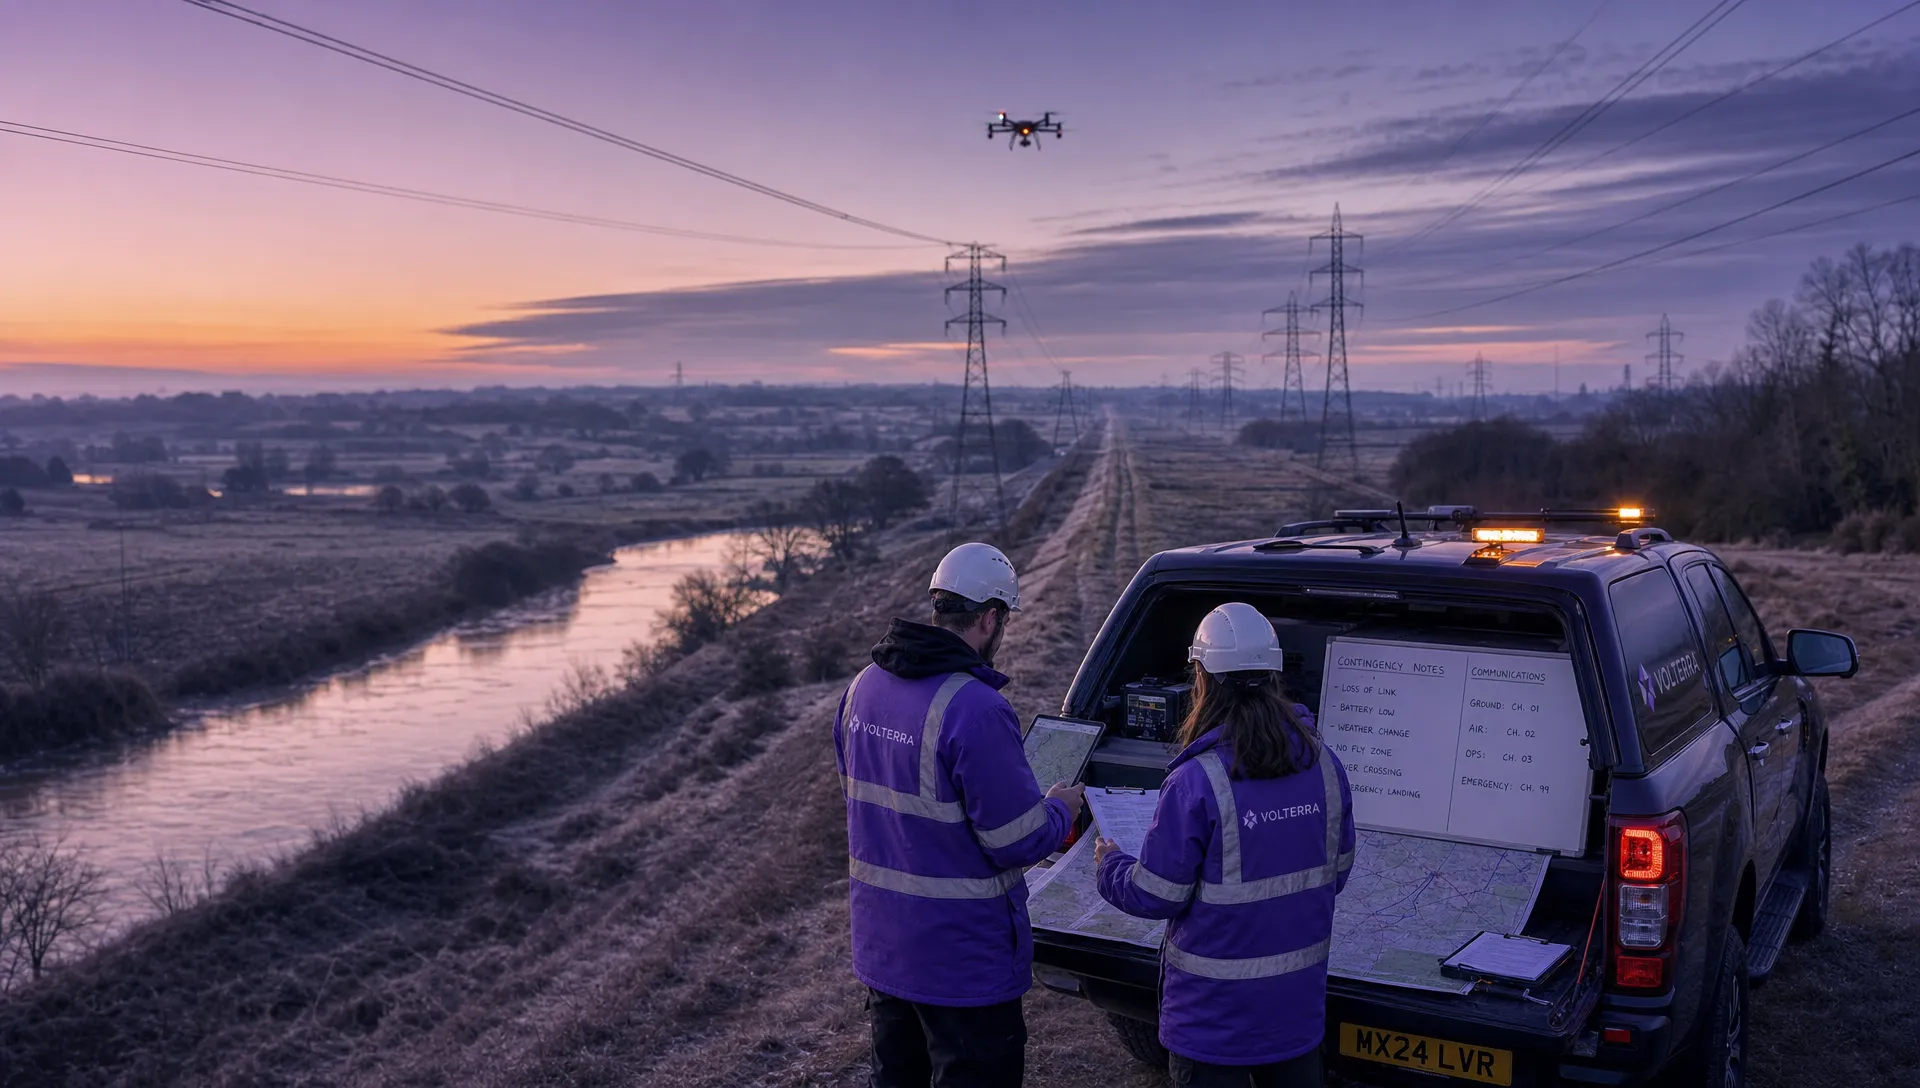 How BVLOS Drone Operations Change Commercial Workflows →
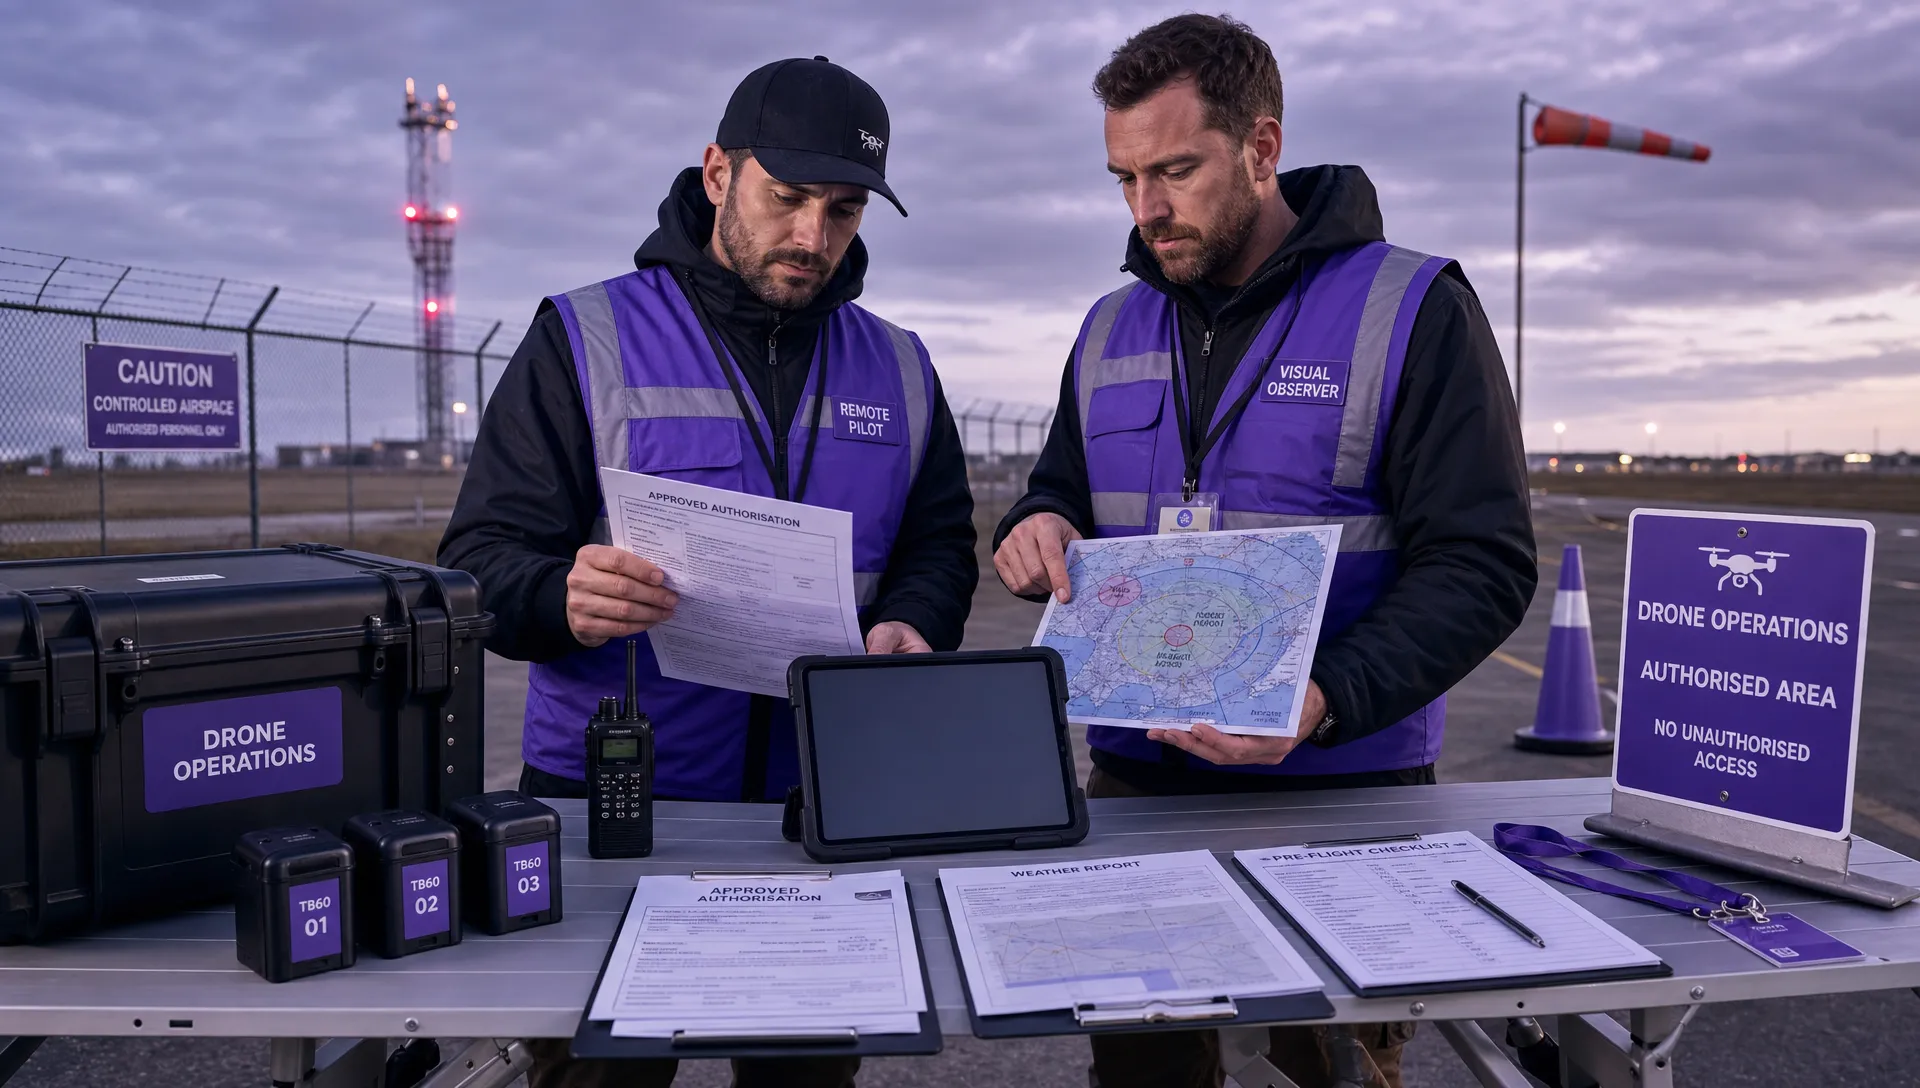 FAA Drone Rules Every Commercial Pilot Should Know →
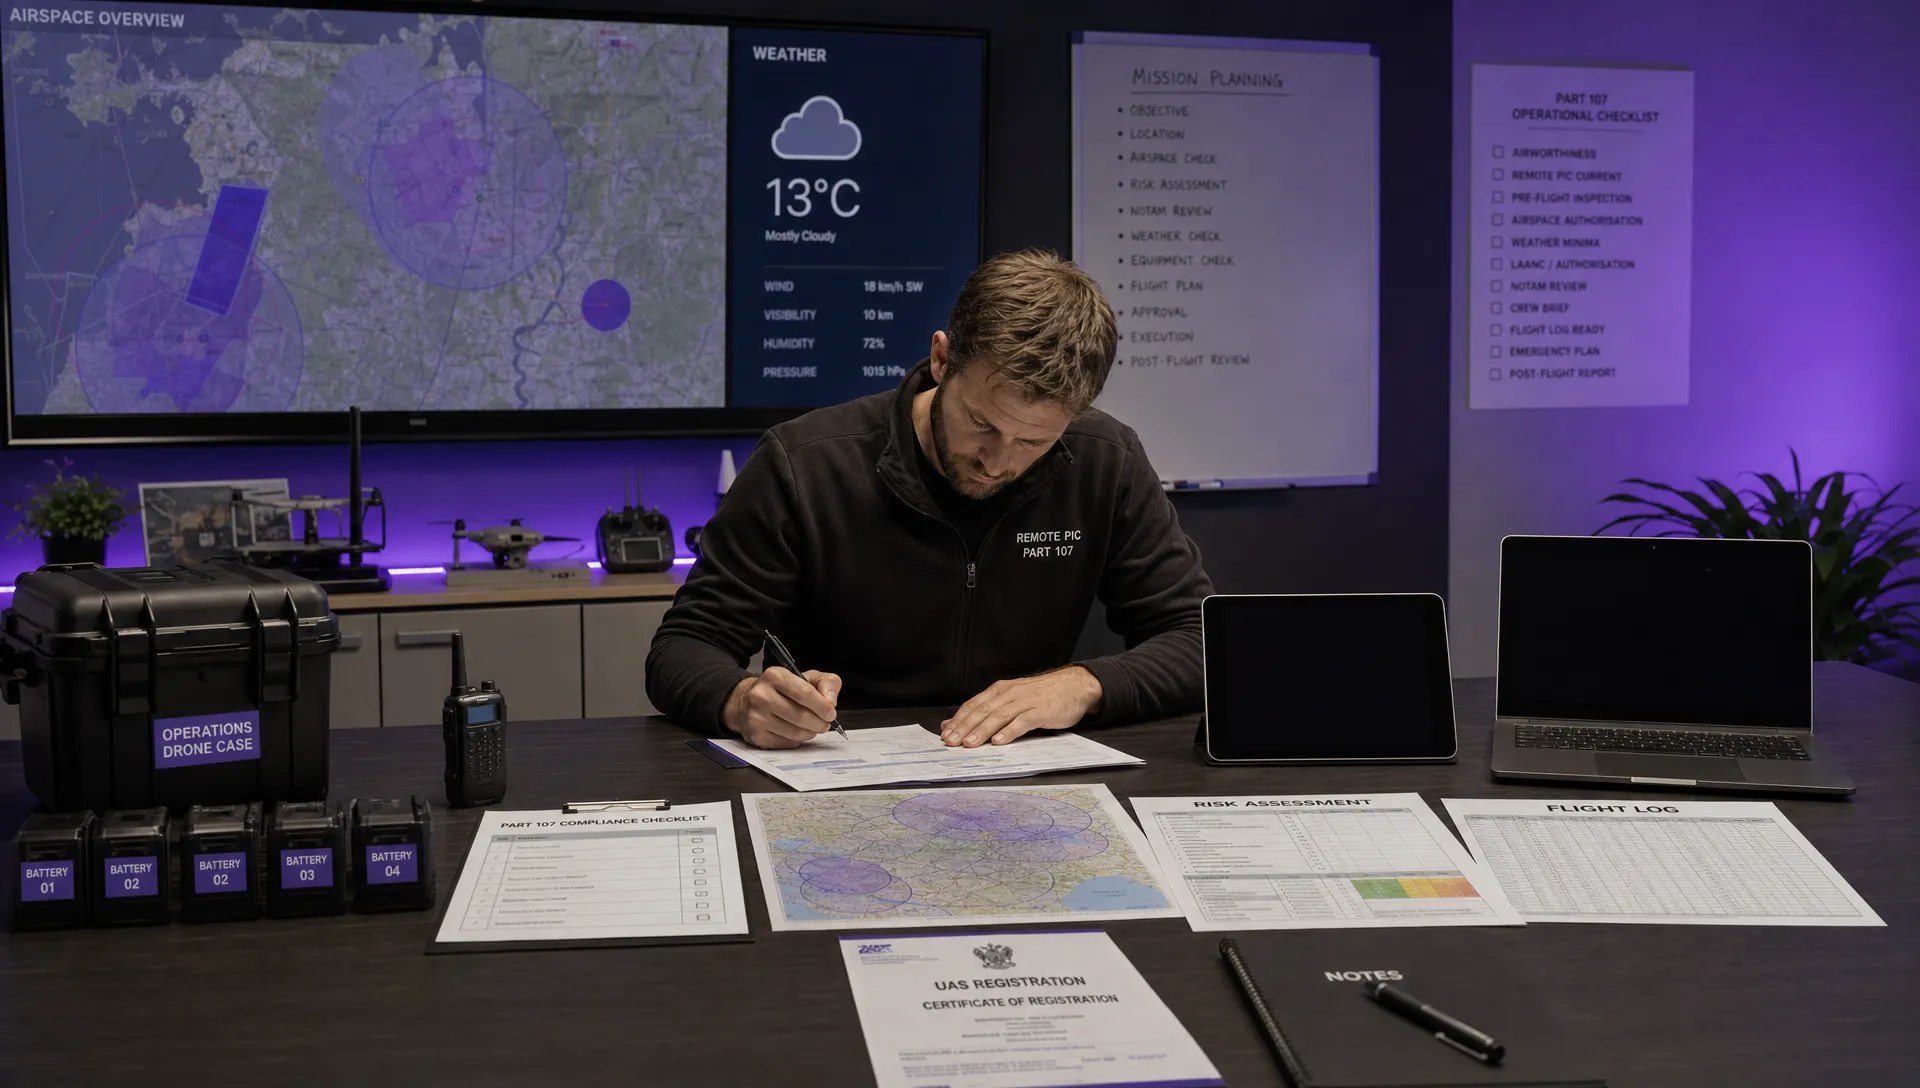 FAA 107 Explained for Commercial Drone Operators →
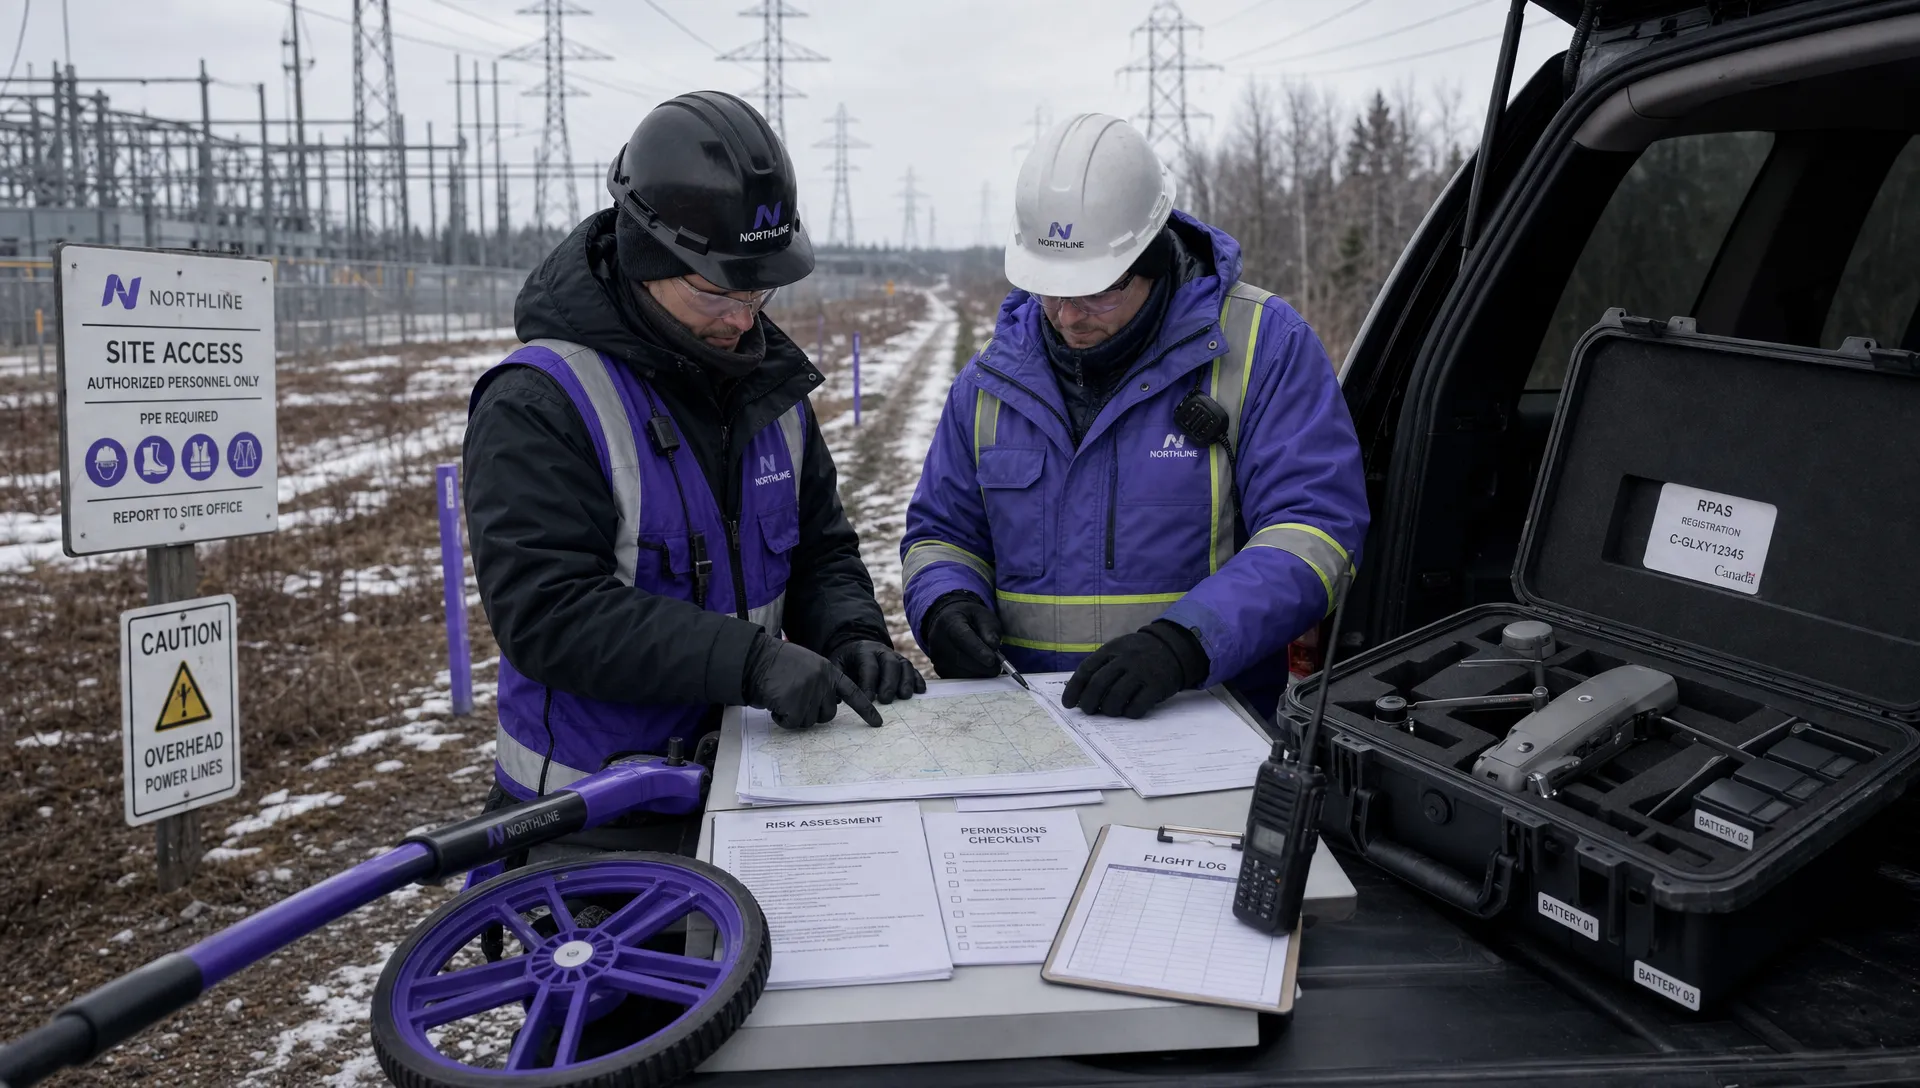 Canadian Drone Regulations Explained for Business Use →
 FAA Part 107 Drone License Explained for Beginners →
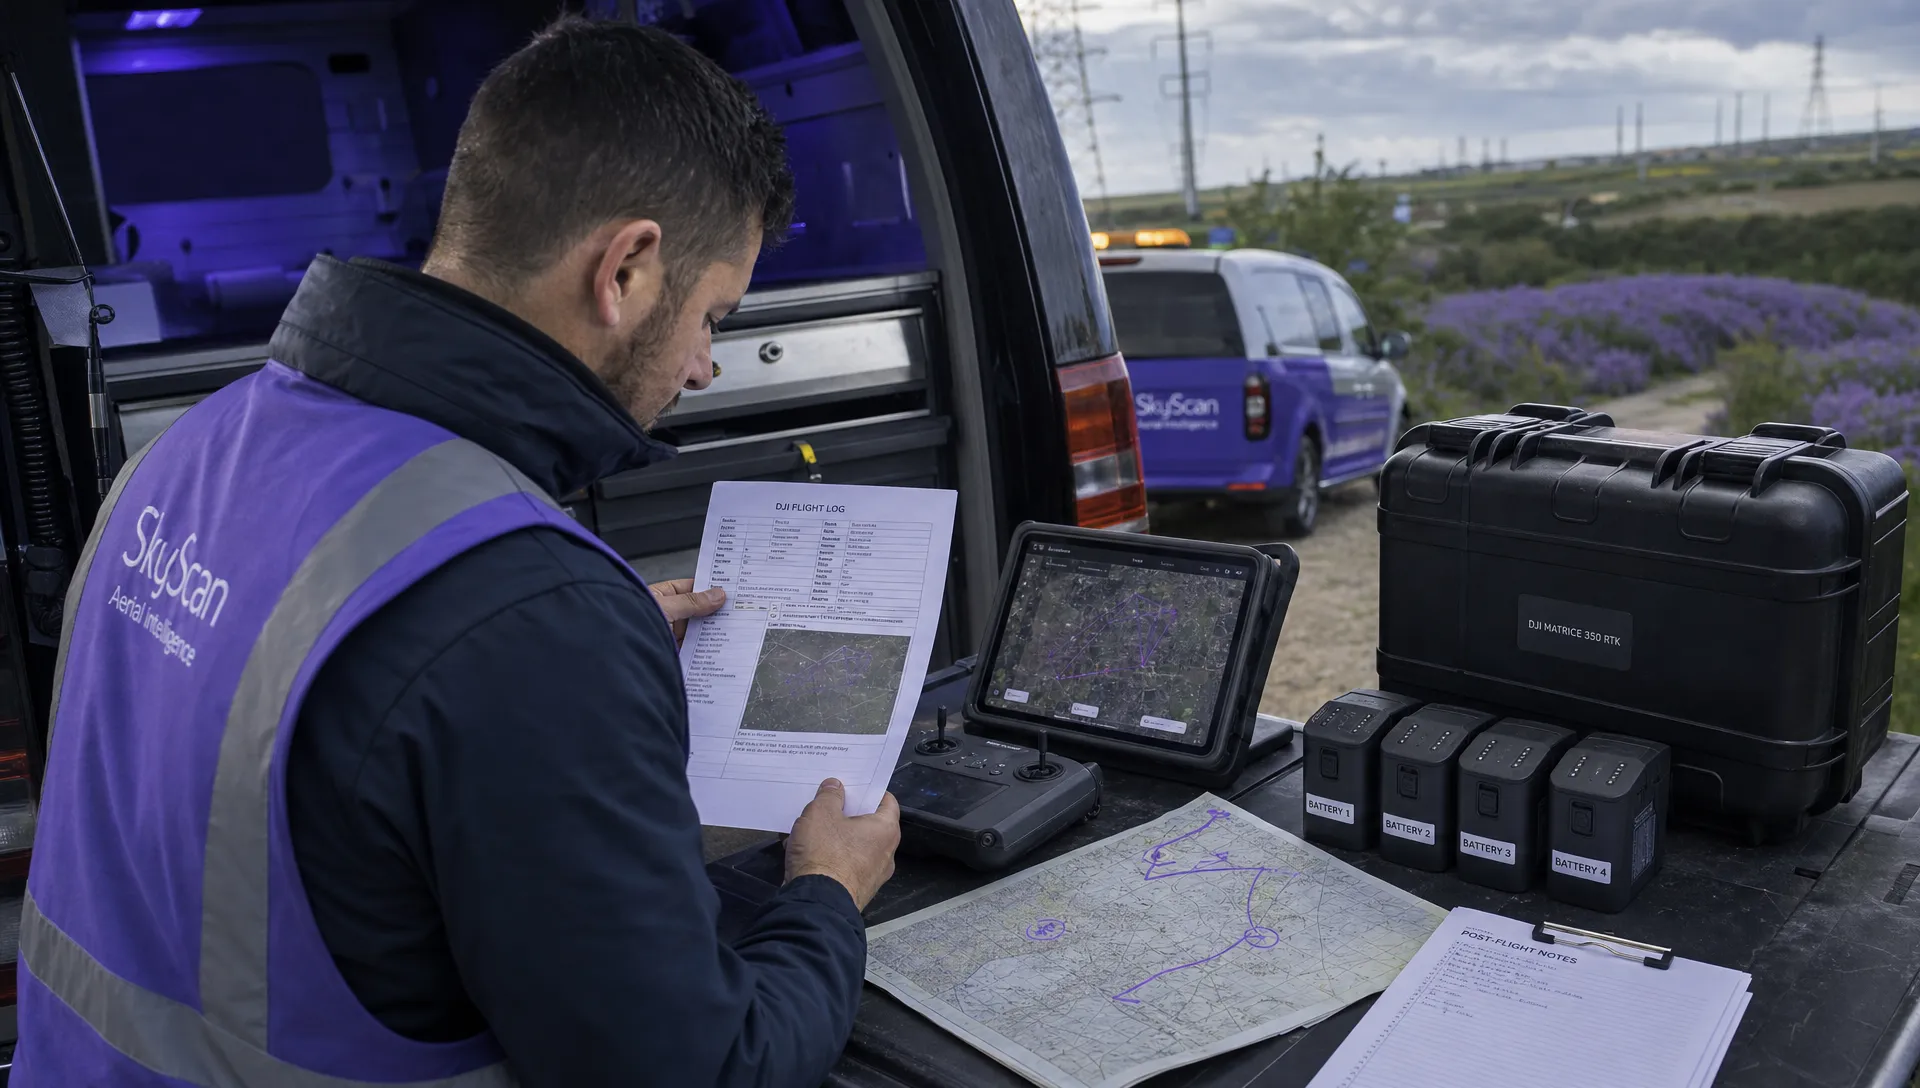 How to Review a DJI Drone Flight Log Step by Step →
 Drone Registration Law Explained for Commercial Pilots →