A Practical Guide to Professional Drone Data Collection
Drone data collection is, at its core, the process of using a drone to capture information with sensors—think high-res cameras, LiDAR, or multispectral imagers. That raw data is then refined into valuable business assets, like 3D models, orthomosaic maps, and detailed inspection reports. It’s about turning pixels captured in the sky into profit on the ground.
From Flying Drones to Delivering Business Value
Let's be honest, professional drone work is so much more than just flying. It's a technical service where the ultimate goal is delivering actionable intelligence that a client can actually use. This guide isn't for hobbyists; it's about the repeatable, high-quality workflows that successful commercial operators run every single day. A structured approach to data collection is the essential backbone of every valuable deliverable you'll ever produce.
This shift from just hardware to valuable information is driving massive growth. The global drone analytics market pulled in around USD 5.2 billion in 2023. It’s projected to grow at a staggering 24.5% CAGR through 2028, outpacing the broader drone market itself. For operators like us, this means each flight isn't just a one-off job but a potential recurring data product. You can explore more about these drone analytics statistics if you want to dig deeper.
The Four Pillars of a Professional Workflow
To turn individual flights into a scalable, professional operation, you absolutely need a system. Every successful mission, no matter the industry, is built on four core phases that lock in efficiency, safety, and client satisfaction. Think of this as the value chain for your entire operation.
This visual breaks down the essential steps from the initial project setup to the final delivery of insights.

This process makes it clear that success isn't just about the "capture" phase. It's equally dependent on meticulous planning, robust processing, and a crystal-clear delivery of the final product.
Why a Systematic Approach Is Essential
Without a structured workflow, things get chaotic and unprofitable, fast. A repeatable process is what separates a side hustle from a sustainable business. Here’s why putting a framework like this in place is so critical:
- Improved Efficiency: A clear plan minimises wasted time on-site and dramatically reduces the need for costly re-flights.
- Enhanced Safety: Systematic risk assessments and pre-flight checks are baked into the planning phase, not left to chance when you're under pressure.
- Consistent Quality: Standardised procedures for both data capture and processing lead to reliable, high-quality deliverables every single time. Your clients will notice.
- Greater Scalability: A defined workflow allows you to train new team members and take on more complex projects without sacrificing the quality you're known for.
By treating drone data collection like a manufacturing process—with clear inputs, processes, and outputs—you build a foundation for real growth. It’s about creating a predictable system that delivers predictable, high-value results for your clients.
This guide is your playbook for building that system. It's all underpinned by smart management tools that can automate the tedious admin work, freeing you up to focus on what really matters: the flight itself.
Designing a Mission That Guarantees Quality Data
A successful drone mission is won or lost long before the props start spinning. It's the pre-flight planning that really separates the pros from the amateurs, turning a simple flight into a precise data acquisition project that actually delivers what the client needs. This is all about moving from a vague request to a concrete set of operational parameters.

This process starts by translating what the client says they want into technical specifications. For instance, when a surveyor asks for a "high-resolution map," you need to pin them down to a specific Ground Sample Distance (GSD), say 2 cm/pixel. That single number dictates your flight altitude and influences your sensor choice, directly impacting the quality of the final deliverable.
Getting this planning right isn't just about good practice; it's good business. The global drone data services market is booming, with projections hitting USD 4.45 billion by 2025. North America is expected to grab a massive 38.4% of that pie, showing just how integrated structured drone data has become in major industries.
Translating Objectives into Flight Parameters
The first step in designing any mission is to dig deep into the project's real goals. What decision will this data support? Answering that question is key to choosing the right sensor and defining the necessary accuracy. An RGB sensor is perfect for tracking progress on a construction site, but you'll need a multispectral sensor to analyze crop stress for a precision agriculture client.
Once you’ve nailed down the why, you can figure out the how. That means setting the key flight parameters that will govern the entire mission.
- Ground Sample Distance (GSD): This is just the real-world size of one pixel on the ground. A lower GSD means higher resolution, but it usually means flying lower, which eats up more time and requires more photos.
- Image Overlap: This is non-negotiable for photogrammetry. If your images don't overlap enough, the software can't stitch them together properly. A good starting point is 75% front overlap and 65% side overlap for clean 2D orthomosaics.
- Flight Altitude: This is directly tied to your GSD. Flying higher covers more ground faster but gives you a lower-resolution map. It’s always a trade-off.
- Accuracy Requirements: If the project needs survey-grade accuracy (we're talking centimetre-level precision), you absolutely must plan for Ground Control Points (GCPs) or use a drone equipped with RTK/PPK.
The most expensive mistake in this business isn't crashing a drone. It's finishing a mission only to discover the data is completely useless. Think of meticulous planning as your insurance policy against costly and reputation-damaging re-flights.
Before diving into the specifics of your flight plan, let's talk sensors. The sensor you choose will heavily influence your flight parameters, so it’s crucial to match the hardware to the job's requirements from the very beginning.
Choosing the Right Sensor for Your Data Collection Job
This table breaks down the most common drone sensors, what they're used for, and what you need to consider when planning a mission with them.
| Sensor Type | Primary Use Case | Common Deliverables | Key Planning Consideration |
|---|---|---|---|
| RGB Camera | Construction monitoring, real estate marketing, basic mapping | Orthomosaics, 3D models, high-resolution photos/videos | Consistent lighting is crucial. Avoid harsh, moving shadows. |
| Multispectral | Precision agriculture, environmental monitoring | NDVI maps, crop health analysis, vegetation indices | Flight timing is key to capture accurate plant reflectance data. |
| Thermal | Building inspections, solar farm analysis, search & rescue | Radiometric thermal maps, heat loss reports, hotspot detection | Avoid flying during solar noon to minimize thermal reflection. |
| LiDAR | Forestry management, corridor mapping, terrain modeling | Point clouds, Digital Elevation Models (DEM), 3D terrain maps | Requires careful flight line planning to ensure adequate point density. |
Selecting the right sensor is half the battle. Once you know what you're flying with, you can fine-tune your flight parameters to ensure the data you capture is exactly what the project demands.
Conducting a Thorough Site and Risk Assessment
With your data requirements locked in, your focus needs to shift to the operational environment. A proper site assessment is way more than just checking for obvious obstacles. It’s a multi-layered review of airspace, weather, and ground conditions. A solid drone flight planning process is essential for both safety and efficiency.
You have to analyze potential risks methodically. This isn't a box-ticking exercise; it’s about actively identifying hazards and coming up with practical mitigation strategies.
Critical Pre-Flight Checks:
- Airspace Analysis: Check for controlled airspace (like near airports), temporary flight restrictions (TFRs), and any local advisories. Use a tool that pulls real-time airspace data.
- Weather Forecasting: Look beyond just rain and strong winds. Consistent, overcast lighting is often ideal for photogrammetry, whereas harsh, moving shadows can completely ruin a dataset.
- Ground Control Point (GCP) Planning: If you're using GCPs, plan their locations before you even get to the site. Make sure they are evenly distributed, clearly visible from the air, and placed on stable ground that won't shift.
- On-Site Obstacle Review: You need to do a walk-around. Identify potential hazards like cranes, power lines, and tall trees that might not show up on standard maps.
This detailed planning phase is where you build the foundation for a flawless flight. By investing your time here, you minimize surprises in the field and ensure every piece of data you capture contributes to a valuable, client-ready final product.
Executing Your Flight for Flawless Data Capture
All the planning is done. Now for the fun part: the flight. This is where your careful preparation pays off, translating plans into clean, consistent data that's ready for processing. Getting this right in the field is the difference between a smooth project and the dreaded, costly re-flight. Nobody wants that.

A perfect capture mission isn't about fancy stick skills. It's about meticulously confirming that your automated flight plan is dialed in. Even tiny errors here can snowball into huge problems later, creating gaps or distortions in your models that are simply impossible to fix in post-production.
Mastering Your Flight and Camera Parameters
Before you even think about launching, do one last deep dive into your mission settings. These parameters are the DNA of your raw data. Get them right, and you're golden.
- Image Overlap: This is absolutely non-negotiable for creating seamless maps and 3D models. I can't tell you how many projects fail because of insufficient overlap. A solid baseline for 2D orthomosaics is 75% front overlap and 65% side overlap. Don't skimp here.
- Altitude and GSD: You must maintain a consistent altitude above your target. This ensures a uniform Ground Sample Distance (GSD) across the entire site, which is essential for any kind of accurate measurement.
- Flight Speed and Shutter Speed: Think of these two as a balancing act. Flying too fast with a slow shutter is a guaranteed way to get motion blur, making your images totally useless. Your shutter speed has to be fast enough to freeze the drone's motion relative to the ground.
Let's say you're mapping a 50-acre construction site for a progress report. Flying at a consistent 250 feet AGL might give you a perfect 3.5 cm/pixel GSD. But if you're creating a detailed 3D model of a historic building, you'll need more. You'd supplement your top-down grid flight with several orbital flights at different heights and angles to capture all that rich detail on the walls.
The biggest rookie mistake is treating every flight the same. A topographic survey needs a totally different flight pattern than a detailed facade inspection. Always tailor your execution to the specific deliverable you're creating.
On-Site Best Practices for Data Integrity
Your job in the field is about more than just flying the drone. A true pro manages the entire on-site environment to guarantee a successful outcome. This means being on top of your gear and checking your work in real-time.
On larger sites, battery management becomes a key part of your strategy. I always number my batteries and keep track of their usage. Make it a rule to land with a safe margin—25-30% is a good target. It protects the long-term health of your batteries and gives you a buffer for unexpected wind or a delayed landing.
While the mission is running, don't just stare at the drone in the sky. Watch your live data feed like a hawk.
Real-Time Mission Monitoring Checklist:
- Image Count: Is the drone snapping photos at the rate you expected?
- Telemetry Data: Are your altitude, speed, and GPS lock holding steady?
- Exposure and Focus: Do the image previews look sharp? A cloud passing over can throw off your exposure consistency if you're not careful.
- Flight Path Adherence: Is the drone sticking to the planned flight lines?
This constant monitoring lets you catch a problem—like a camera glitch or a sudden GPS dropout—the second it happens. It's far better to pause the mission and troubleshoot than to discover a fatal flaw hours later back at the office.
The Role of Nadir and Oblique Imagery
The type of images you capture fundamentally dictates what you can create.
For flat, 2D orthomosaic maps—think agricultural fields or large land surveys—a standard grid flight capturing nadir images (where the camera points straight down) is usually all you need.
But if your goal is a rich, detailed 3D model of a building or a bridge, nadir imagery alone will let you down. It can't see vertical surfaces, which results in stretched, messy, or completely missing walls.
To solve this, you absolutely must incorporate oblique imagery. This means capturing photos with the camera tilted at an angle, usually somewhere between 45-60 degrees. By combining a nadir dataset with several oblique datasets, you give the photogrammetry software all the information it needs to reconstruct complex structures with incredible accuracy. This hybrid approach is the professional standard for high-quality 3D modeling.
Securing Your Data from the Field to the Office
The mission isn’t over when the drone lands safely on the ground. Far from it. The moments immediately following a flight are some of the most critical in the entire workflow. This is where you protect your hard-won data from corruption, loss, or disorganization, making sure it’s ready for the processing stage.
Think of the data on your drone's SD card as a raw, perishable asset. If you mishandle it now, you can invalidate hours of meticulous planning and flight time. A systematic approach to offloading and backing up your data isn't just a best practice; it's a professional necessity.
A Rock-Solid Data Offloading and Backup Strategy
Data loss is a nightmare scenario. It can destroy a project's profitability and seriously damage your reputation. The most reliable way to prevent this is by adopting the 3-2-1 backup rule the moment you power down the drone.
The rule is simple but incredibly effective:
- Have three total copies of your data.
- Store these copies on two different types of media.
- Keep one copy in an off-site location.
For example, your first copy is the original on the drone's SD card. The second copy should be immediately transferred to a rugged external hard drive or a field laptop. Your third copy could then be uploaded to a cloud storage service as soon as you have a stable internet connection, taking care of the off-site requirement.
Never, ever format an SD card in the field until you have triple-confirmed that the data has been successfully backed up in at least two other locations. Rushing this step is one of the easiest ways to lose an entire day's work.
On-Site Quality Control: A Non-Negotiable Step
Before you even think about packing up your gear, you need to perform a quick but thorough quality check on the data you just captured. There’s nothing worse than discovering an issue like widespread motion blur or a gap in coverage back at the office. It’s a soul-crushing experience that forces a costly re-flight.
Conducting these checks on-site takes just a few minutes with a laptop or tablet.
Immediate On-Site QC Checklist:
- Spot Check Imagery: Quickly scroll through a sample of the images. Are they sharp and in focus? Is there any obvious motion blur or excessive noise?
- Verify Coverage: Load the photos into a simple flight log viewer or even just look at the GPS tags on a map. Do you see any glaring gaps in your flight lines?
- Check for Consistency: Were there any sudden changes in lighting, like a large cloud moving in, that could throw off the final model?
- Confirm File Count: Does the number of images on the SD card match what your flight planning app reported?
This initial review isn't about deep analysis. It’s a critical triage process to catch mission-fatal errors while you still have the chance to fix them.
Verifying Metadata and Organizing for Handoff
Every image your drone captures contains a wealth of hidden information called EXIF data. This metadata includes the precise GPS coordinates, altitude, camera settings, and timestamp for each photo—it’s the lifeblood of the photogrammetry process.
It is absolutely crucial to verify that this metadata is present and accurate. A corrupted or missing timestamp file can render an entire dataset useless for high-accuracy methods like Post-Processed Kinematic (PPK) processing. In a PPK workflow, that image timestamp file is what allows for the precise sync between the photos and the satellite observation data. Without it, you simply cannot achieve survey-grade results.
Finally, organize everything into a logical folder structure before you leave the site. Create a main project folder, and within it, create subfolders for things like:
- Raw Imagery
- Flight Logs
- GCP Data
- Site Photos & Notes
This level of organization makes the handoff to the processing team smooth and efficient, and it helps maintain a clear project history for future reference. For more insights on this topic, you can review our guide on drone data integration best practices to further improve your workflow.
Turning Raw Data Into Client-Ready Insights
Raw images and point clouds are just the start; the real money is in the final deliverable. This is where we get into the nitty-gritty of turning all that carefully collected data into the actionable insights your clients are actually paying for. It’s the magic step where pixels from the field become practical business intelligence.

The journey from a folder full of JPEGs to a final product generally follows a standard photogrammetry workflow. While the software you use might look different from the next person's, the core principles are the same across the board. The whole process is about using powerful algorithms to find common points across thousands of images to build a spatially accurate, digital twin of a site.
The Core Photogrammetry Workflow
So, how do we turn a bunch of 2D images into interactive 3D models and maps? It all happens in a few key stages. Each step builds on the last, refining the data into something more and more useful.
- Aligning the Photos: First, the software chews through all the images, identifying millions of common "tie points" between them. Using the GPS data baked into each photo, it creates an initial alignment, resulting in a sparse, low-density point cloud.
- Building the Dense Point Cloud: With the initial alignment as a guide, the software then does the heavy lifting. It performs a much more intensive calculation to build a dense point cloud, which can contain millions or even billions of points. This is the foundational 3D dataset that almost everything else is built from.
- Generating Key Deliverables: From that dense cloud, you can now create the final products. This is where you generate a textured mesh for a realistic 3D model, an orthomosaic (think of it as a single, perfectly flat, distortion-free aerial map), and various elevation models like a Digital Surface Model (DSM) or Digital Elevation Model (DEM).
Fair warning: this process is a beast computationally. It demands a powerful computer and can take several hours—or even days—for really large datasets. You can dive deeper into how this all works in our detailed guide on mapping with drones.
Extracting Value From Processed Data
A stunning 3D model looks great, but clients pay for answers, not just pretty pictures. The real skill is in analysing the processed data to pull out quantifiable metrics that help them make better business decisions. This is where your expertise adds a ton of value beyond simply flying the drone.
For instance, a construction client isn't just buying an orthomosaic. They're buying the ability to track progress against blueprints, verify that things are being built where they should be, and make sure the site is safe.
The most successful drone service providers are data consultants, not just pilots. They understand their client's industry and can translate a point cloud into a clear, concise report that answers a specific business question.
Practical Applications of Data Analysis
Let's look at some real-world examples of how this data becomes actionable:
- Stockpile Volume Calculations: For a client in mining or aggregates, you can use the dense point cloud to calculate the volume of stockpiles with incredible precision—often within 1-3% accuracy. This gives them a fast, safe, and reliable way to manage their inventory.
- Cut and Fill Analysis: On an earthworks project, you can compare a current surface model to the final design grade. This lets you calculate exactly how much dirt needs to be moved (cut) or brought in (fill), helping to optimise logistics and slash costs.
- Crop Health Monitoring: Armed with a multispectral map, an agricultural client can see things the human eye can't. By generating an NDVI (Normalized Difference Vegetation Index) map, you can pinpoint specific areas where crops are stressed, allowing for targeted watering or fertilising.
When turning data into reports, it's also smart to be aware of any relevant regulatory frameworks, like ICAO's Annex 16 for Aviation Environmental Protection, as these can sometimes influence reporting standards depending on the project.
Secure Data Storage and Delivery
The final piece of the puzzle is getting these massive datasets to your client securely and efficiently. Project files can easily swell to hundreds of gigabytes, making email or your average file-sharing service a non-starter.
A professional delivery workflow often means using a dedicated cloud-based platform. This lets clients view, measure, and interact with the data right in their web browser, no special software needed. It also provides a secure, central hub for project storage and collaboration. This kind of professional touch reinforces your value and helps build the long-term trust that leads to repeat business.
How to Streamline Operations and Scale Your Business
When you're starting out, a few spreadsheets and a mishmash of apps might get the job done. But as your drone business grows, those manual processes that once worked just fine quickly become serious bottlenecks. Juggling flight logs, weather apps, airspace checkers, and endless client email chains simply won't cut it when you're handling multiple projects.
This is exactly where a dedicated operations platform becomes your most valuable asset. Tools like Dronedesk are built to connect all the dots we've talked about into one seamless workflow. Instead of bouncing between a dozen different systems, you manage every single part of a job from one central hub. It’s about working smarter, not harder, so you can actually focus on flying and delivering top-notch data to your clients.
From First Call to Final Invoice
Let's walk through a real-world scenario. A construction firm gives you a call; they need bi-weekly progress surveys of a new development site. Inside a platform like Dronedesk, you can kick things off immediately by creating a new project tied directly to that client.
From that point on, the entire workflow lives in one place:
- Log Client Needs: Document the specific data requirements, like the target GSD and what deliverable formats they need.
- Run Automated Checks: Pull up airspace analysis and pinpoint potential ground hazards with just a few clicks.
- Generate Risk Assessments: Use pre-built, customizable templates to create and log a thorough risk assessment, keeping you compliant.
- Sync Flight Logs: Forget manual entry. Your flight logs can sync directly from the drone, which cuts out a ton of admin time and kills the chance of errors.
This approach builds a complete, auditable trail for every single job. Of course, for this to work smoothly—especially when you're uploading large datasets—your network connection needs to be solid. You might want to look into optimizing network performance by fixing high latency to ensure syncing logs and project files doesn't become a new bottleneck.
The Power of an Integrated System
An integrated system is all about freeing you from the administrative death spiral that eats up your time and energy. Think about how much time you'd save by automatically generating compliance reports or having all your team and equipment records in one spot. You're no longer digging through folders for a pilot's certificate or guessing when a drone's next maintenance check is due—it's all tracked and readily available.
The real goal here is to spend less time on paperwork and more time flying billable hours. By centralizing your operations, you’re not just getting organized; you’re building a scalable foundation that actually supports your growth instead of holding it back. This is how you make the leap from being a drone pilot to a true business owner.
This kind of operational efficiency has a direct impact on your bottom line. When your planning, flying, and reporting are all connected, you drastically reduce the risk of expensive mistakes, slash time spent on non-billable tasks, and present a much more polished, professional image to your clients. You can pull up project histories in seconds, share progress updates, and even generate invoices with all the necessary flight data already attached.
Ultimately, this level of organization gives you the confidence to take on bigger, more complex projects and expand your client base, knowing your backend operations are more than ready to handle the load.
Got a few questions about drone data collection? You're not alone. Here are some of the most common things we get asked by other pro operators out in the field.
What’s the Most Common Mistake People Make?
Honestly, the biggest and most expensive mistake is skimping on the planning phase. So many operators are eager to get the drone in the air, but they rush the prep work.
This usually pops up as poorly chosen flight parameters, like not enough image overlap or an inconsistent flying altitude, which can completely torpedo the quality of your dataset. We also see people fail to account for changing light conditions or forget to set enough Ground Control Points (GCPs) on jobs that need survey-grade accuracy. The best way to dodge these bullets? A rock-solid, repeatable pre-flight checklist. No exceptions.
The biggest mistake is thinking the flight itself is the most critical part of the job. The truth is, meticulous planning and rigorous on-site quality control are what really guarantee a valuable final product and prevent those soul-crushing re-flights.
How Much Image Overlap Do I Actually Need?
For a standard 2D orthomosaic map, a good baseline is at least 75% front overlap and 65% side overlap. This gives your photogrammetry software plenty of common points to stitch the images together cleanly without gaps or weird artifacts.
But if you're tackling complex 3D models of things like buildings, bridges, or stockpiles, you've got to crank those numbers up. Aim for 80-85% overlap in these cases. And remember, you absolutely must capture oblique (angled) shots to get the data from vertical surfaces. A top-down, nadir-only flight will miss them entirely.
Can I Fly in Cloudy or Windy Weather?
You can, but you need to know the trade-offs. A heavily overcast day with flat, consistent light can actually be perfect for photogrammetry. It gets rid of the harsh shadows that can really mess up a 3D model. The key word there is consistent—if the light is changing throughout the flight, your dataset will be a mess.
As for wind, most commercial drones can handle a steady breeze up to 20-25 mph. Just be mindful that stronger winds can introduce motion blur, which is a dataset killer. It also chews through your batteries like you wouldn't believe. Always fly within your drone's stated limits, and just as important, within your own comfort zone as the pilot in command.
Tired of juggling spreadsheets, weather apps, and logbooks? Dronedesk brings your entire operational workflow under one roof. From managing clients and planning flights to logging everything for compliance, we help you get back to flying. See how Dronedesk can transform your drone operations.
 FAA Remote ID Rule Explained for Commercial Pilots →
 Drone Legal Requirements for Commercial Operations →
 Drone Near Airport Rules Explained for Safer Planning →
 International Drone Regulations Every Global Team Should Know →
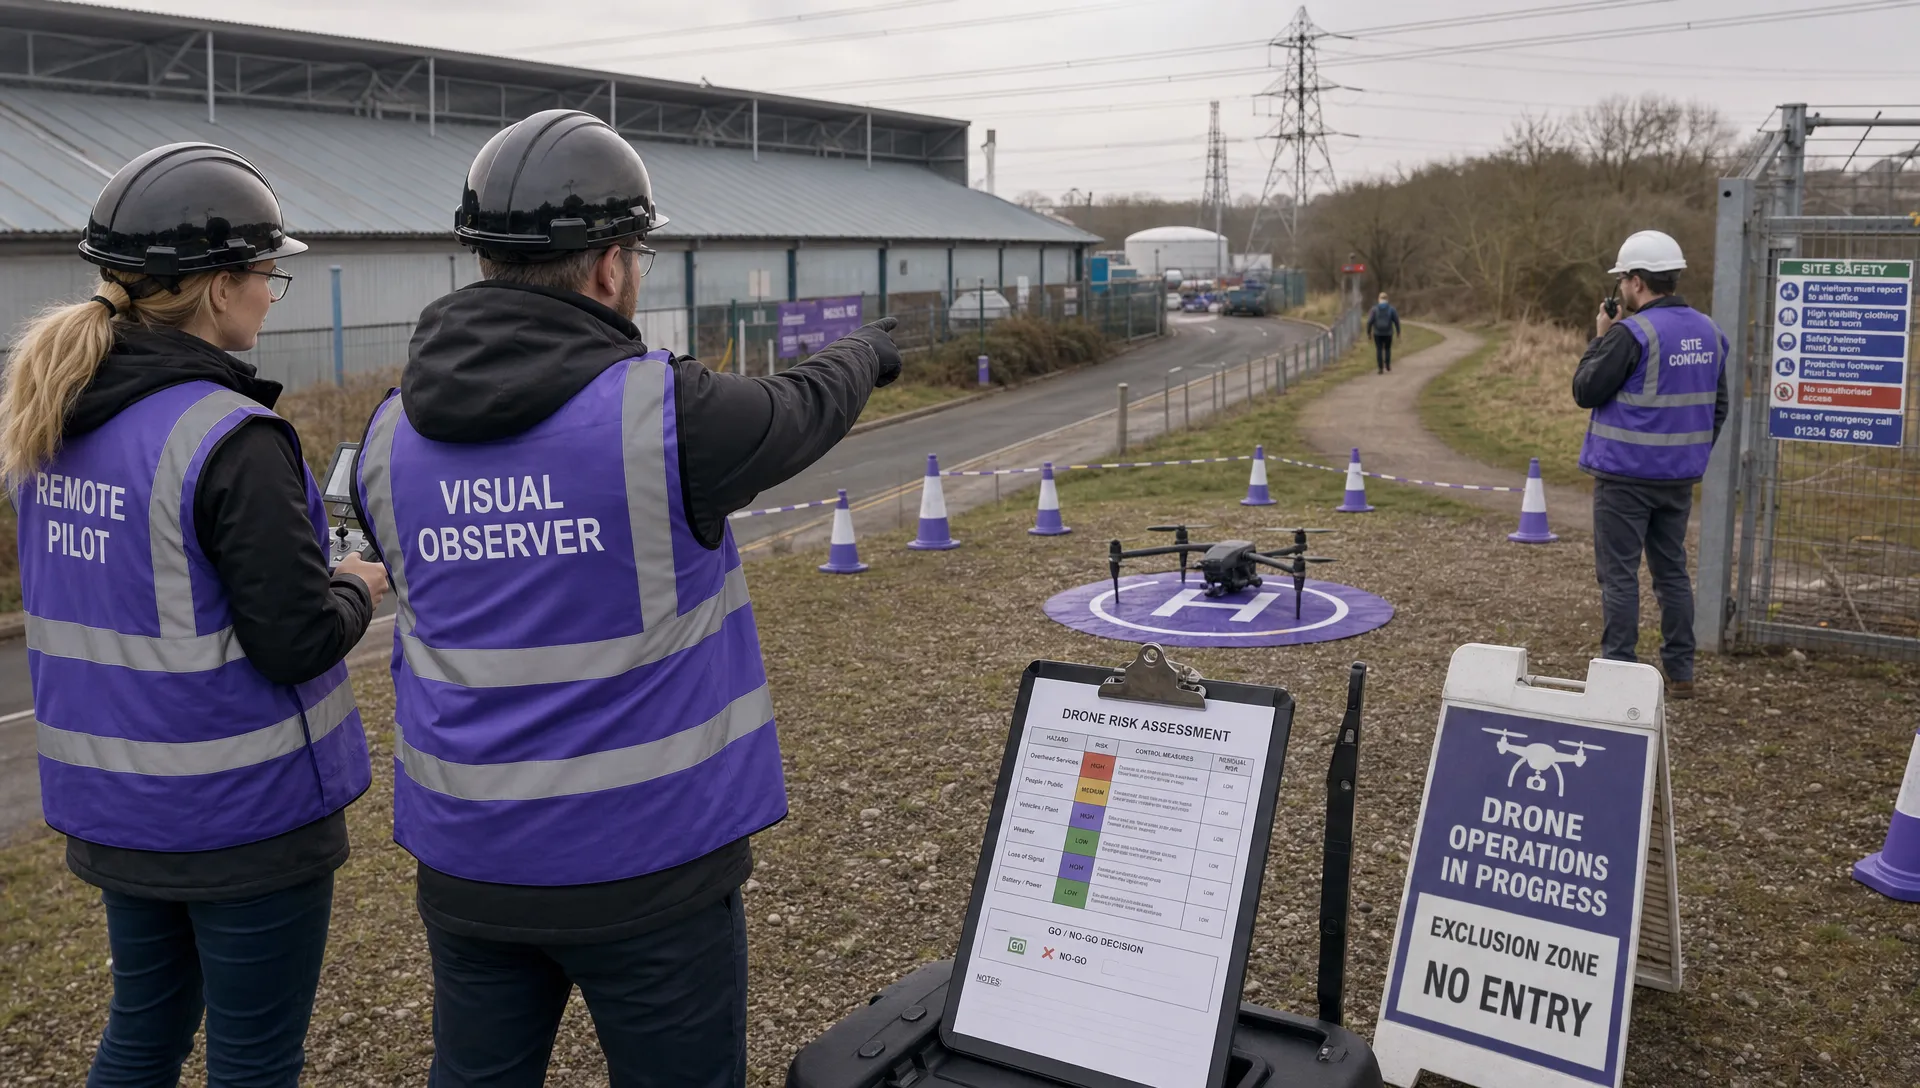 Drone Flight Risk Assessment Example for Safer Missions →
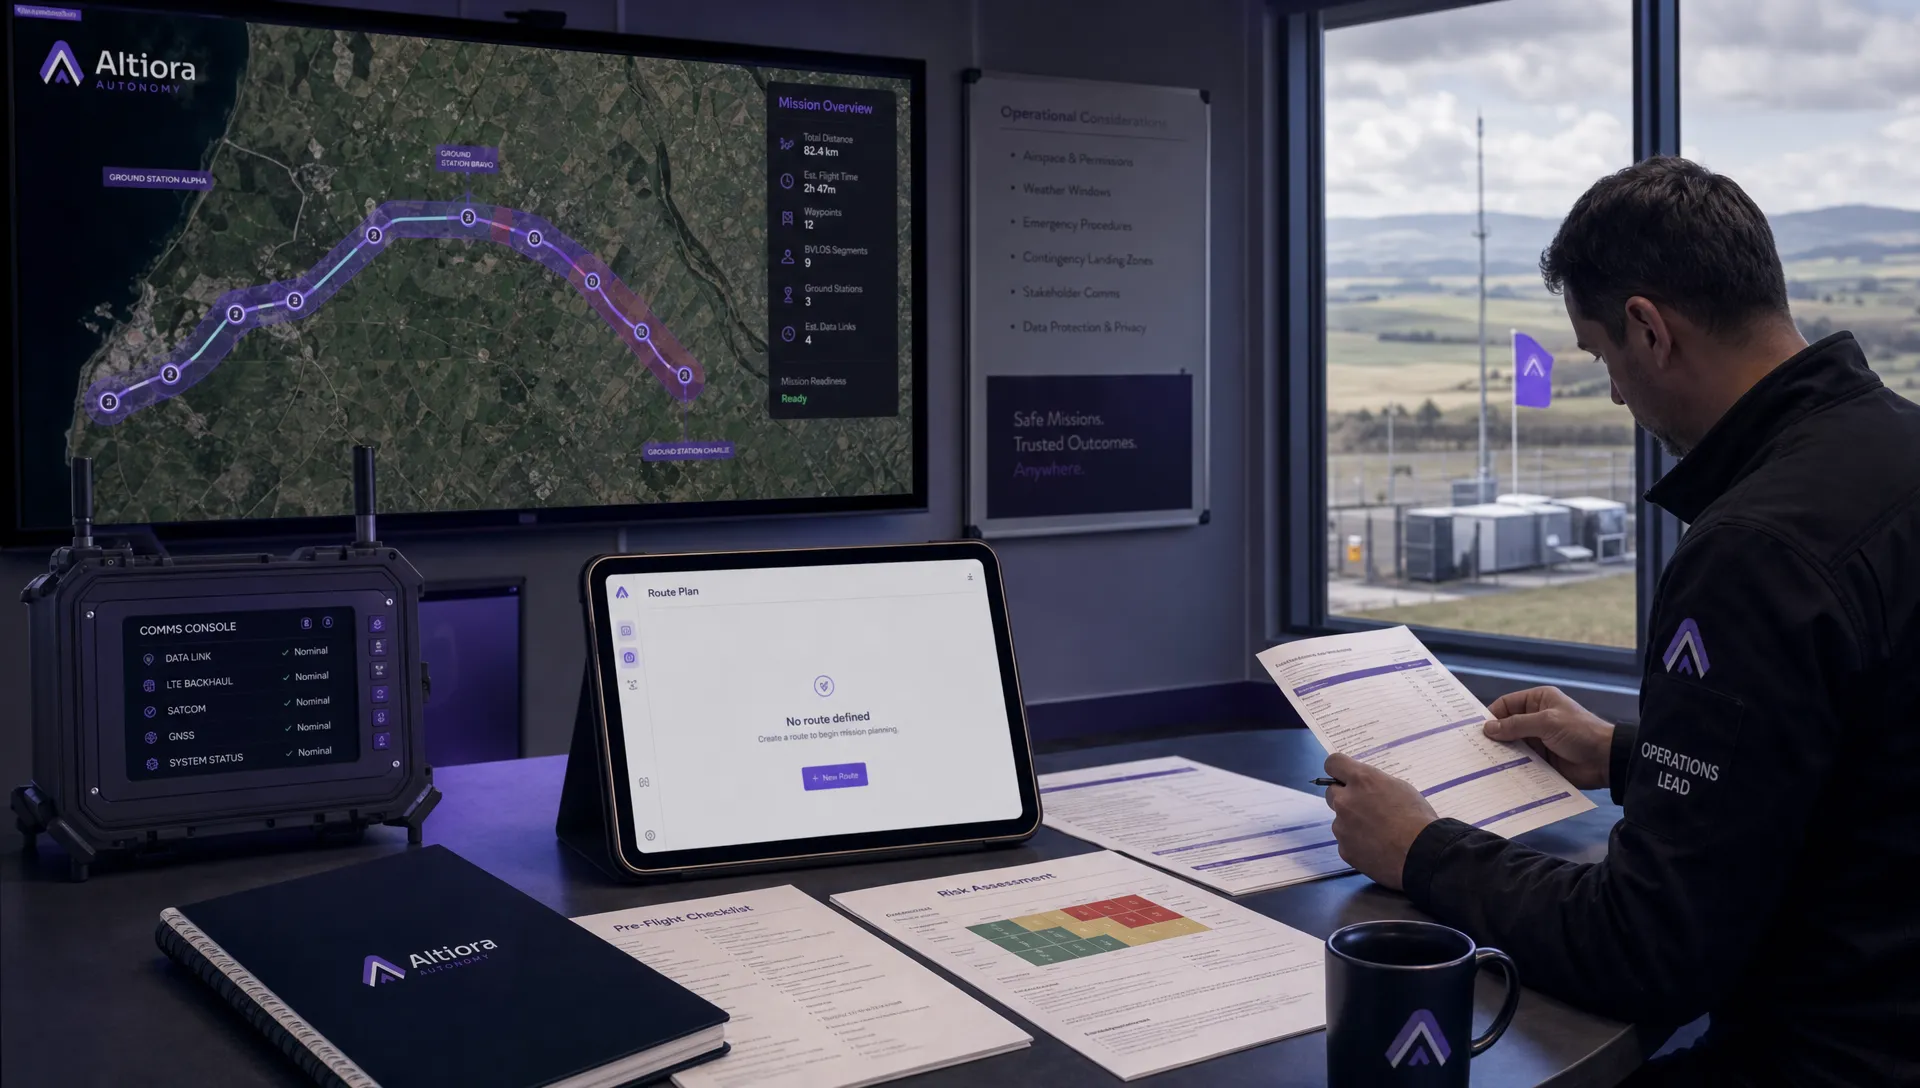 Beyond Visual Line of Sight Explained for Operators →
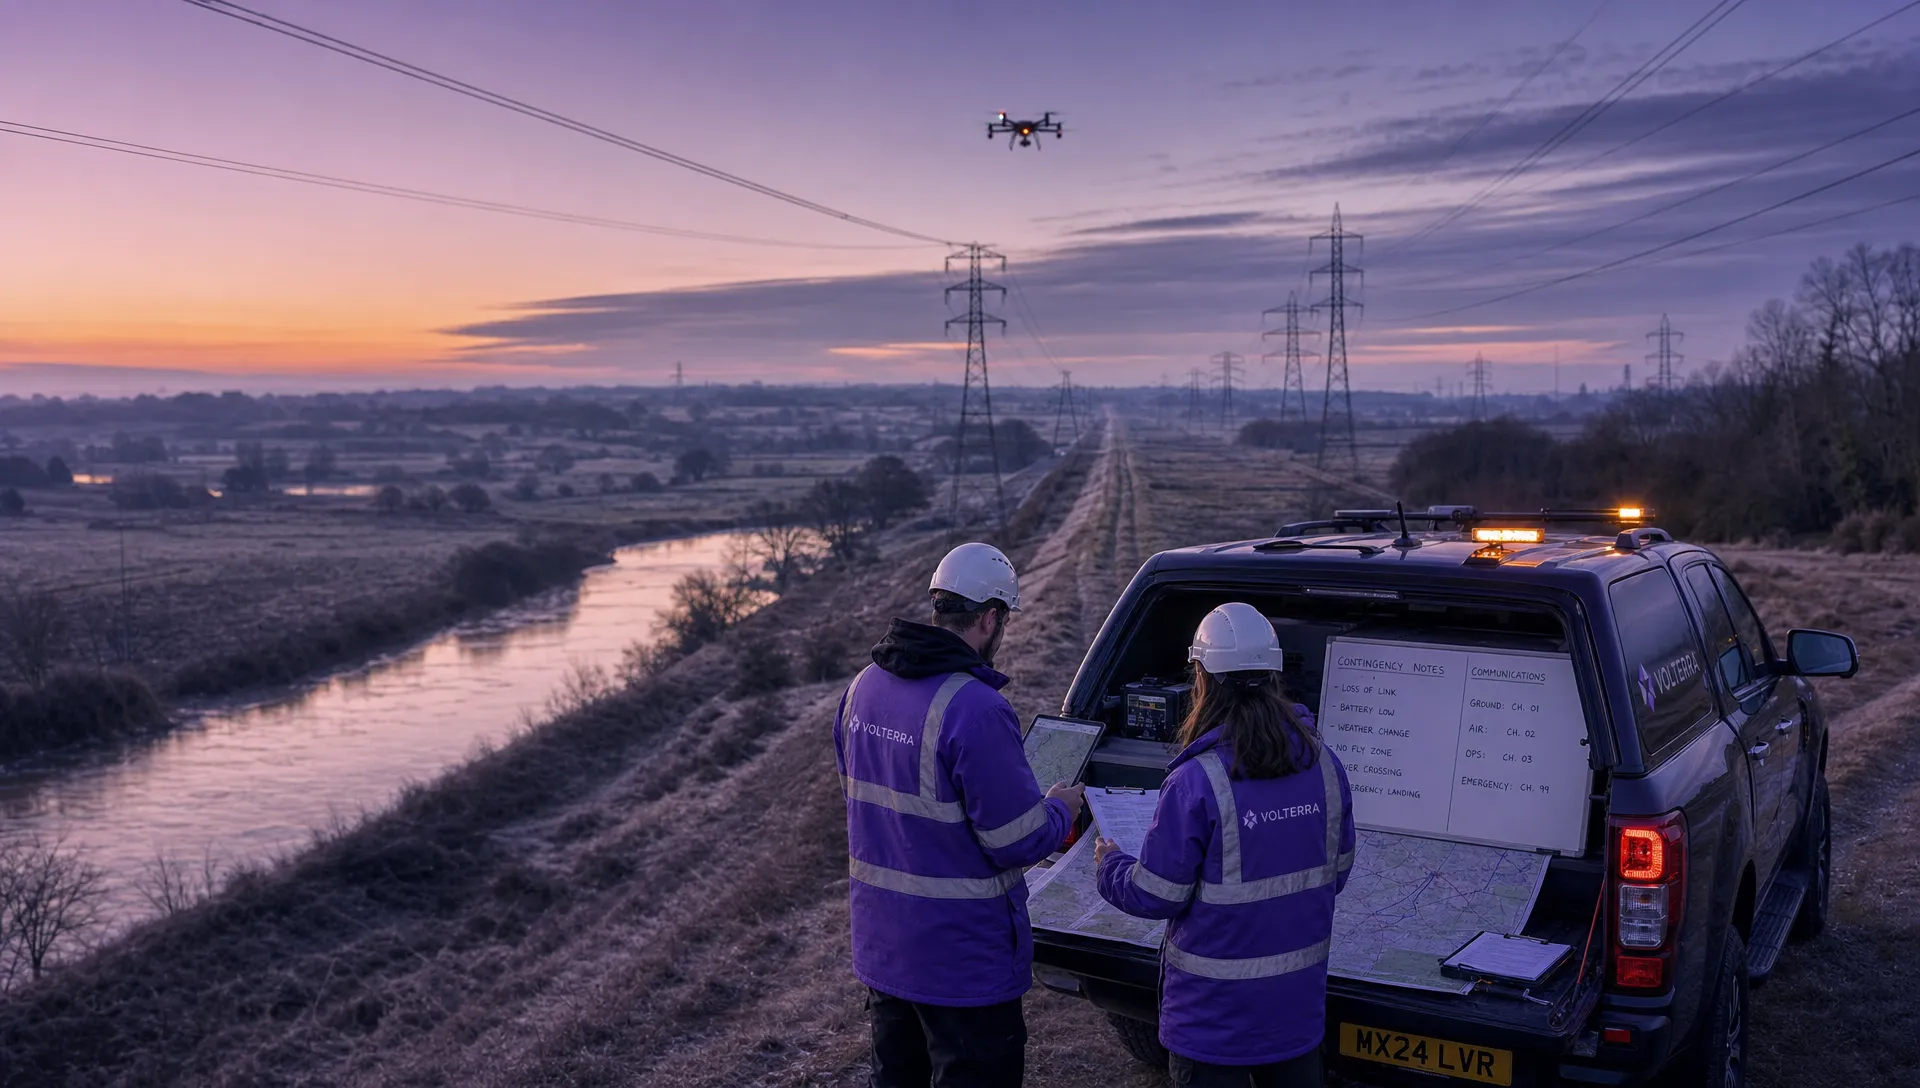 How BVLOS Drone Operations Change Commercial Workflows →
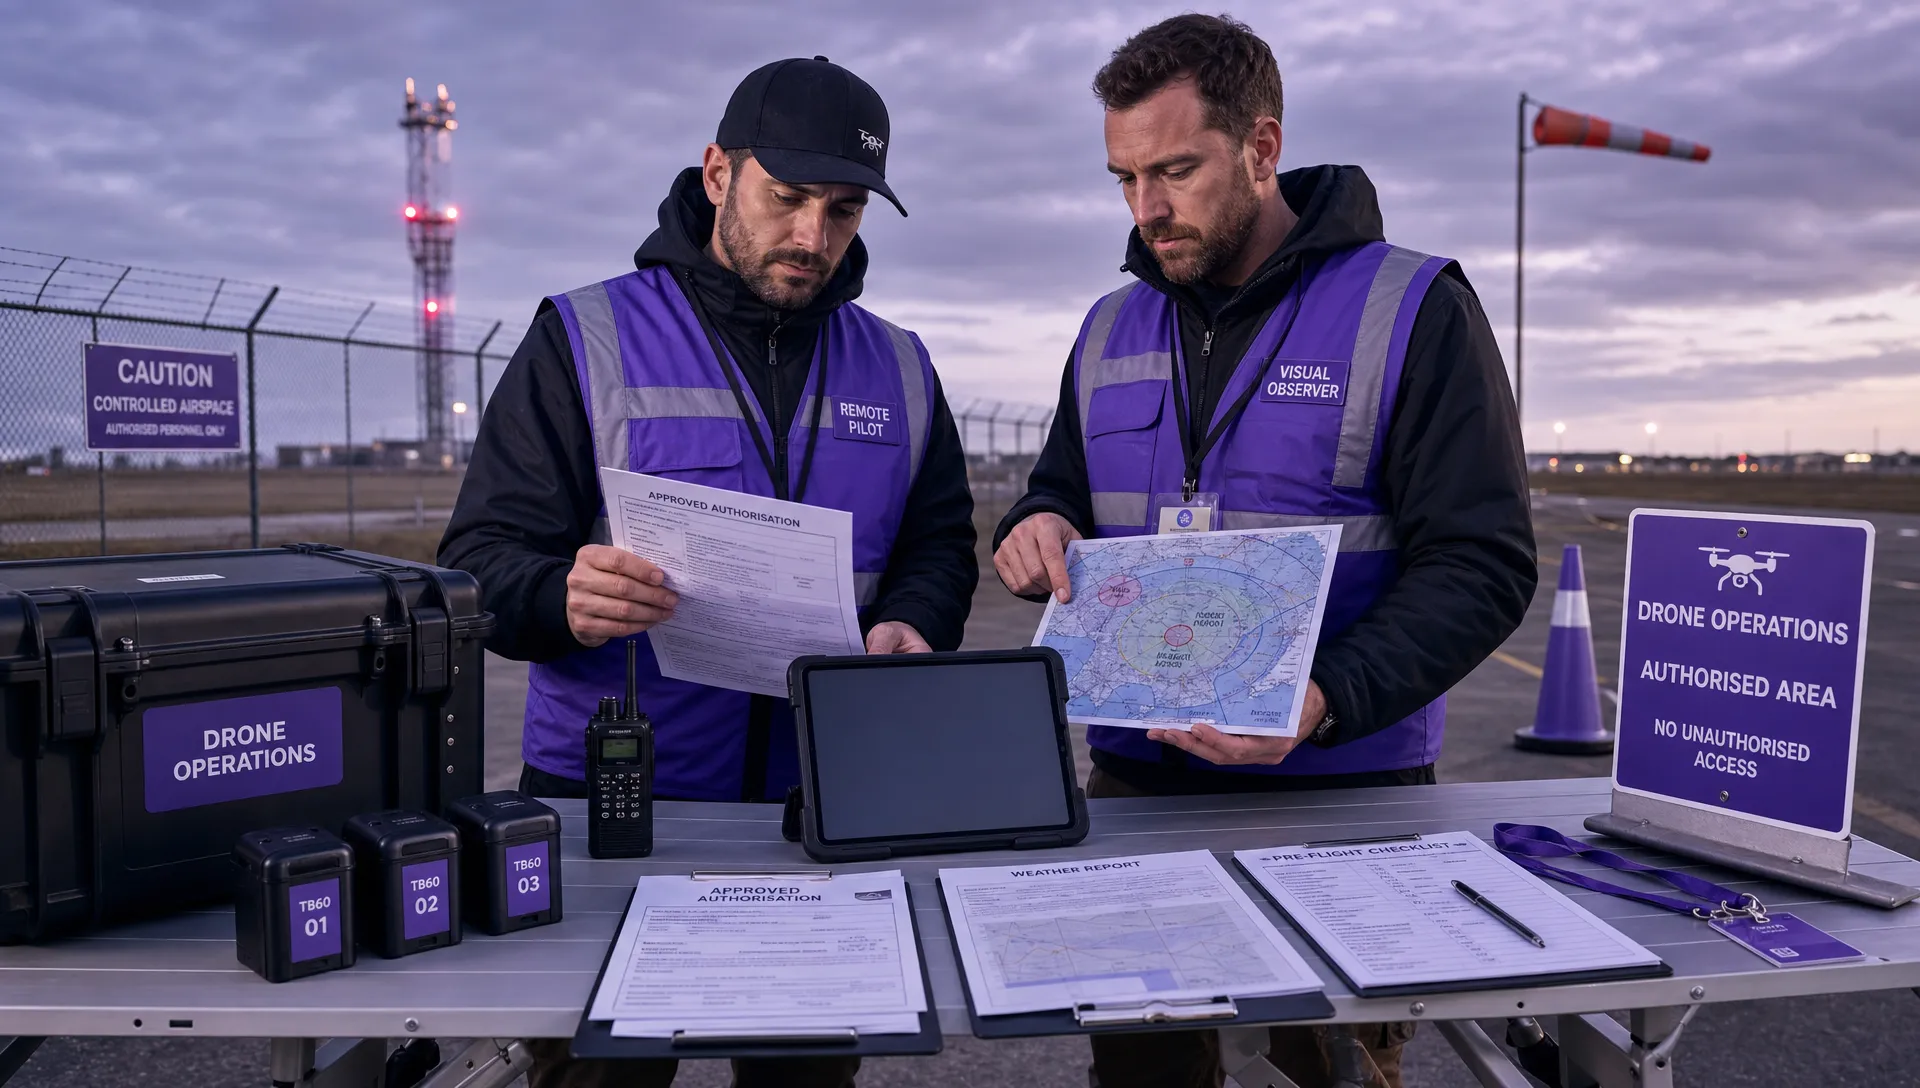 FAA Drone Rules Every Commercial Pilot Should Know →
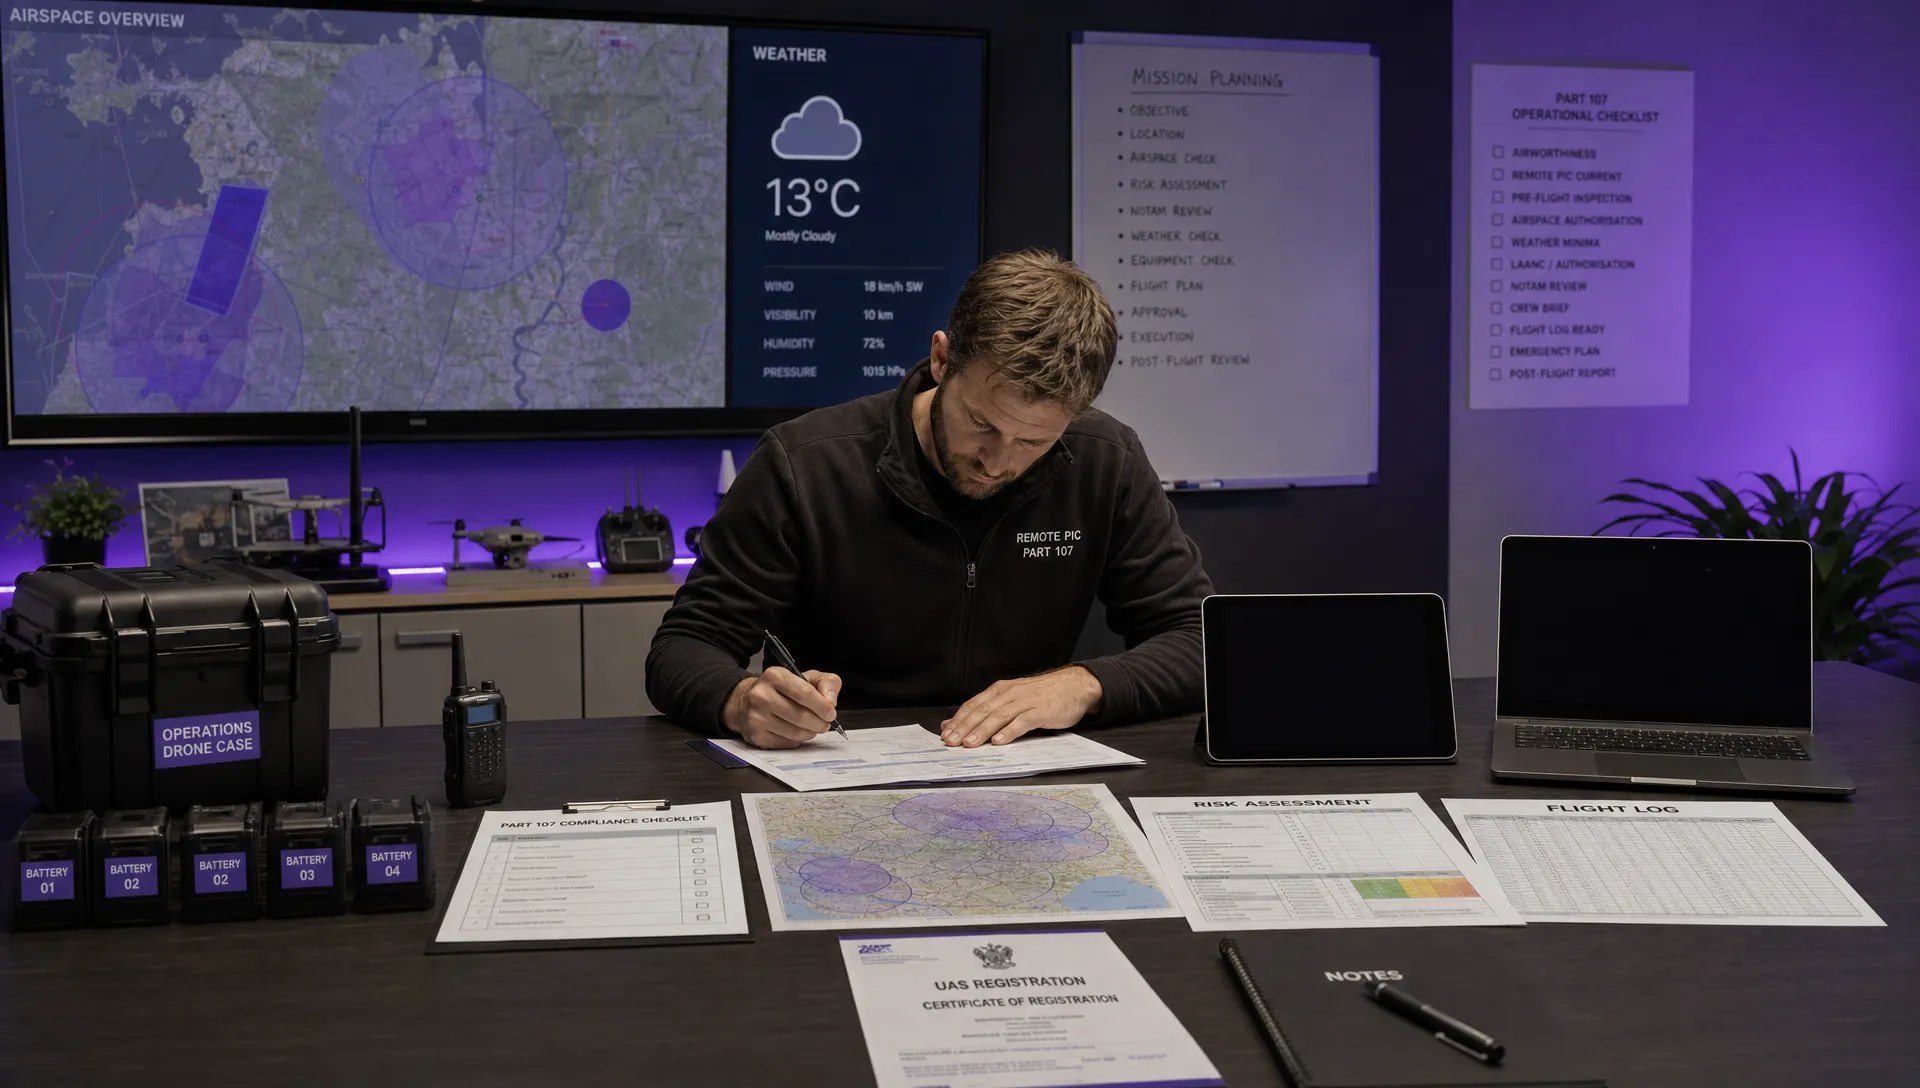 FAA 107 Explained for Commercial Drone Operators →
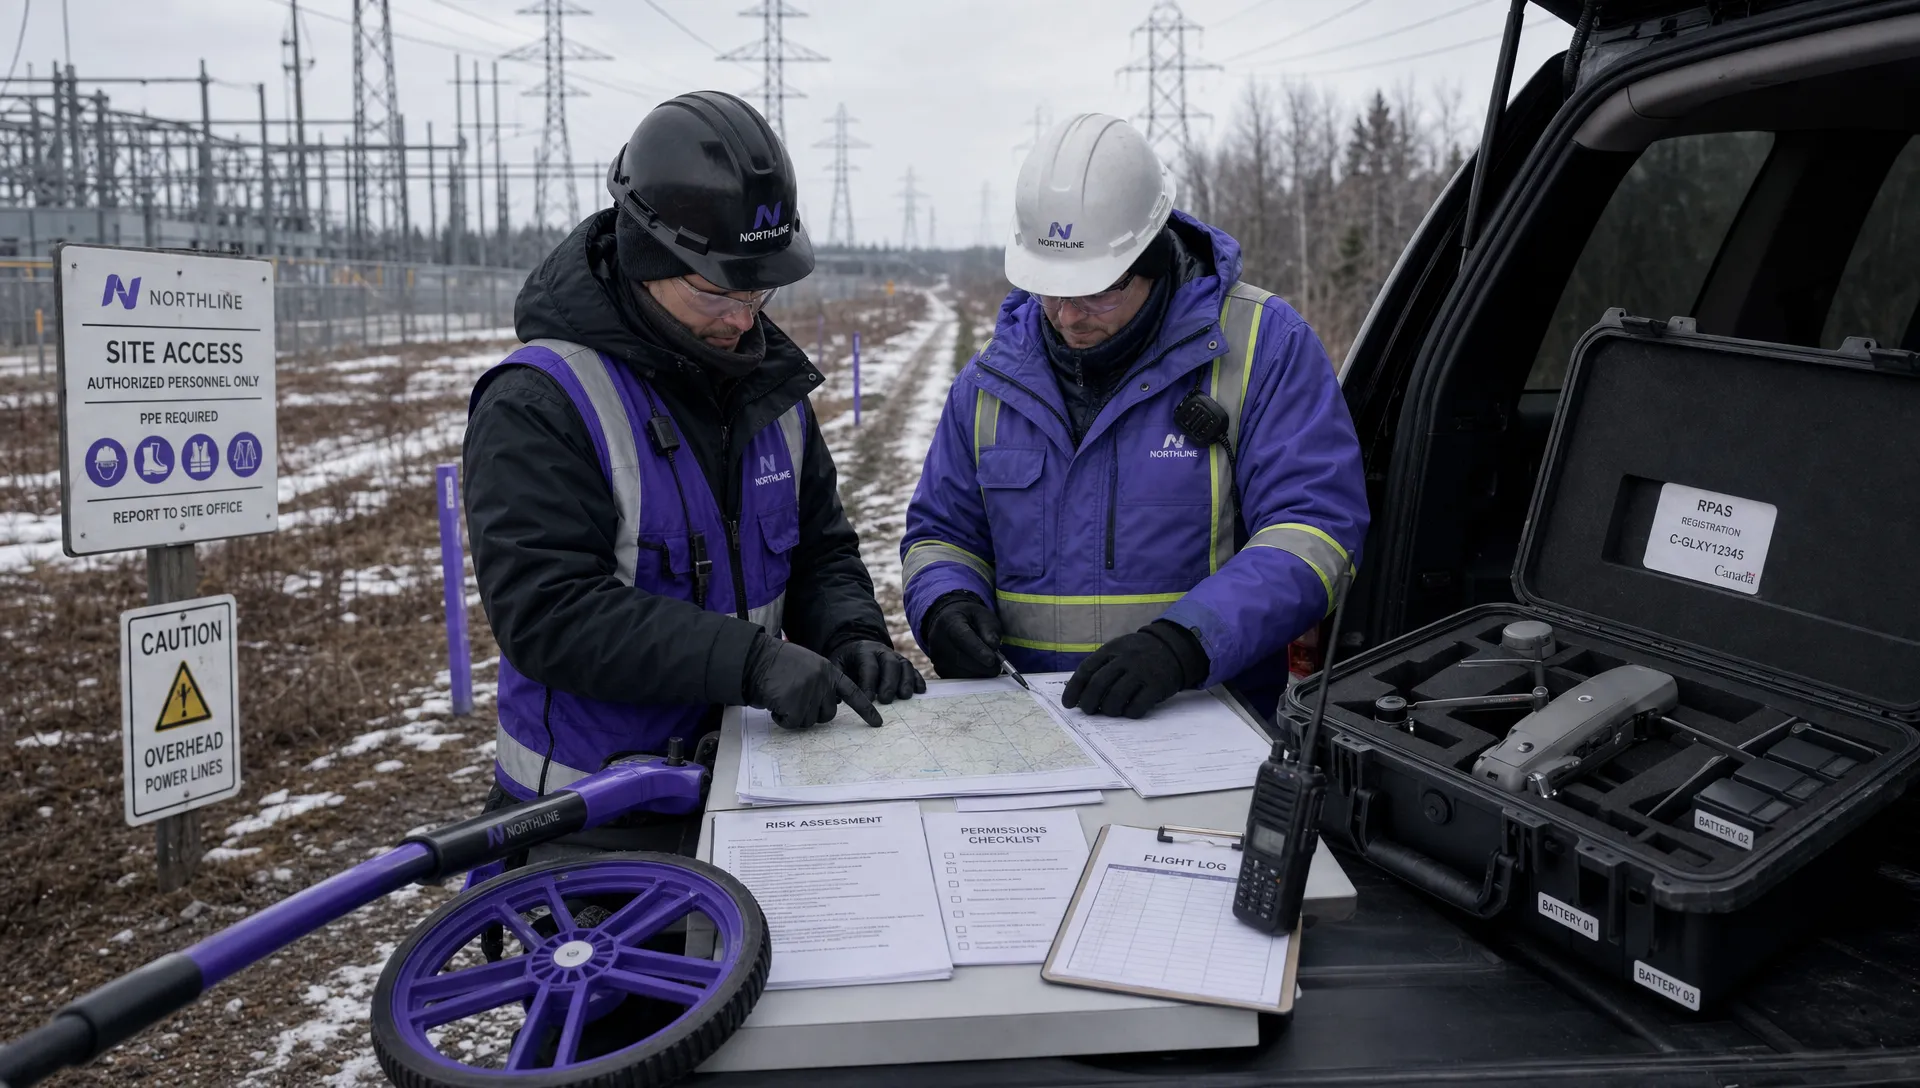 Canadian Drone Regulations Explained for Business Use →