Mastering DJI Drone Mapping with Dronedesk
The best drone maps are made long before you even get to the field. Real success comes from meticulous preparation that goes way beyond a basic pre-flight check, making sure every single flight is safe, efficient, and gathers the exact data your dji drone mapping project needs.
Setting Up Your Mission for Success

Before you can even think about spinning up the props, you need a solid plan. A successful drone mapping mission is all about foresight and includes mastering risk management to head off problems before they start.
The very first thing you need to do is define what success actually looks like. What are you trying to achieve? Are you monitoring stockpile volumes at a quarry? Maybe you're assessing crop health across a 500-acre farm, or creating a detailed 3D model of a building for an inspection.
Each of those goals completely changes how you'll fly. For instance, that stockpile measurement job demands high accuracy and will almost certainly need Ground Control Points (GCPs). On the other hand, a quick crop health overview is more about getting consistent imagery than pinpoint positional accuracy. Nailing this down from the start is absolutely essential.
Performing a Thorough Site Assessment
Let's be clear: a comprehensive site assessment isn't optional. It's the bedrock of a professional operation. Before you fly, you need to do a deep dive into the environment using a tool like Dronedesk. This is way more than just checking the weather forecast; it's about identifying and documenting every single potential hazard.
Here's what I always look for:
- Airspace Analysis: First things first, check for controlled airspace (like near airports), any Temporary Flight Restrictions (TFRs), and other local advisories. Dronedesk is a huge help here because it automates a lot of this research.
- Ground Obstacles: Next, I'm scouring satellite views for power lines, trees, towers, and buildings that could get in the way of my planned flight path.
- Terrain Challenges: Always check for big changes in elevation. Flying over a steep hill requires a terrain-following flight plan if you want to maintain a consistent Ground Sample Distance (GSD), which is key for quality data.
This level of detailed planning is becoming the industry standard. The enterprise drone market, which includes mapping, is expected to explode from $2.09 billion in 2025 to a massive $10.70 billion by 2035. This growth is built on technology that requires professional-grade planning and execution.
Choosing the Right DJI Drone for Your Mapping Needs
Not all drones are created equal, especially when it comes to mapping. The aircraft you choose in Dronedesk has a huge impact on flight time, image quality, and the overall success of your mission. Selecting the right tool for the job is a critical part of the planning phase.
Here’s a quick look at some popular choices and where they shine:
| DJI Drone Model | Sensor and Resolution | Average Flight Time | Ideal Mapping Scenario |
|---|---|---|---|
| DJI Phantom 4 Pro V2.0 | 1-inch 20MP CMOS with Mechanical Shutter | ~25-30 minutes | The go-to workhorse for general site mapping and 2D orthomosaics. |
| DJI Mavic 3 Enterprise | 4/3 CMOS 20MP with Mechanical Shutter | ~40-45 minutes | Excellent for larger sites and detailed inspections. |
| DJI Matrice 300 RTK | Payloads like Zenmuse P1 (45MP) | ~45-55 minutes | The top choice for survey-grade accuracy and large-scale projects. |
| DJI Mini 4 Pro | 1/1.3-inch 48MP CMOS | ~30 minutes | Best for small, quick mapping jobs where portability is key. |
Ultimately, the best drone depends on your specific project needs—balancing budget, required accuracy, and the size of the area you need to cover. The Matrice 300 RTK is a beast for high-precision work, but a Phantom 4 Pro still delivers fantastic results for many standard mapping jobs.
The Importance of Ground Control Points
If you’re delivering professional, survey-grade results, using Ground Control Points is non-negotiable. Seriously, it's probably the most critical step you can take for accuracy. GCPs are just marked points on the ground with very precise, known geographic coordinates.
By tying your drone imagery to these fixed, real-world locations, you transform a visually appealing map into a highly accurate, measurable dataset. Without them, your map's absolute accuracy could be off by several meters.
This is the difference between a pretty picture and data that can be used for engineering, construction, or legal purposes. If you want to dive deeper, our detailed guide on https://blog.dronedesk.io/surveying-with-a-drone/ covers the nitty-gritty of placing and using GCPs to get that coveted centimeter-level accuracy. Think of properly used GCPs as the foundation of reliable DJI drone mapping.
Building Your Automated Flight Plan in Dronedesk
This is where the magic happens. Taking your plan from paper to an actual, automated flight path is the moment your DJI drone mapping mission really takes shape. Inside Dronedesk, what could be a complex mess of variables becomes a smooth, repeatable process. The goal is to capture perfect data every single time you fly, and it all begins by drawing out your mapping area on the map.
Once you’ve defined your area, the two most important dials you need to turn are flight altitude and image overlap. These settings are a team; they work together to dictate the quality and accuracy of your final map. Fly higher, and you'll cover more ground faster, but your resolution will be lower (a higher Ground Sample Distance, or GSD). Fly lower, and you'll get stunning detail, but it's going to cost you time and batteries.
For a lot of general site survey work, I find a sweet spot between 80-120 meters altitude with 70-80% front and side overlap. This usually gives a GSD that’s more than good enough for things like construction progress tracking or building detailed orthomosaics.
Fine-Tuning Your Flight Parameters
Don't think of your flight plan as being set in stone. It's more of a starting template that you'll tweak depending on what the job demands. For instance, mapping a flat farm field for a 2D orthomosaic is a completely different ballgame than creating a 3D model of a complex industrial site with lots of vertical structures.
For the simple 2D map, a standard grid flight with the camera pointing straight down (a 90-degree nadir angle) is all you need. But for that 3D model? You’ll need to capture the sides of the buildings. To do that, I’ll add oblique images by tilting the camera gimbal to a 60-75 degree angle and running a crosshatch pattern or even an orbital flight around the main structures.
This is where a solid platform like Dronedesk really shows its worth. It lets you make these kinds of adjustments easily while keeping an eye on safety and data quality. It pulls in all the airspace intelligence you need, so you can spot potential hazards long before you start worrying about gimbal angles. You can read more about how Dronedesk folds crucial airspace intelligence into your planning to keep every flight compliant.
The infographic here gives you a great visual breakdown of this whole process, from setting your parameters to seeing the final product.

It really shows the direct link between the altitude and overlap you choose, the GSD you end up with, and how long it's going to take to process all that data into a map.
Balancing Speed and Image Quality
One last thing to consider is your flight speed. It's tempting to crank it up to get the job done faster, but going too fast can introduce motion blur, especially if the light isn't perfect. Slowing down a bit ensures the camera has plenty of time to snap a sharp, clear photo every time. Personally, I keep my flight speed between 5-10 m/s for the majority of my mapping jobs.
This obsession with capturing high-quality data is what's pushing the whole commercial drone industry forward. The numbers are staggering—the global drone market is valued at $73.06 billion in 2024 and is expected to hit $163.60 billion by 2030. Hardware sales, including the multi-rotor drones perfect for this kind of work, make up over 58% of that market. It’s a clear sign that getting the right gear and using it properly is big business.
Executing a Smooth and Confident Mapping Flight

With your automated plan from Dronedesk locked and loaded, it's go time. But true confidence in the field isn't about luck; it's about having a solid, repeatable process you stick to every single time. It’s how you turn a potentially complex operation into a controlled, professional routine.
Before I even think about powering up the drone, I run through a final set of on-site checks. This isn't just a quick glance around. It's a deliberate, final verification of the conditions as they are right now.
I'll check the local weather one last time for any changes in wind speed or gusts, physically walk my pre-planned takeoff and landing zones to make sure they're clear, and only then power everything on to confirm I have a rock-solid link between the drone and controller.
Monitoring Your Automated Mission
Once you hit 'start' and the drone takes off, your role shifts from hands-on pilot to mission supervisor. The drone is handling the flying, but you are still the pilot-in-command. That means your eyes need to be glued to the screen, watching the key telemetry.
Here are the critical data points I’m constantly keeping tabs on:
- Satellite Lock: A strong GPS signal is completely non-negotiable. I won't even consider launching until the drone has locked onto at least 15-20 satellites. This ensures stable positioning and a reliable flight path.
- Battery Life: Keep a sharp eye on the voltage and remaining percentage. Dronedesk gives you a solid flight time estimate, but real-world factors like a stiff headwind can drain a battery faster than anticipated.
- Image Capture Confirmation: Most flight apps will give you a little visual cue or an audible click to let you know a photo has been taken. This is your proof that the camera is firing and you aren't flying a whole mission for nothing.
This kind of vigilant monitoring is what really separates a casual flight from a professional DJI drone mapping operation. You’re not just passively watching it fly; you're actively ensuring data quality and operational safety from start to finish.
Handling the Unexpected
No matter how meticulous your planning is, things can happen mid-flight. The key is not to panic, but to have a protocol ready to go. What’s the plan if a sudden, strong gust of wind kicks up? What if you get a low battery warning way sooner than you expected?
The answer is to always, always prioritize safety. If conditions turn sketchy or the drone's status is in doubt, calmly interrupt the mission. Use the return-to-home function to bring it back safely, and then assess the situation on the ground. You can almost always resume a mission, but you can't undo an accident.
For instance, if a surprise rain shower pops up, I’m hitting pause and landing immediately. Water and expensive electronics are not friends. Similarly, if I notice the controller link is weakening for some reason, I'll pause the flight and physically move to a spot with a better line of sight.
Having these simple, pre-decided actions in your back pocket turns a potentially stressful moment into just another step in your process. It empowers you to manage any scenario calmly, ensuring every flight is a controlled and successful data capture mission. This approach keeps you, your expensive gear, and the public safe, all while delivering the reliable results your clients are paying for.
Turning Your Raw Drone Images into Actionable Data
So, your drone has landed and the batteries are cooling down. You might think the job is done, but really, the most important part of your DJI drone mapping project is just getting started. Those hundreds—or maybe thousands—of individual photos sitting on your SD card are just the raw ingredients. The real magic happens when you process this data using photogrammetry, which stitches all those images together into one cohesive, incredibly detailed map or model.
Your post-flight workflow kicks off with a simple data transfer. Get all those image files off the drone's SD card and into a dedicated folder on your computer. Trust me, keeping your project data organized from the very beginning is a habit that will save you massive headaches later on, especially when you're juggling multiple flights or massive sites.
With everything organized, it's time to import the entire image set into your photogrammetry software of choice. There are a lot of great options out there, each with its own quirks and strengths. It's a good idea to learn which software plays nicely with different drones; you can check out a list of drones officially supported by Pix4D to get a sense of what the pros are using.
The Key Processing Stages
Once you've imported your images, the software begins its heavy lifting. It starts by analyzing every single photo, identifying thousands of common points between overlapping images. This initial alignment process creates what’s called a sparse point cloud—think of it as a rough 3D skeleton of your site. This is your first real confirmation that the data you collected is solid.
From there, the software builds on this skeleton to create a dense point cloud. This part of the process can really tax your computer, but it's worth it. The result is a highly detailed model made up of millions of points, each with precise color and location data. This dense cloud is the foundation for every final deliverable you'll create.
From that dense point cloud, the software can generate a few different key outputs:
- Orthomosaic Map: A super high-resolution, geographically accurate 2D map without any of the usual lens distortion. It's like having your own private, incredibly detailed Google Earth view.
- Digital Surface Model (DSM): This is a map that shows the elevation of everything on the site—not just the ground, but also buildings, trees, and any other objects.
- 3D Model: A fully interactive, textured model of the site. It’s perfect for visual inspections, client presentations, and getting a true feel for the terrain.
Optimizing Your Settings and Troubleshooting
Getting the best results isn't as simple as just clicking "start." You'll need to get comfortable with tweaking the processing settings. For instance, running a job on "high" quality will give you stunning detail, but it could take many hours, or even days, to complete. Processing on "medium," on the other hand, might deliver 80% of the quality in just 20% of the time, making it a far smarter choice for initial drafts or less critical projects.
My personal tip is to always run a quick, low-quality processing job first. This lets you spot any major problems—like gaps in your data or weird distortions—without wasting hours on a dataset that was flawed from the start.
Most common errors come down to two things: not enough image overlap or poor lighting conditions during the flight. If you see blurry patches or "holes" in your final map, that's a classic sign the software couldn't find enough common points to stitch those areas together properly. The data you get from your drone maps can be powerful, feeding into broader industrial strategies. For example, it's fascinating to see how these insights contribute to the adoption of new technologies in manufacturing, helping create smarter and more efficient operations.
Refining Your Workflow for Professional Results
 Moving from good to great in DJI drone mapping isn't about one giant leap. It’s about the small, deliberate refinements that turn your raw data into a polished, professional solution that clients are happy to pay for. This is where you graduate from simply providing images to delivering real, tangible business value.
One of the first hurdles you’ll hit is just wrangling the sheer volume of data. It's not uncommon for a single mapping mission to spit out thousands of high-resolution images, creating datasets that are dozens of gigabytes in size. This is why a clear, logical folder structure for each project isn't just nice to have—it's non-negotiable. I personally stick to a system like ClientName > ProjectName > YYYY-MM-DD_FlightData to keep everything organised and easy to find later.
Enhancing Your Deliverables for Clients
The default output from your processing software is a solid starting point, but let's be honest, it often lacks the visual punch needed for a client presentation. A little bit of post-processing can make all the difference.
- Color Correction: Simple tweaks to brightness, contrast, and saturation can make your orthomosaic map pop. It becomes far more vibrant and easier for your client to interpret, which is especially important for projects that might end up in marketing materials.
- Data Integration: The true power of your map is unleashed when it's integrated into your client's own software. Getting comfortable exporting your data into GIS-compatible formats (like GeoTIFF) or CAD-friendly files (like .dxf or .dwg) is a critical skill.
- Detailed Logging: Always, always maintain meticulous mission records in a platform like Dronedesk. This log should include flight parameters, weather conditions, and GSD. When a client questions the data, this log is your proof of consistency and professionalism.
Presenting Your Data with Impact
How you present your findings is every bit as important as the data itself. Remember, you’re not just handing over a file; you’re providing a solution to a problem they have.
Your goal is to clearly demonstrate the value your map provides. Instead of just showing a picture of a construction site, create a side-by-side comparison with the previous week's map to visually prove project progress. For a quarry, use the software's volumetric tools to show the exact cubic meters of a stockpile. This is how you deliver a solution, not just a picture.
This relentless focus on delivering high-value, actionable solutions is a big reason why DJI is a leader in this space. By 2025, DJI is expected to hold 20-25% of the global drone mapping market, a position built on its advanced tech and strong foothold in key industrial sectors. This market share reflects the real-world demand for the kind of precise data that professionals rely on. If you're interested in the market dynamics, you can find more drone mapping industry insights on factmr.com.
Ultimately, refining your workflow boils down to consistency, professionalism, and clearly communicating the powerful insights your drone data can unlock for a client's business.
Diving Into DJI Drone Mapping: Your Questions Answered
When you're getting your feet wet with drone mapping, a flood of questions is totally normal. Trust me, getting good answers upfront is the fastest way to dial in your technique and head off problems before you're even on site. Let's tackle some of the most common things pilots ask about DJI drone mapping.
Which DJI Drone Should I Get for Mapping?
Ah, the million-dollar question. The "best" drone really boils down to your budget and just how precise the final maps need to be. There isn't a single magic bullet, but the options fall into pretty clear categories.
For serious, survey-grade work, you'll want to look at something like the Mavic 3 Enterprise or the legendary Phantom 4 RTK. The big deal with these models is their mechanical shutter. This is a huge advantage, as it completely eliminates the image warping and distortion that can creep in with rolling shutters when the drone is moving. Pair that with their built-in RTK (Real-Time Kinematic) gear, and you're pulling down centimeter-level accuracy straight out of the box.
Now, if you're just starting out or your projects are more for visual progress than millimeter-perfect surveys, drones like the Mavic 3 Pro or even the newer Air 3 can deliver surprisingly good results. The trick with these is solid technique. Flying a bit slower and using well-placed Ground Control Points (GCPs) will make a world of difference, anchoring your map firmly to its real-world location.
How Accurate Is DJI Drone Mapping, Really?
This is probably the question I hear most, and the honest answer is: it's all about your process. The final accuracy of your map is a direct reflection of the gear you fly and the methods you use on the ground.
Here’s how it usually breaks down in the real world:
- Flying with No GCPs: You can generally expect a relative accuracy of about 1 to 3 times your Ground Sample Distance (GSD). So, if your flight altitude gives you a GSD of 2.5 cm per pixel, features on your map will be accurate in relation to each other within a range of roughly 2.5 to 7.5 cm.
- Adding GCPs to the Mix: This is where things get serious. By adding ground control, you can lock in an absolute accuracy of 2-5 cm. This means your entire map is correctly positioned on the globe within that tolerance, which is solid enough for most survey-grade jobs.
- Using RTK/PPK Drones: An RTK-capable drone like the Phantom 4 RTK can consistently hit centimeter-level absolute accuracy without needing a ton of GCPs. This can be a massive time-saver in the field.
A quick note on Post-Processed Kinematic (PPK): this is another incredibly powerful technique. It often delivers even higher accuracy than RTK because it isn't vulnerable to losing the real-time correction signal during flight. DJI's Enterprise drones automatically log all the satellite data you need, so you can always use the PPK method as a fallback to get the absolute best results.
Can I Use My Own Processing Software with Dronedesk?
Absolutely, and this is a crucial part of the workflow to understand. Think of Dronedesk as your mission control—it's purpose-built for the planning, management, and logging of your flights, not for crunching the image data itself.
Once you’ve nailed the flight and have all those images safely on your SD card, you're in the driver's seat. You can take that dataset and import it into any major photogrammetry software out there. Popular choices include Pix4D, Agisoft Metashape, RealityCapture, or DJI Terra. The flight logs and project details from Dronedesk are perfect for supplementing the project files in whichever processing platform you prefer.
Ready to streamline your flight planning and ensure every mission is a success? Dronedesk gives you the tools to manage your clients, fleet, and team while handling all the critical airspace checks automatically. Start your free trial of Dronedesk today!
 FAA Remote ID Rule Explained for Commercial Pilots →
 Drone Legal Requirements for Commercial Operations →
 Drone Near Airport Rules Explained for Safer Planning →
 International Drone Regulations Every Global Team Should Know →
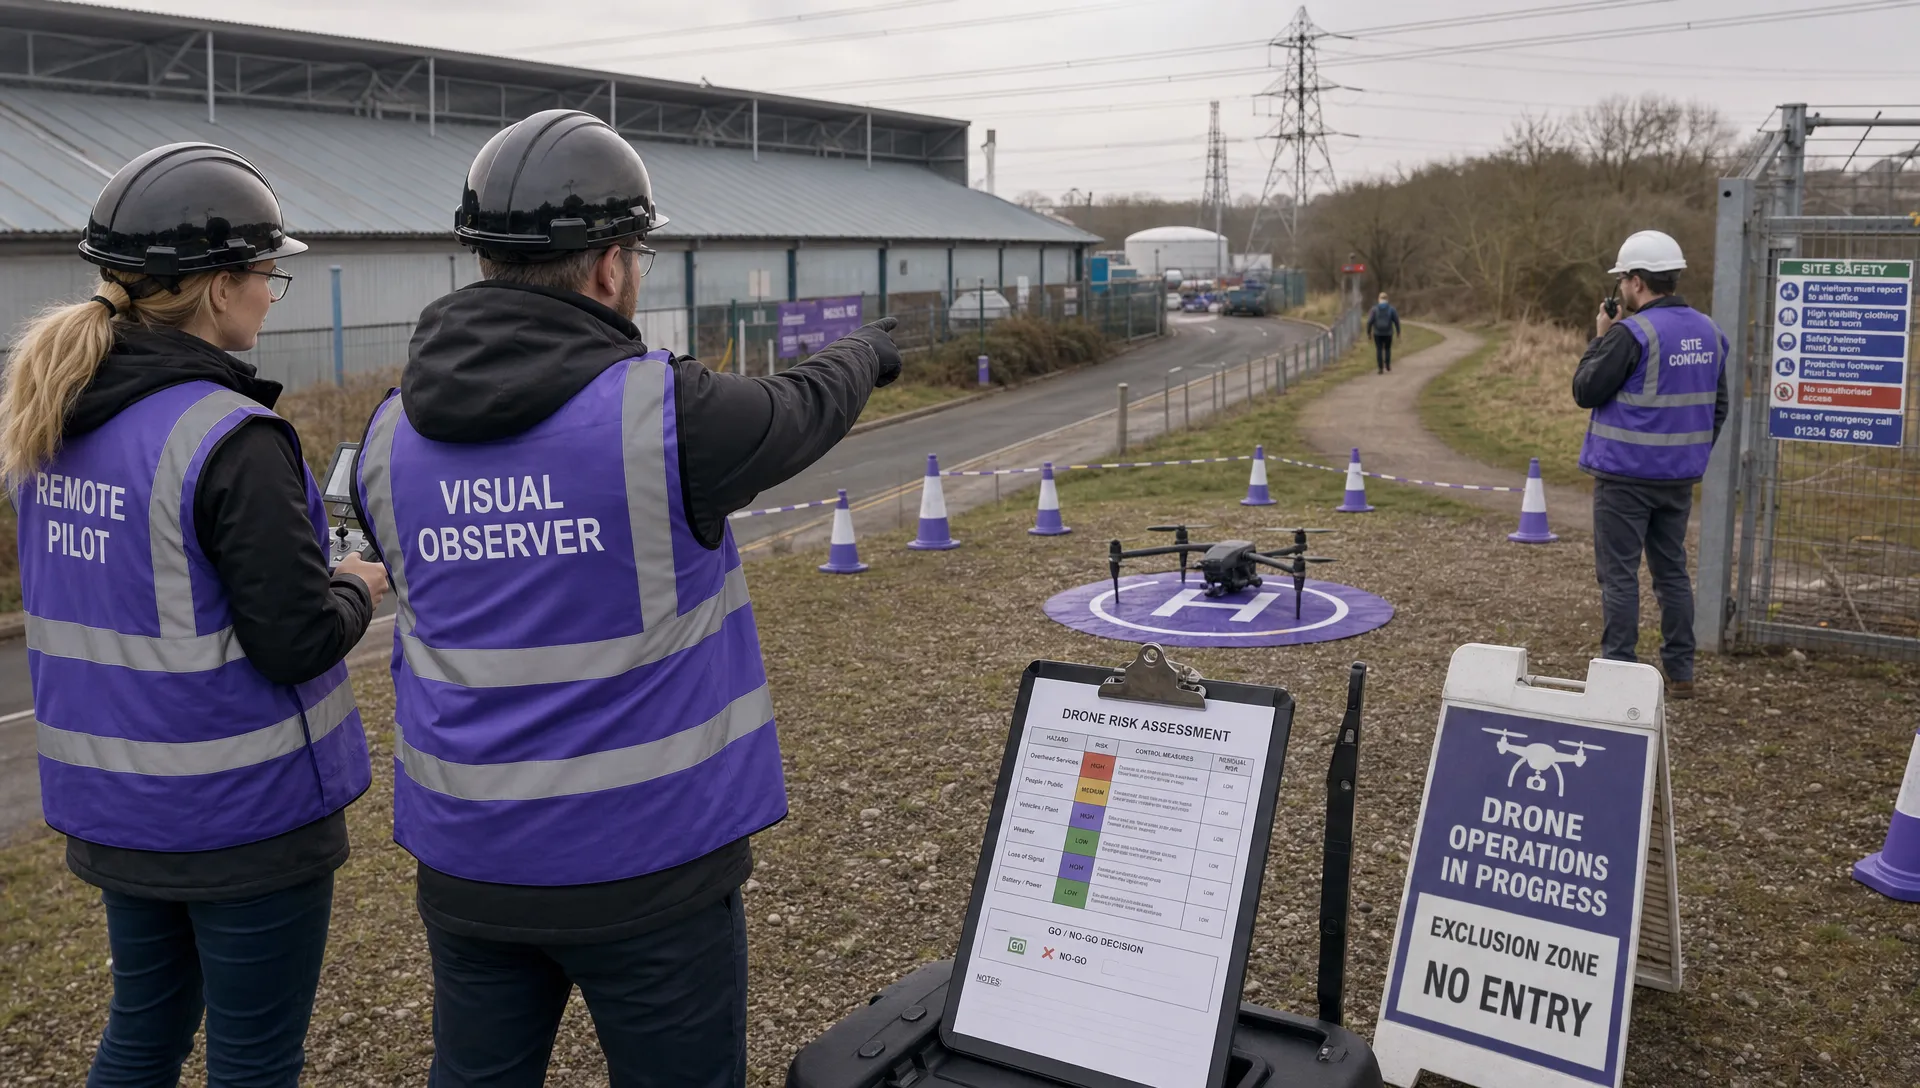 Drone Flight Risk Assessment Example for Safer Missions →
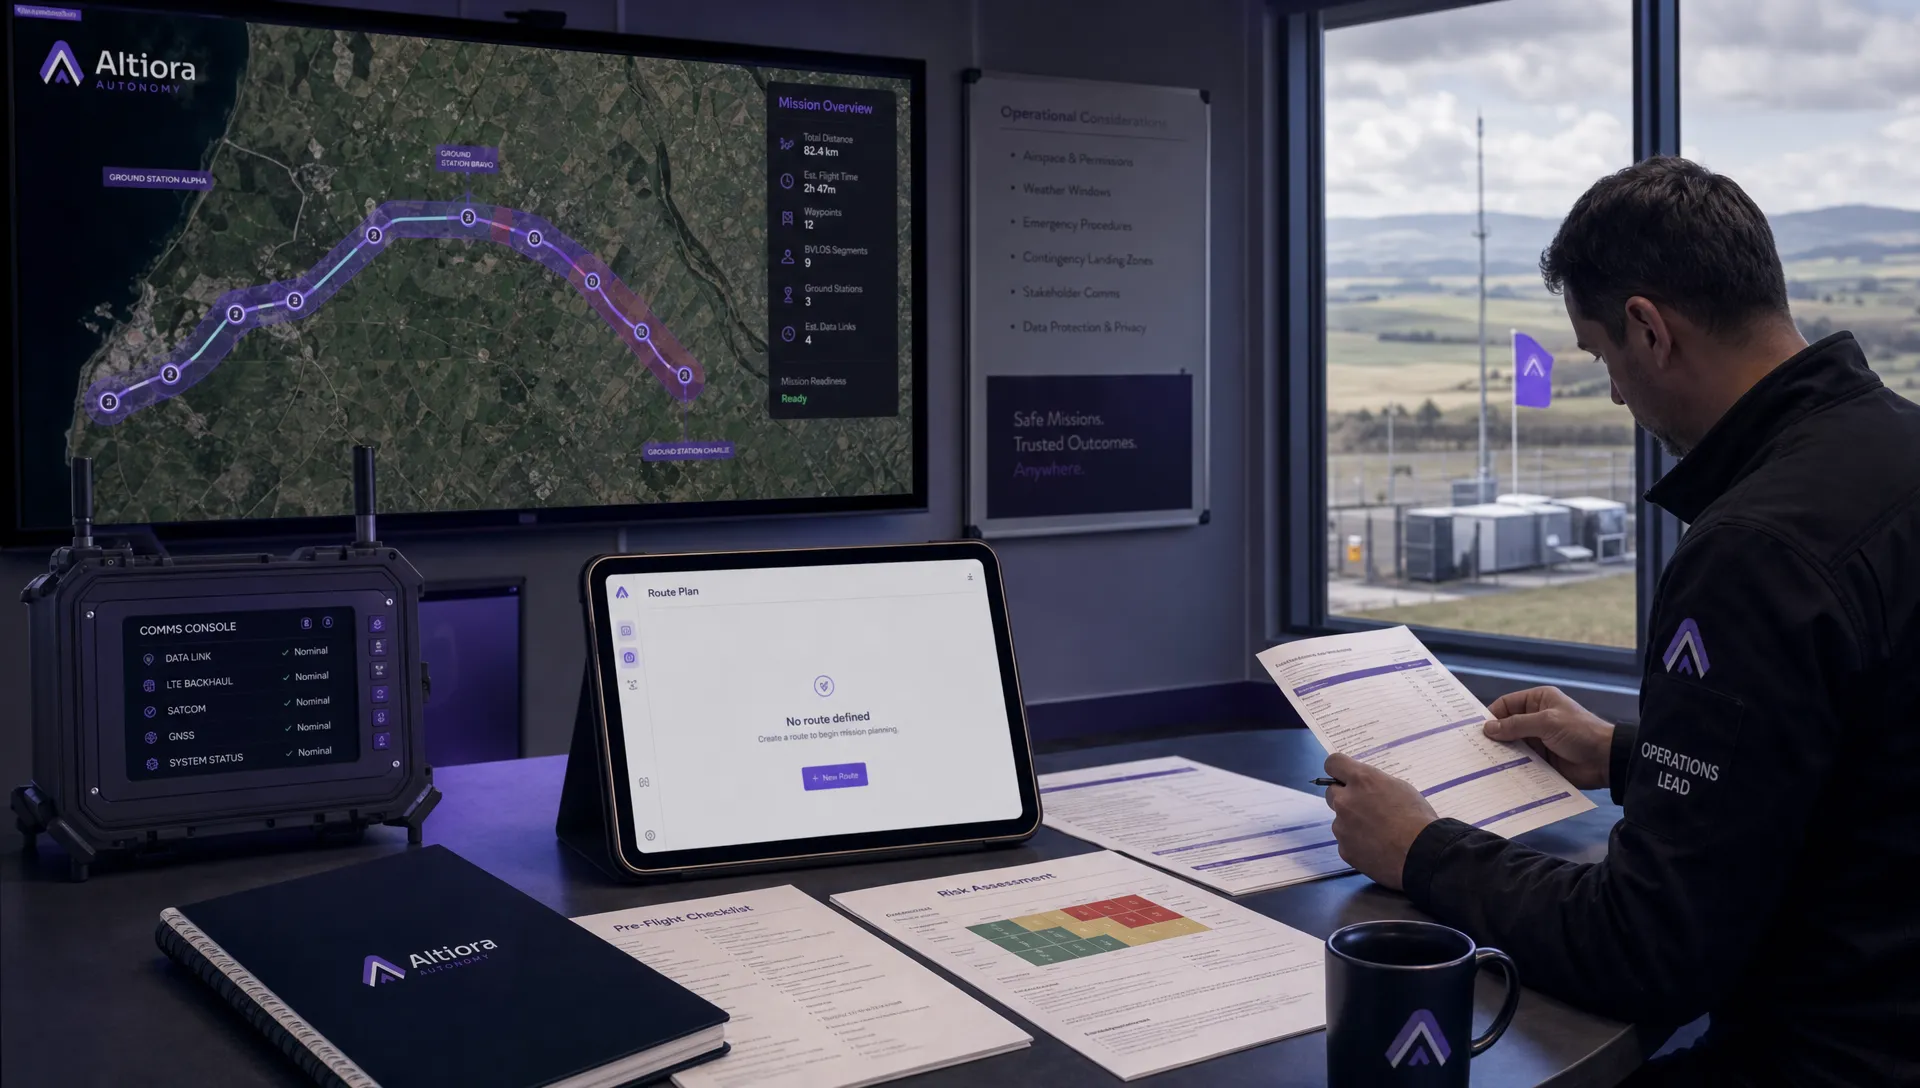 Beyond Visual Line of Sight Explained for Operators →
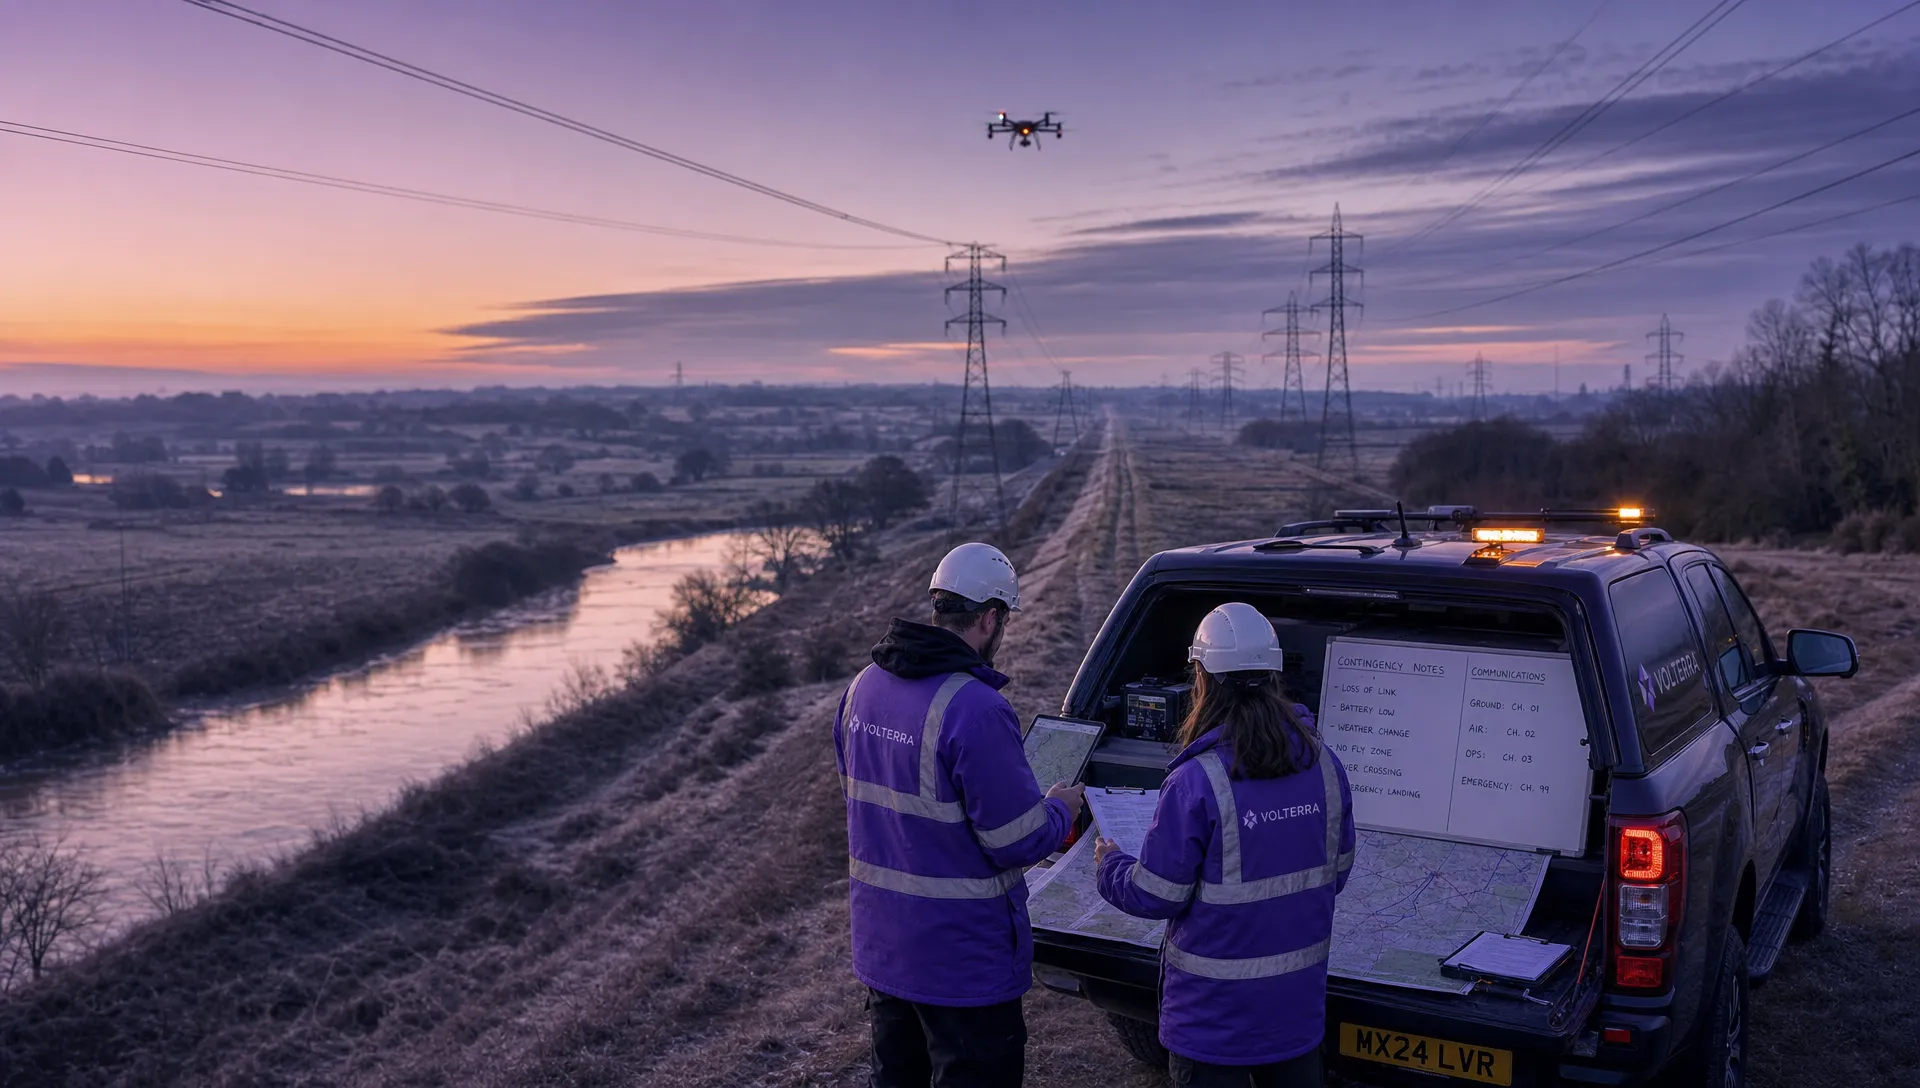 How BVLOS Drone Operations Change Commercial Workflows →
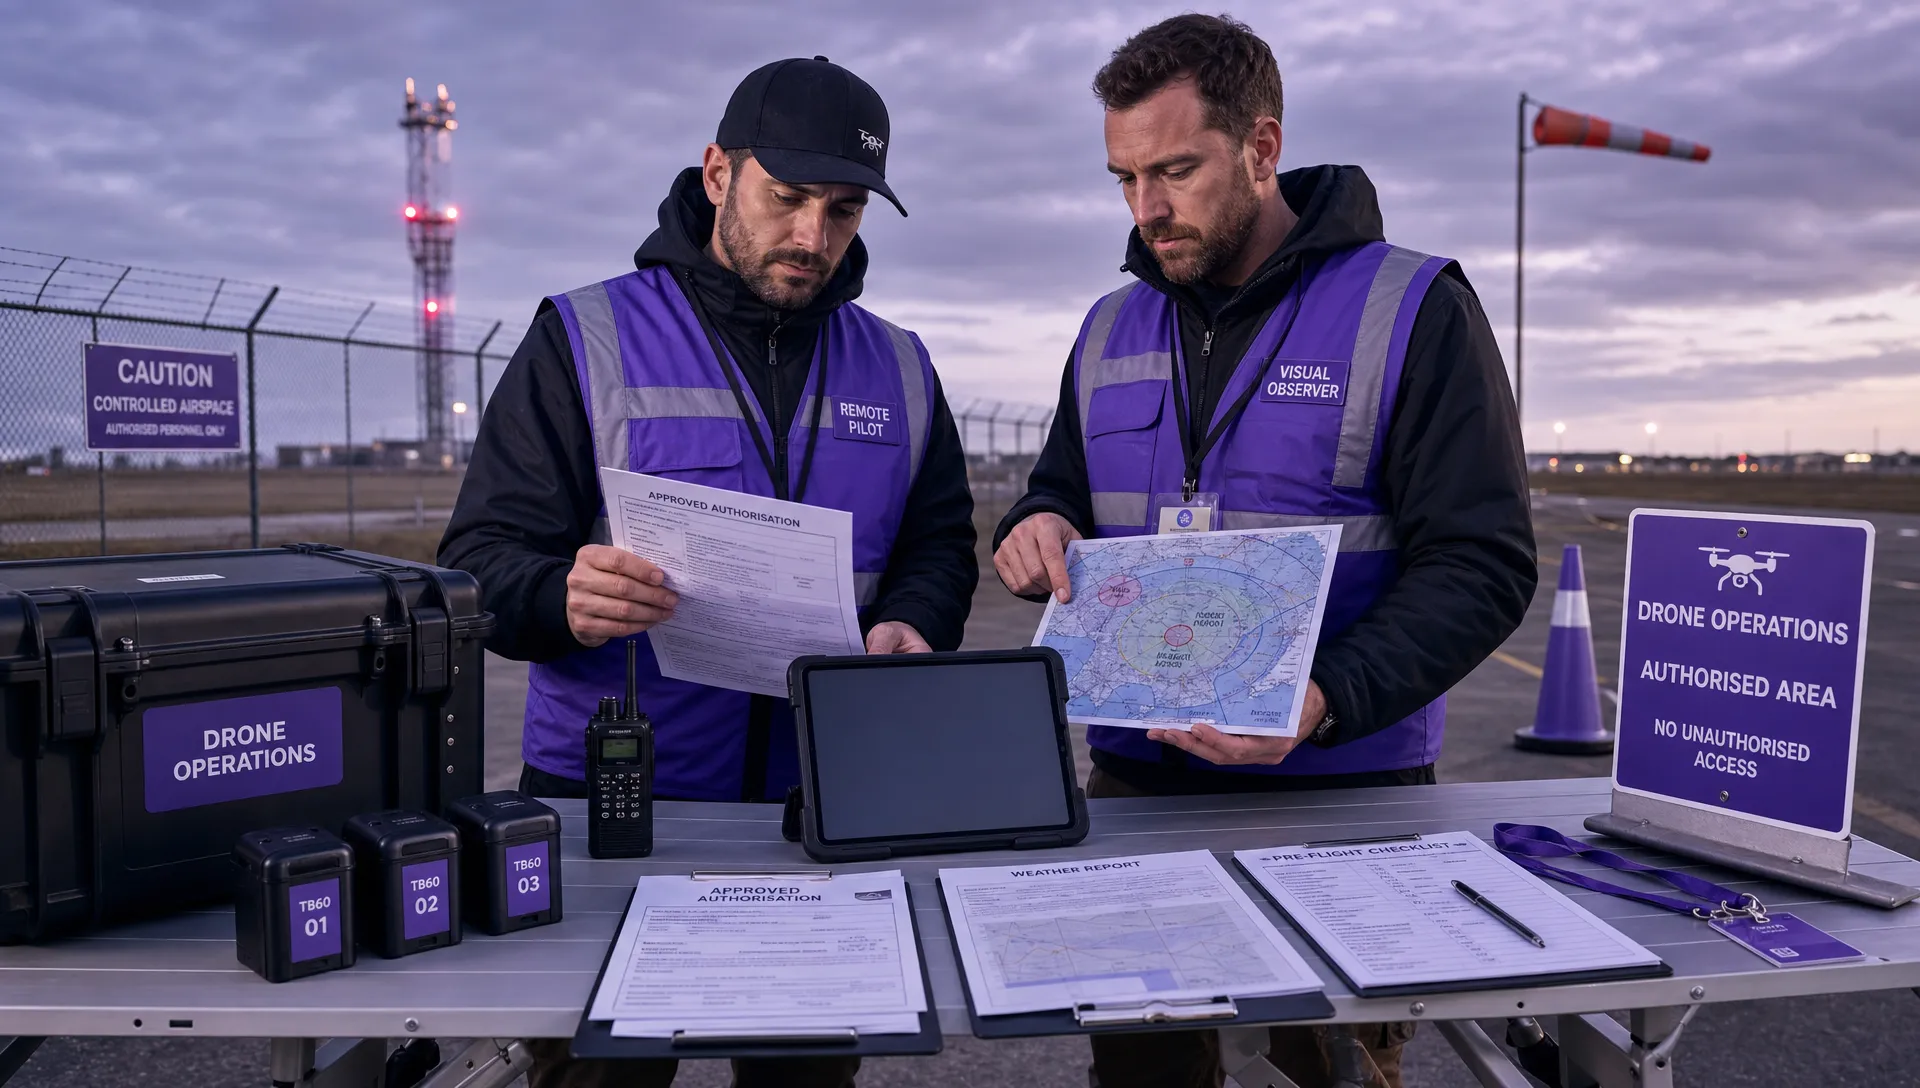 FAA Drone Rules Every Commercial Pilot Should Know →
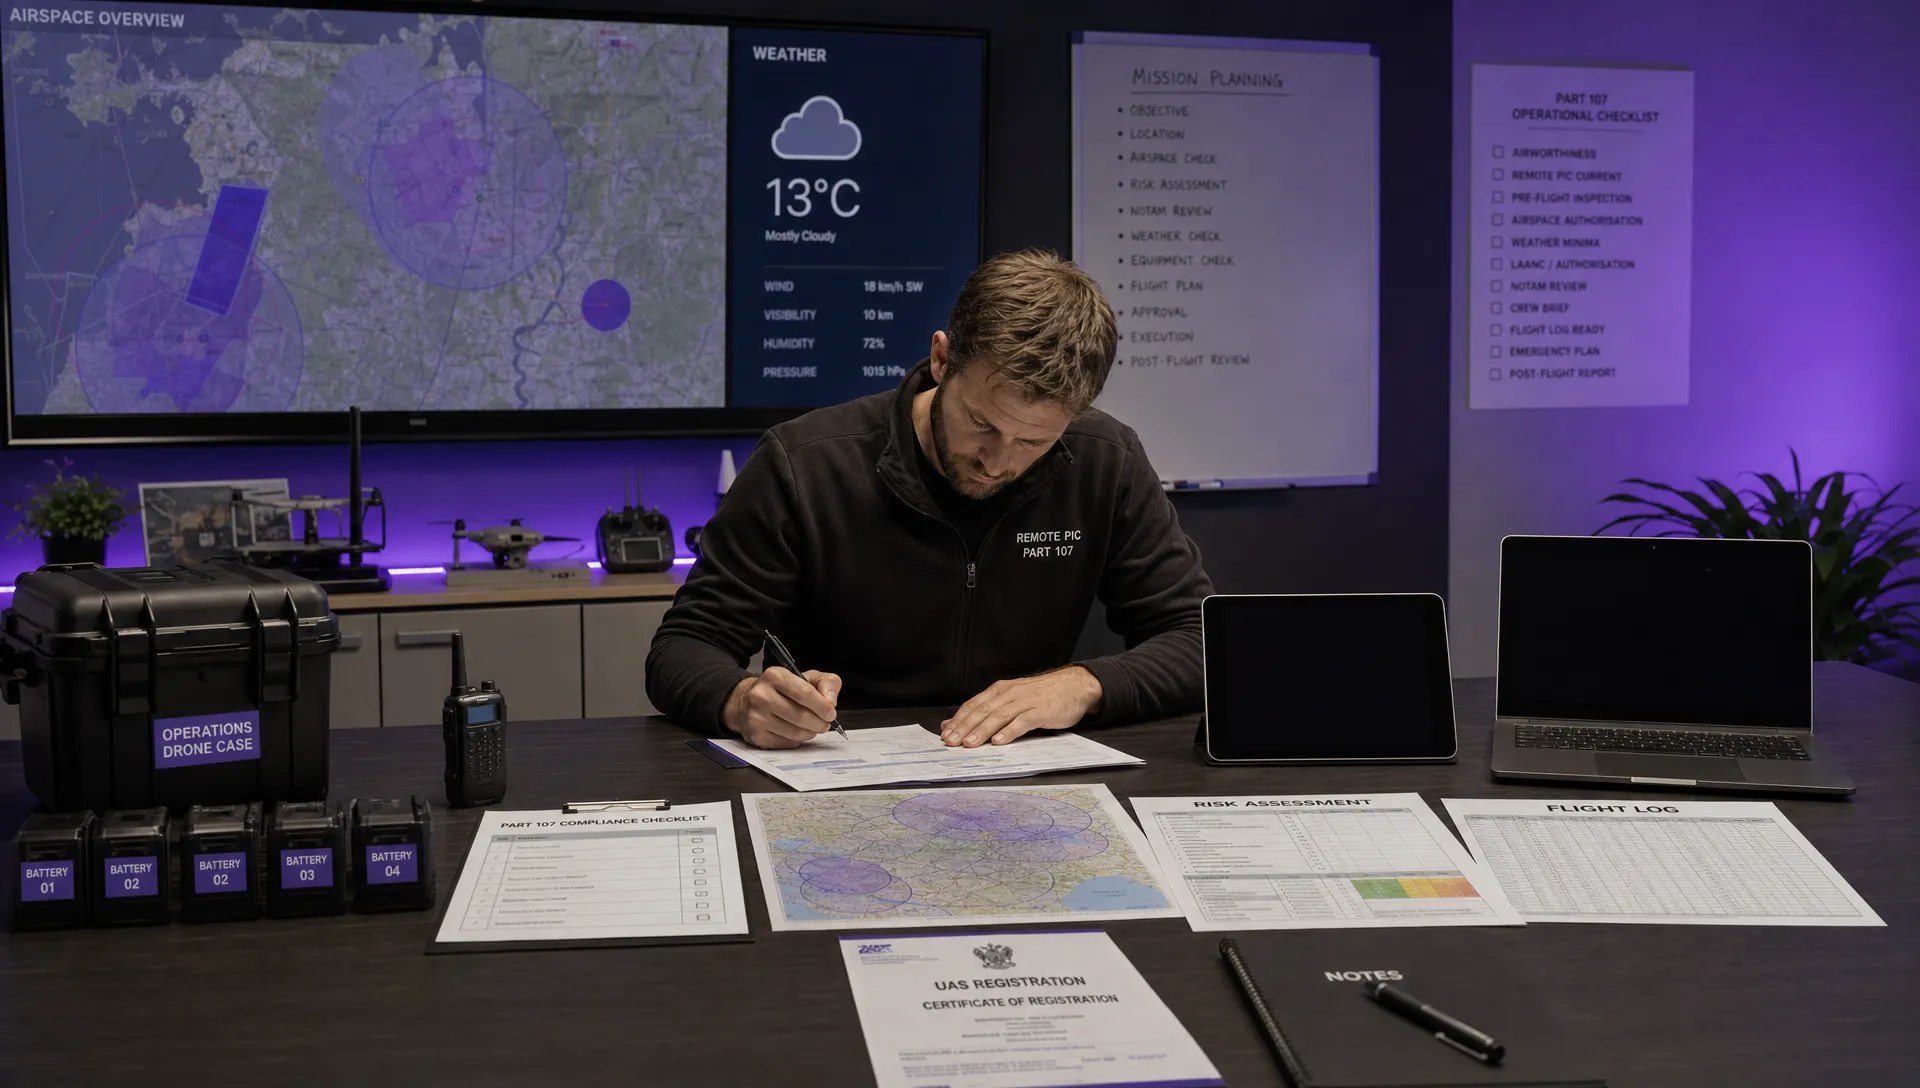 FAA 107 Explained for Commercial Drone Operators →
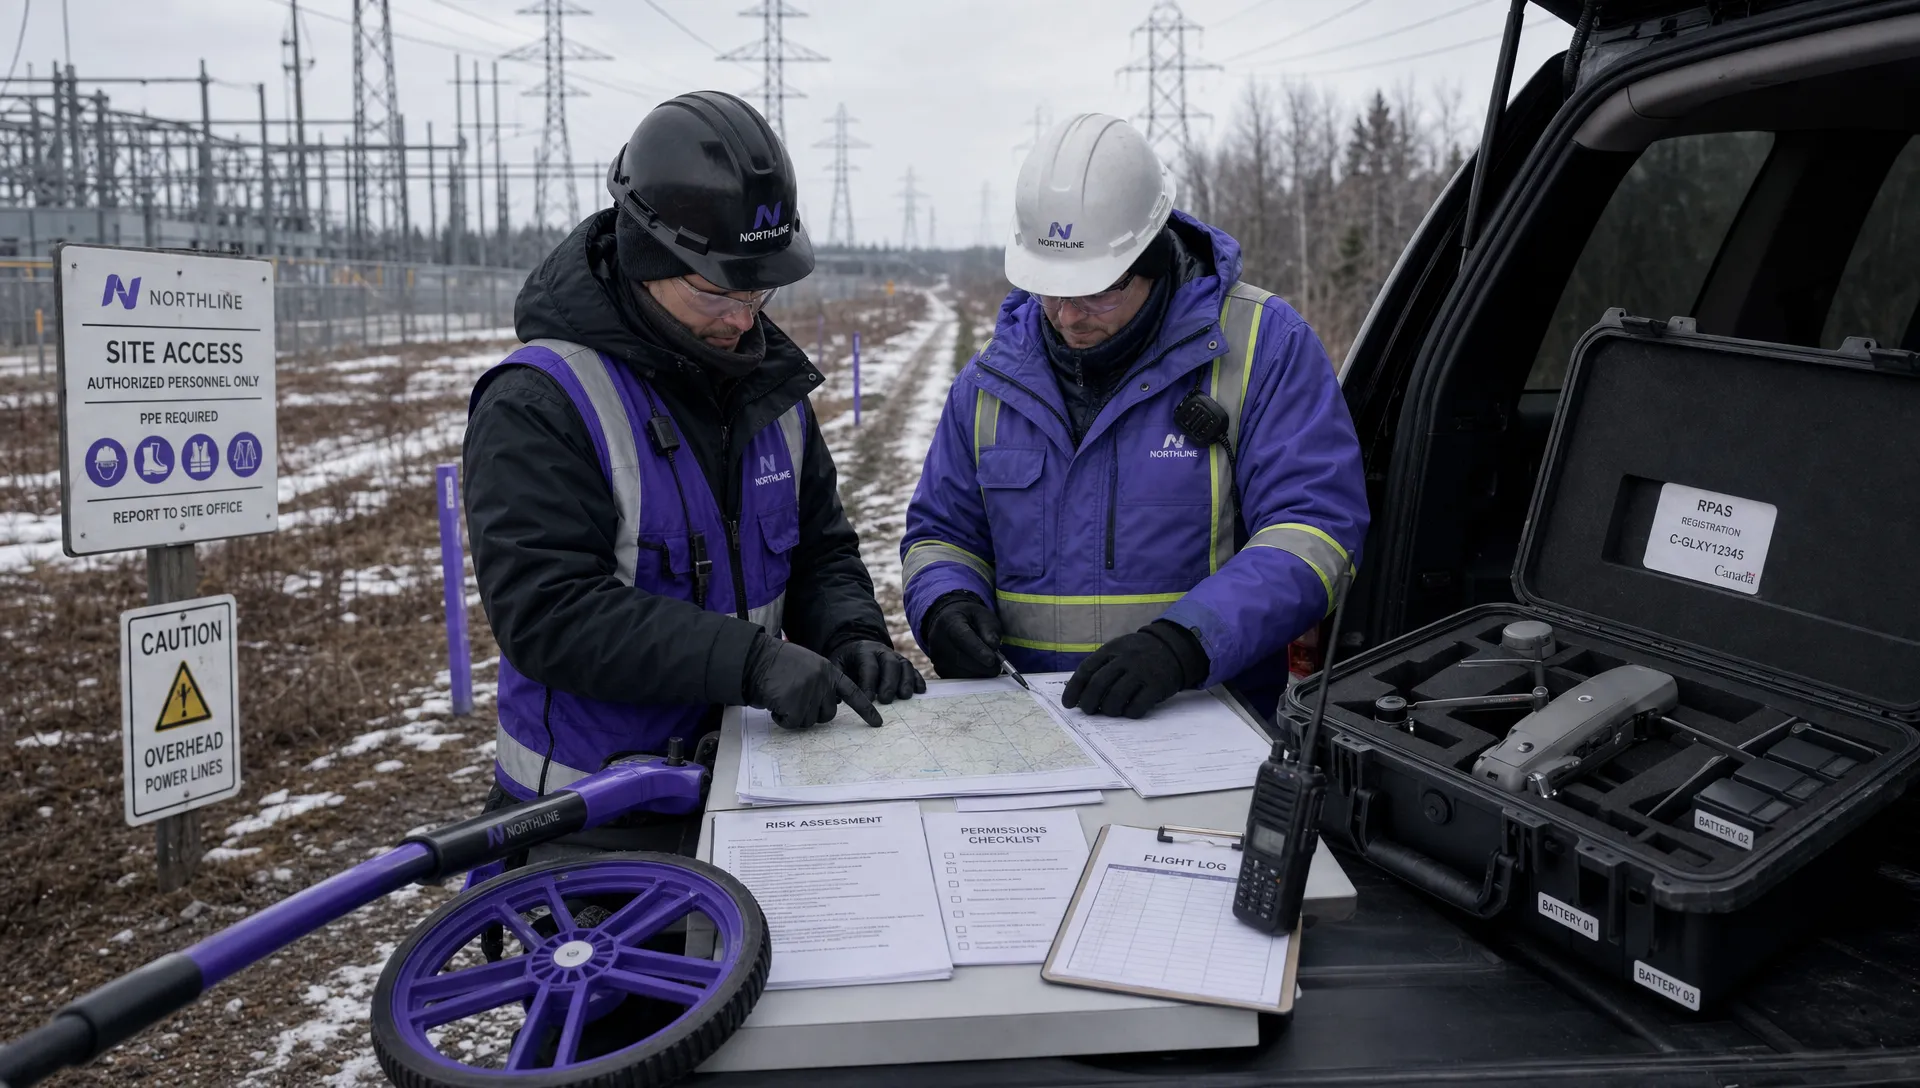 Canadian Drone Regulations Explained for Business Use →