Pilots Preflight Checklist: pilots preflight checklist for safe drones
A pilot's preflight checklist isn't just a list of items to glance over. It's a systematic, ironclad safety procedure that confirms your aircraft is airworthy and the entire operation is safe to launch. Think of it as the professional standard for catching human error, turning what could be a complex and overwhelming inspection into a simple, repeatable routine. It’s how you guarantee nothing gets missed before you spin up the props.
Why a Preflight Checklist Is Non-Negotiable
Forgetting a single, simple step can have catastrophic results. That’s not hyperbole; it’s a hard truth learned from over a century of aviation history. A systematic pilot's preflight checklist is the absolute backbone of any professional drone operation. It stands as your primary defense against the one factor responsible for the vast majority of incidents: human error.
Even the most seasoned pilots fall victim to cognitive overload, distractions, and—worst of all—complacency. A structured, repeatable process is your antidote to these risks. Instead of banking on a fallible memory, you follow a proven flow that builds muscle memory and professional discipline. This isn't just about ticking boxes. It’s about cultivating a professional mindset that separates a successful mission from a costly, potentially dangerous failure.
The Birth of the Modern Checklist
The modern checklist was born from tragedy, and it completely reshaped aviation safety forever. Back in 1935, a prototype Boeing Model 299 bomber crashed during a test flight. The cause wasn't a mechanical failure; the pilots simply forgot to release the gust locks—a single, crucial step.
In response, engineers developed the first standardized preflight checklist. The results were immediate and profound. The first 12 aircraft flown using this system logged an incredible 1.8 million miles without a single serious accident, proving the checklist's incredible power. You can read the full story behind this foundational safety tool and its impact on aviation.
This history lesson is vital for drone pilots. Our aircraft may be smaller, but the principles of airmanship are exactly the same. A consistent preflight routine is the foundation for:
- Enhanced Safety: Catching small issues on the ground before they become big problems in the air.
- Regulatory Compliance: Showing due diligence and adherence to the operational standards required by aviation authorities.
- Client Trust: Proving to clients and stakeholders that you operate with a professional, safety-first approach.
A checklist doesn't fly the aircraft, but it ensures the pilot can. It’s your single best tool for managing complexity and mitigating risk before the rotors ever start spinning.
Core Pillars of a Professional Drone Inspection
A truly effective preflight inspection goes way beyond just looking at the drone. It's a holistic assessment of the entire operational picture. To make sure nothing slips through the cracks, your checklist should be built around several core pillars, each one tackling a critical aspect of the mission. A disorganized check leaves gaps; a structured one ensures you’ve covered all your bases.
This table gives you a high-level overview of the essential categories that form a complete and professional drone preflight process.
| Check Category | Primary Focus | Key Objective |
|---|---|---|
| Site & Airspace | External environment, regulations, and potential ground hazards. | To confirm the operational area is legally clear and physically safe for flight. |
| Aircraft Systems | Physical condition of the drone, propellers, batteries, and payload. | To verify the aircraft's mechanical and structural integrity. |
| Digital Systems | Firmware, software settings, sensor calibration, and failsafe modes. | To ensure all digital components are functioning correctly and configured for the mission. |
| Crew & Operations | Team briefings, emergency procedures, and client communication. | To align the entire team on the mission plan and prepare for contingencies. |
Think of these pillars as the building blocks for a safe flight. Each one supports the others, creating a solid foundation for a successful operation.
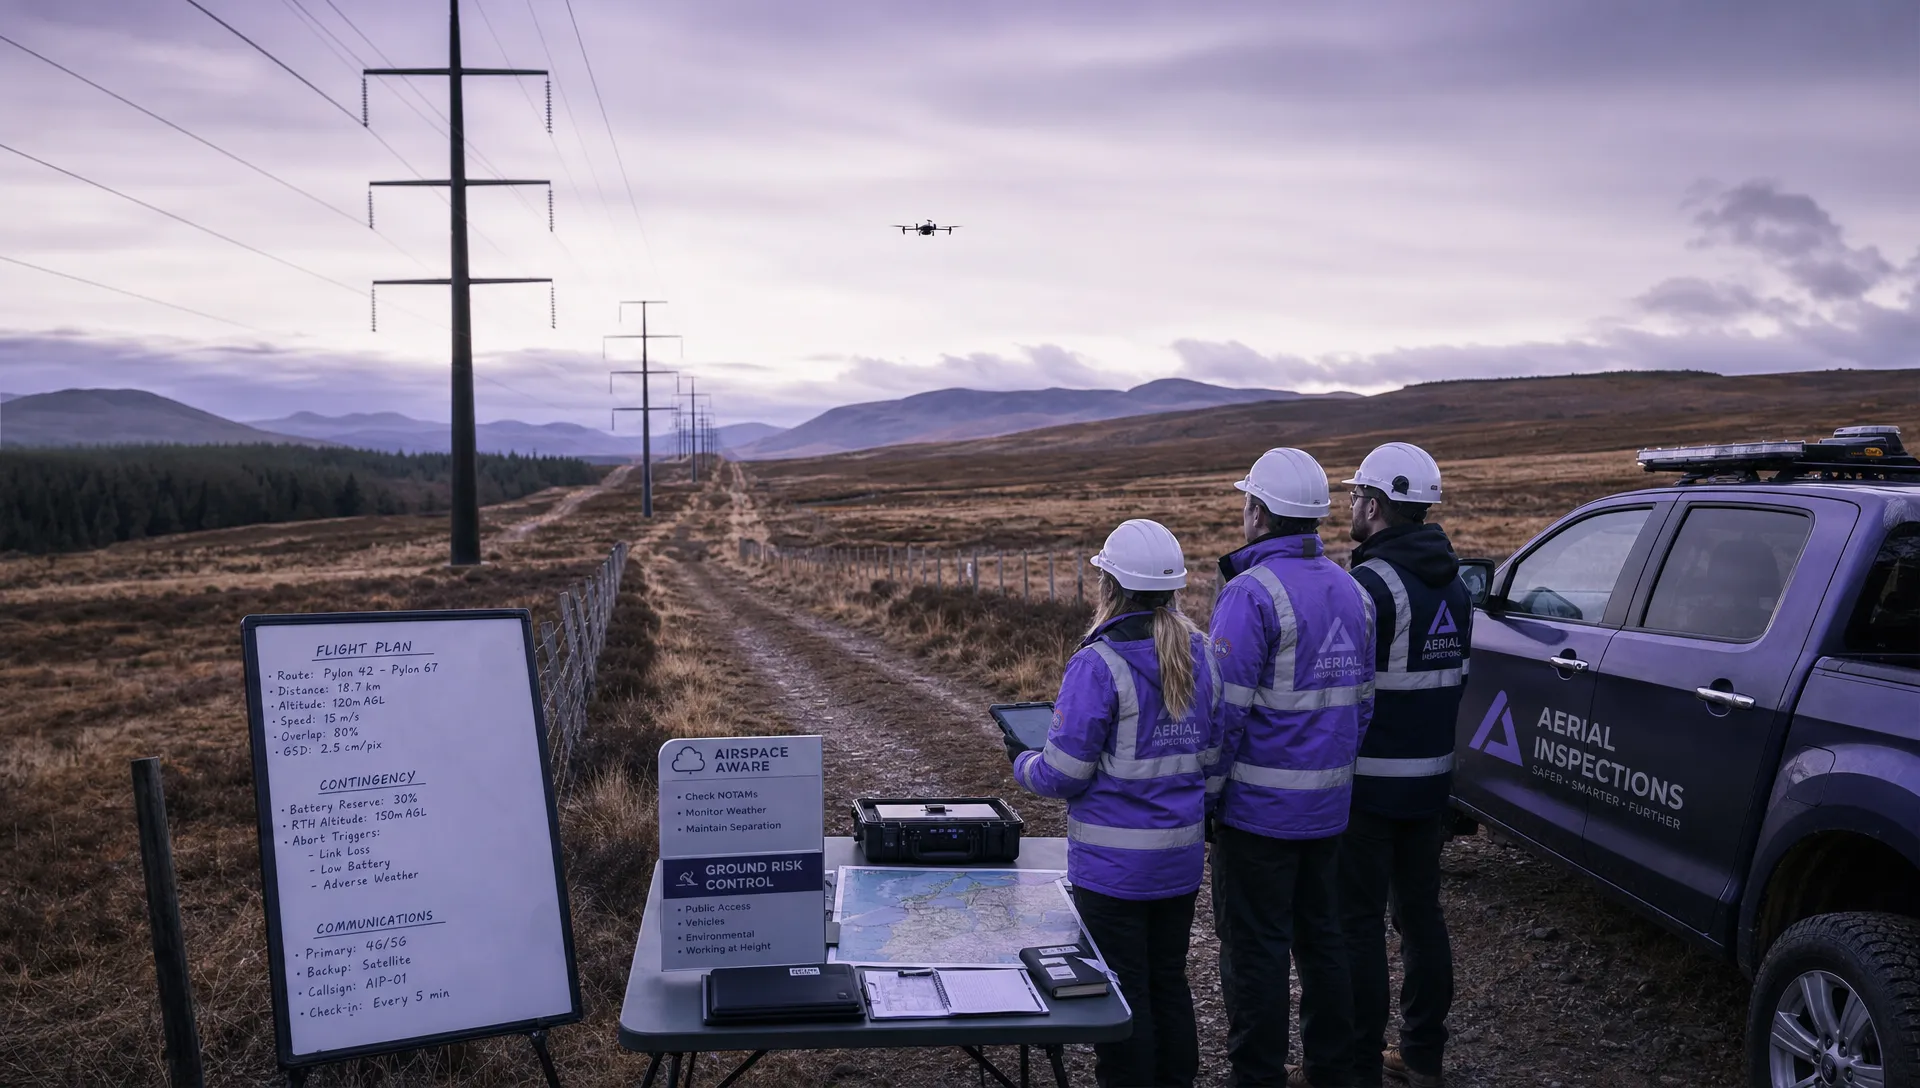
Evaluating Your Airspace and Environment
Long before your props ever spin up, the most important work for a safe flight happens on a screen. A rock-solid site and airspace assessment is absolutely non-negotiable for any professional pilot. This isn't just about glancing at a map; it's about getting a deep, practical understanding of the environment you're about to fly in.
This is the phase where you uncover the regulatory roadblocks, physical hazards, and weather factors that will dictate how—or even if—you can fly. Skipping this is like setting sail without checking the tide charts. You're just rolling the dice on safety.
This flow chart perfectly illustrates why this systematic process is so critical. It turns the very human potential for error into a solid framework for safety.

It’s a simple concept: a good checklist acts as a powerful buffer against mistakes and memory lapses, which directly leads to safer outcomes.
Decoding Airspace and On-Site Hazards
The first layer of your environmental check is all about the sky itself. You have to know exactly what class of airspace you'll be in and what rules come with it. This is where tools like the FAA's B4UFLY app or integrated platforms like Dronedesk become indispensable.
Let’s say you're booked for a real estate shoot. A quick map check shows the property is just two miles from a small, private grass airstrip. That proximity immediately raises a red flag, signaling a need for extreme vigilance and maybe even a phone call to the airstrip operator. It’s a classic case where a quick look isn't enough; you need to grasp the real-world implications of flying near any active runway.
Once you’ve got a handle on the airspace, your focus shifts to the ground. Using satellite imagery and mapping tools, you need to conduct a detailed review of your immediate flight area.
- Spot Critical Infrastructure: Pinpoint every power line, substation, and communication tower. These aren't just collision risks; they can also create electromagnetic interference that messes with your drone’s compass.
- Locate Sensitive Areas: Mark out schools, hospitals, parks, and busy roads on your flight plan. This helps you establish firm no-fly zones to keep uninvolved people on the ground safe.
- Assess the Lay of the Land: Take note of any major elevation changes, like hills or tall buildings. These can easily block your line of sight or mess with your Return-to-Home (RTH) settings.
Checking for Temporary Flight Restrictions
Airspace is never static; restrictions can pop up with little to no warning. That's why checking for NOTAMs (Notices to Airmen) and TFRs (Temporary Flight Restrictions) is a mandatory step. These alerts contain time-sensitive info that won't show up on your standard aeronautical charts.
A TFR might be in place for a VIP moving through the area, a major sporting event, or a wildfire. Flying into one is a serious violation. A NOTAM check might reveal something as simple but crucial as crane operations or unexpected tower light outages right next to your flight path.
Your authority as Pilot in Command (PIC) starts with your hands-off planning. A thorough airspace check is the first command decision you make, and it shows you’re serious about operating safely and legally.
This digital groundwork is your first line of defense. For a deeper dive into the nitty-gritty, you can learn more about understanding airspace for drones in our article, which breaks down the rules for each airspace class.
Analyzing Weather for Safe Drone Operations
Weather is, without a doubt, the most unpredictable part of any drone mission. Your assessment has to go way beyond a simple "sunny or cloudy" check. Pro pilots dig into the hard meteorological data to see how atmospheric conditions will really affect the aircraft.
Start with a METAR (Meteorological Aerodrome Report) from a nearby airport. This gives you a real-time snapshot of wind, visibility, cloud cover, and temperature. But wind is the big one. Always remember that wind speed can increase dramatically with altitude. What you feel on the ground might be nothing like what your drone is fighting at 200 feet.
It’s also smart to look for potential wind shear—a sudden change in wind speed or direction over a short distance. This often happens near buildings or terrain and can flip a drone in an instant.
It's More Than Just Wind and Rain
Two other data points are crucial for drone stability and navigation: the K-index and Visible Satellite imagery.
- The K-Index: This measures geomagnetic activity. A high K-index (usually 5 or above) can seriously disrupt GPS signals, leading to poor positioning or even a total loss of satellite lock. Trying to fly a precise waypoint mission during a geomagnetic storm is just asking for trouble.
- Visible Satellite: Watching satellite loops helps you see how weather systems are actually developing. You might spot a line of thunderstorms building just outside your area that a standard forecast completely missed, giving you the heads-up to land and pack up before things get ugly.
By pulling all these pieces together—airspace class, ground hazards, NOTAMs, and detailed weather—you build a complete operational picture. This foundational work ensures that by the time you arrive on-site, you’ve already neutralized the biggest risks.
Alright, you've done your digital homework on the airspace and weather. Now it's time to get hands-on. This is where your pilots preflight checklist moves from the screen to the aircraft itself. Think of this hands-on inspection as a physical conversation with your drone, letting you feel and see the small issues that could become big problems once you're airborne.
This methodical walk-around is how you really get to know your equipment. You're not just glancing at it; you're hunting for a hairline crack, feeling for a loose connection, and confirming the physical integrity of every single component. Your authority as Pilot in Command is cemented by this direct, personal verification of the aircraft's condition.

From the Airframe Down to the Screws
Kick off your physical check with the drone's body, or airframe. This is the skeleton of your aircraft, and its structural integrity is everything. Run your hands along the arms and chassis, applying a bit of gentle pressure to check for any unexpected flex or weakness.
Look closely for stress fractures, which often show up as thin white lines on plastic parts. You'll typically find these near motor mounts or landing gear attachment points—the areas that take the most punishment from vibration and landing impacts. A tiny fracture on the ground is a potential catastrophic failure at altitude.
Your inspection should zero in on these points:
- Screws and Fasteners: Give all screws a visual check. Make sure they're all there and look secure. A single missing screw can introduce vibrations that can lead to other components failing.
- Landing Gear: Check that the landing gear is firmly attached, free of cracks, and not bent or warped from a previous hard landing.
- Gimbal and Camera: Inspect the gimbal for freedom of movement. It should glide smoothly without any grinding or catching. Make sure the camera lens is clean and scratch-free—you don't want a ruined shot.
This level of detail isn't just for manned aviation. The disciplined approach used to inspect a Cessna is the exact same mindset a professional drone pilot applies before every single flight.
Examining the Propulsion System
The propellers are arguably the most critical part of your propulsion system. They're your drone’s wings, and even minuscule damage can throw everything off balance and become dangerous. Never, ever fly with a compromised prop.
Take each propeller and carefully run your finger along both the leading and trailing edges. You're feeling for any nicks, chips, or cracks. A small nick creates a weak point that could cause the propeller to shatter under the stress of high RPMs.
Think of a damaged propeller like a tire with a slow leak—it might work for a while, but failure is inevitable and unpredictable. The cost of a new set of props is microscopic compared to the cost of a lost drone.
After the blades, move on to the motors. Gently spin each one by hand. You should feel a slight magnetic resistance, but the rotation must be smooth. Any grittiness or binding could mean there's debris inside the motor or a bearing is failing, which is a definite no-go for flying.
Powering Up Safely with Battery Checks
Your drone’s batteries are its lifeblood, but they're also one of the biggest potential points of failure. A proper battery inspection is a non-negotiable step in every pilots preflight checklist.
Before slotting the battery into the aircraft, give it a thorough visual and physical once-over. Look for any signs of swelling or puffiness. A swollen LiPo battery is a massive fire hazard and must be safely discharged and disposed of immediately—don't even think about using it again.
Check for these other key battery health indicators:
- Inspect the Casing: Look for any dents, punctures, or cracks in the battery's outer shell.
- Check the Connectors: Make sure the electrical contacts are clean, free of corrosion, and not bent out of shape. A poor connection can lead to a sudden power loss mid-flight.
- Confirm the Charge: Power the battery on for a moment to check its charge level. Always take off with a full battery to maximize flight time and safety margins.
Once the battery is installed, make sure it clicks securely into place. A loose battery can disconnect from in-flight vibration, resulting in total power failure and an uncontrolled drop from the sky.
The Controller and Compass Calibration
With the aircraft checked, turn your attention to the remote controller. Your controller is your direct link to the drone, and making sure it's working properly is just as vital as the aircraft itself.
First, check the antennas for any damage and ensure they're positioned correctly for the best possible signal. Power on the controller and confirm it has enough juice for the entire planned mission. Next, test the control sticks and gimbal wheels, moving them through their full range of motion to make sure they feel smooth and responsive.
A final, crucial step is the compass calibration. Electromagnetic interference from things like metal structures, rebar in concrete, or even your own car can throw off the drone's internal compass. If you've travelled a good distance from your last flight or you're operating near potential interference, doing a compass calibration on-site is mandatory. This ensures your drone knows its precise orientation and can navigate accurately.
Documenting these physical checks is also a huge part of professional operations. Each inspection adds to a living history of the aircraft, which is essential for spotting wear-and-tear trends over time. Keeping a detailed log is fundamental, and you can learn more about creating an effective drone maintenance log to stay compliant and proactive. Beyond physical inspections, pilots are also turning to digital tools and motion flight simulators to rehearse complex scenarios and master their aircraft's systems before ever leaving the ground.
Mastering Your Digital Preflight Checks
A modern drone is as much about its software and firmware as it is about propellers and motors. Your physical inspection is obviously critical, but the digital side of your pilots preflight checklist is where you head off software glitches, flyaways, and mission-ending failures before they ever have a chance to happen. Skipping these steps is like climbing into a cockpit and ignoring the instrument panel—you're essentially flying blind to what the drone's brain is doing.
This digital deep-dive should be part of your prep long before you even think about leaving for the job site.
Imagine this scenario: you arrive for a time-sensitive shoot, only to discover your controller and aircraft firmware are mismatched. Now you're grounded, trying to troubleshoot a forced update on-site while the clock is ticking and the client is watching. Checking for updates the night before is a simple habit, but it's one of the key things that separates the pros from the amateurs.
Verifying Firmware and Failsafe Settings
Think of your drone's firmware as its operating system. When you have mismatched versions between the aircraft, the controller, and even the flight app, you're inviting unpredictable behavior. This can range from annoying control lag to a complete loss of connection mid-flight. Always, always confirm that every component is running the latest stable version.
Just as important are your failsafe settings. These rules dictate exactly what the drone will do if it loses its connection to your controller. This isn't a "set it and forget it" feature; you need to verify it for every single location you fly in.
- Signal Loss Behavior: Check that the drone is set to Return-to-Home (RTH), not just hover or, even worse, land. A "land" command over a lake, a busy road, or inaccessible terrain is a recipe for total loss.
- Home Point Lock: Before you launch, make absolutely sure your drone has acquired a strong GPS lock and accurately set its home point. A rushed launch without a confirmed home point can easily lead to a flyaway if RTH is ever triggered.
- Battery Level Failsafes: Are the low-battery RTH and critical-battery landing thresholds set appropriately for your mission? You need enough of a buffer to get back home safely, and this can change depending on wind conditions and flight distance.
The Critical Importance of Return-to-Home Altitude
Setting the Return-to-Home (RTH) altitude is hands-down one of the most crucial digital checks you'll perform. This one number determines whether your drone makes it back in one piece or slams into an unseen obstacle during an emergency. Your RTH altitude must be set higher than the tallest potential obstacle in your entire operational area.
For example, you might be flying in a wide-open park, but if there's a 150-foot cell tower half a mile away, your RTH altitude has to be at least 200 feet to be safe. You have to account for everything—trees, buildings, power lines—that the drone could possibly encounter on its direct flight path back to you. This is a perfect example of how solid site planning, which we cover in our guide to drone flight planning tools, directly informs your digital checklist.
Setting a generic RTH altitude is a dangerously lazy shortcut. You must assess every new location and adjust this setting based on real-world hazards. A correctly set RTH altitude is your drone's single best insurance policy against an automated collision.
Getting complacent with these digital checks can have devastating consequences, a lesson learned the hard way over decades in manned aviation. The NTSB's analysis of a 2014 private jet crash found the pilots tried to take off with the flight controls locked. Shockingly, flight data revealed that incomplete preflight control checks were routine, happening in 98% of the previous 175 takeoffs. Broader studies show partial or entirely skipped checklists happen thousands of times a year, highlighting how easily complacency can creep in. You can read more in this in-depth analysis of preflight checklist adherence.
This history is a stark reminder for us as drone pilots: even the checks that feel the most routine are critical. A digital preflight checklist isn't just about ticking boxes next to software settings; it's about reinforcing the professional discipline that ensures every single flight is built on a foundation of safety, not assumption.
Preparing Your Crew and Emergency Plans
A professional drone flight is rarely a one-person show. Even when you're flying solo, your "crew" still includes clients, stakeholders, and anyone else on-site. This is where a truly professional pilots preflight checklist shines—by expanding to cover team communication and emergency planning.
It’s the step that separates a smooth, professional mission from a disorganized and potentially dangerous one. This isn't just about being polite; it's about establishing clear command and control before the props ever start spinning.
Every single flight needs a pre-mission briefing. No exceptions. This is your chance to get everyone on the same page, set clear expectations, and walk through the safety protocols. It’s a simple but powerful step that builds trust and makes sure everyone understands their role.

Conducting an Effective Crew Briefing
A solid crew briefing is your final operational huddle before kickoff. It needs to be concise, clear, and cover all the essential bases to get the Pilot-in-Command (PIC), any Visual Observers (VOs), and other team members completely in sync.
Your briefing should always nail these points:
- Mission Objective: Be specific. Instead of "getting some shots," say, "We're capturing three cinematic orbits of the main building, followed by a top-down shot of the construction progress."
- Roles and Responsibilities: Leave no room for ambiguity. "I am the PIC. Sarah, you're my VO; focus on the airspace to the west and maintain line-of-sight. Mark, you'll be managing crowd control on the pathway over there."
- Communication Plan: Keep it simple and direct. "We're using handheld radios on channel three. The call 'Clear' means the airspace is free. 'Land Now' is our emergency command."
- Flight Path and Hazards: Give a quick visual walkthrough. Point out the planned flight path and any known hazards like wires, trees, or the designated emergency landing zone.
This kind of structured communication is everything. Everyone knows their job, the game plan, and how to talk to each other when it counts.
Proactive Emergency Planning
Hope is not a strategy. A true professional has actionable, memorized responses for the most likely failure scenarios. This isn't about writing a long, theoretical document nobody reads; it's about having immediate, muscle-memory actions that you and your crew can execute without a second thought.
Your emergency action plan has to be a core part of your briefing. Run through the clear, simple steps for common issues:
- Lost Link (Signal Loss): "If we lose signal, the drone is programmed to return to home at 200 feet. Don't panic; we'll monitor its automated return."
- Sudden Weather Change: "If the wind suddenly picks up or rain starts, I'm immediately bringing the drone back to our primary recovery zone."
- Bird Strike or Aggression: "If a bird gets aggressive, I will descend quickly and fly away from its territory to land safely."
- Battery Failure Warning: "The second we get a critical battery warning, the flight is over. I'm landing immediately at the closest safe spot."
Having pre-planned responses transforms a panic-inducing event into a manageable incident. You're no longer just reacting; you're executing a plan you've already rehearsed.
Briefing Clients for Safety and Trust
Don't forget, your client is part of the on-site team, and their safety is your responsibility. A quick, professional safety briefing does wonders for managing their expectations and showing them you’re a pro who prioritizes safety.
Keep it simple. Point out the designated takeoff and landing zones and ask them to stay a safe distance away. It’s also a good idea to explain what certain sounds mean, like the beeping of a low-battery alert, so they don’t get alarmed for no reason. It’s a small detail, but it builds immense professional trust.
This entire checklist-driven approach to safety isn't new; it has deep roots in aviation history. The preflight checklist's journey from a simple paper idea in 1935 to a global aviation standard has slashed risks for decades. Human factors research consistently proves that checklists are incredibly effective at countering cognitive overload under pressure. For drone pros, this history validates our need for smart planning tools that make safety systematic.
To really appreciate its heritage, you can read more about the checklist's role as a top risk mitigation tool.
Common Questions from the Cockpit
Even the most seasoned pilots run into tricky situations in the field. Let's tackle some of the most common questions I hear about preflight checklists, with practical answers drawn straight from real-world experience. Think of this as the stuff you learn after the textbook is closed—the practical knowledge that makes you a safer, more adaptable pilot.
These aren't just academic exercises; they're the kind of problems you’ll face sooner or later.
How Should I Adapt My Checklist for Different Drones?
This is a big one. While your core safety checks—airspace, weather, failsafe settings—are pretty much universal, you absolutely have to tailor the hands-on aircraft inspection part of your pilots preflight checklist to the specific drone you’re flying that day.
For instance, checking the folding arm mechanisms for a secure lock is a critical step for a DJI Mavic 3, but it's completely irrelevant for a fixed-frame rig like an Inspire 3. On the flip side, a detailed landing gear inspection is a major checkpoint on an Inspire, whereas it's barely a glance on a tiny Mini.
- Fixed-Wing Drones: Here, you need to be laser-focused on control surfaces like ailerons and elevators, and the structural integrity of the wings and fuselage.
- VTOL Hybrids: Your checklist must have specific items for the transition mechanisms and tilt-rotors. These are complex parts and unique points of failure.
- Heavy-Lift Drones: With these beasts, you need an extra level of scrutiny on battery connections, payload security, and motor mount integrity. The loads are just so much higher.
The golden rule here is to have your standard checklist and then bolt on a model-specific addendum for each drone in your fleet. Never assume one size fits all. Each airframe is its own system with its own quirks.
What if I Get Interrupted During My Checklist?
Distractions are the enemy of safety, and they happen all the time. A client walks up with a "quick question," your phone rings, a curious member of the public wants to chat. If you get interrupted mid-checklist, there's only one safe way forward: start that entire section over from the beginning.
Don't try to be a hero and pick up where you think you left off. Memory is notoriously unreliable under pressure. If you were halfway through the physical aircraft inspection, go right back to the first item in that section and re-verify everything. It might feel a bit silly, but this simple habit is one of your strongest defenses against complacency.
How Do I Handle Checklists in Bad Weather?
Flying in tough conditions—cold, rain, high wind—adds a whole other layer of risk. Rushing through your preflight just to get out of the elements is a classic recipe for disaster. You don't rush; you adapt.
Where possible, do as much of your checklist as you can from a sheltered spot, like inside your vehicle or under an awning. This is the perfect time to knock out all the digital checks, controller setup, and the initial battery inspection.
For the hands-on inspection out in the weather:
- Be Deliberate: Seriously, slow down. Cold fingers are less sensitive and can miss small issues. Rain can easily hide a hairline crack or damage.
- Protect Your Gear: Do your best to shield the drone and controller from direct rain during the inspection. A simple umbrella can make a huge difference.
- Add Weather-Specific Checks: Your checklist should now include items like confirming all port covers are securely sealed and giving the sensor lenses a final wipe-down right before you take off.
Your discipline during preflight is never more important than when conditions are at their worst. A meticulous check in bad weather is the mark of a true professional.
Streamline your entire operational workflow, from preflight checks to final reports. With Dronedesk, you can manage your fleet, plan missions with integrated airspace intelligence, and ensure every flight is safe and compliant. Try it today and see how much time you can save. Learn more at https://dronedesk.io.
 What a BVLOS Flight Means for Risk and Compliance →
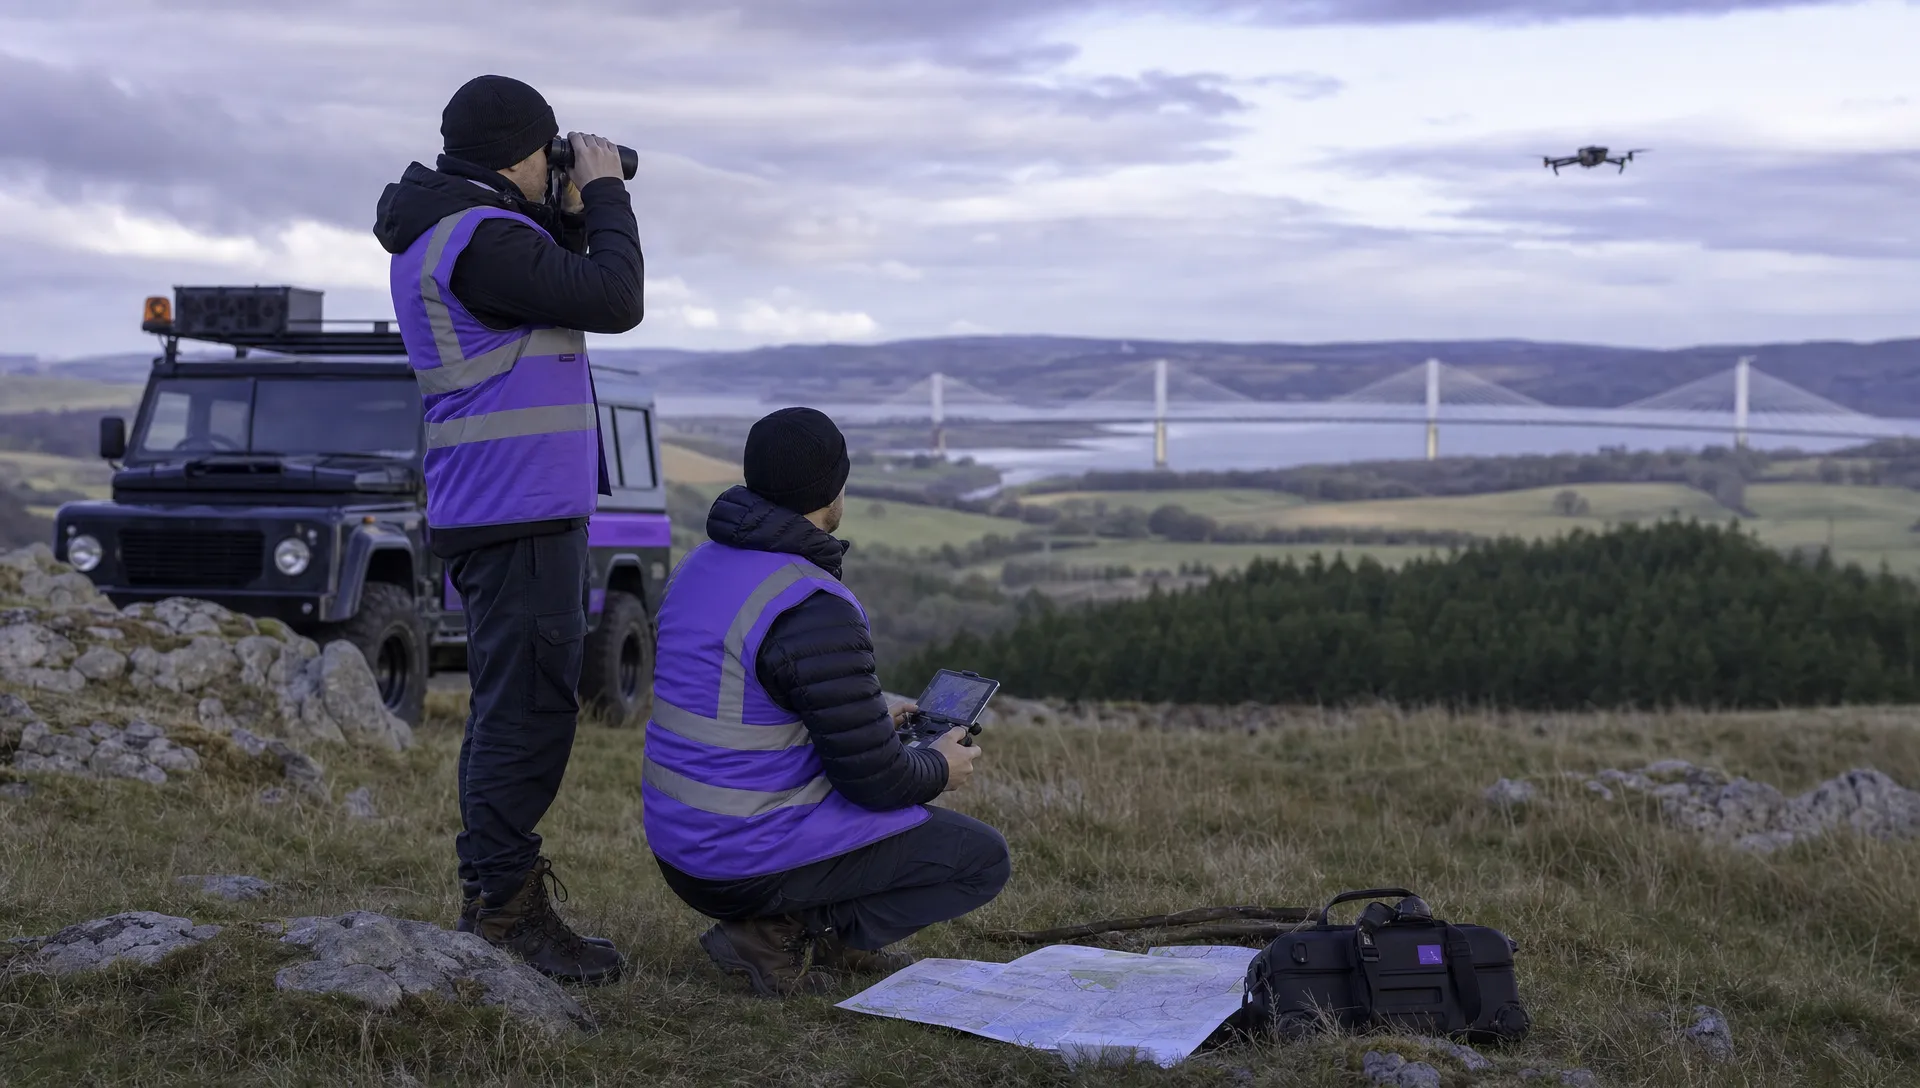 Drone VLOS Rules Explained for Commercial Teams →
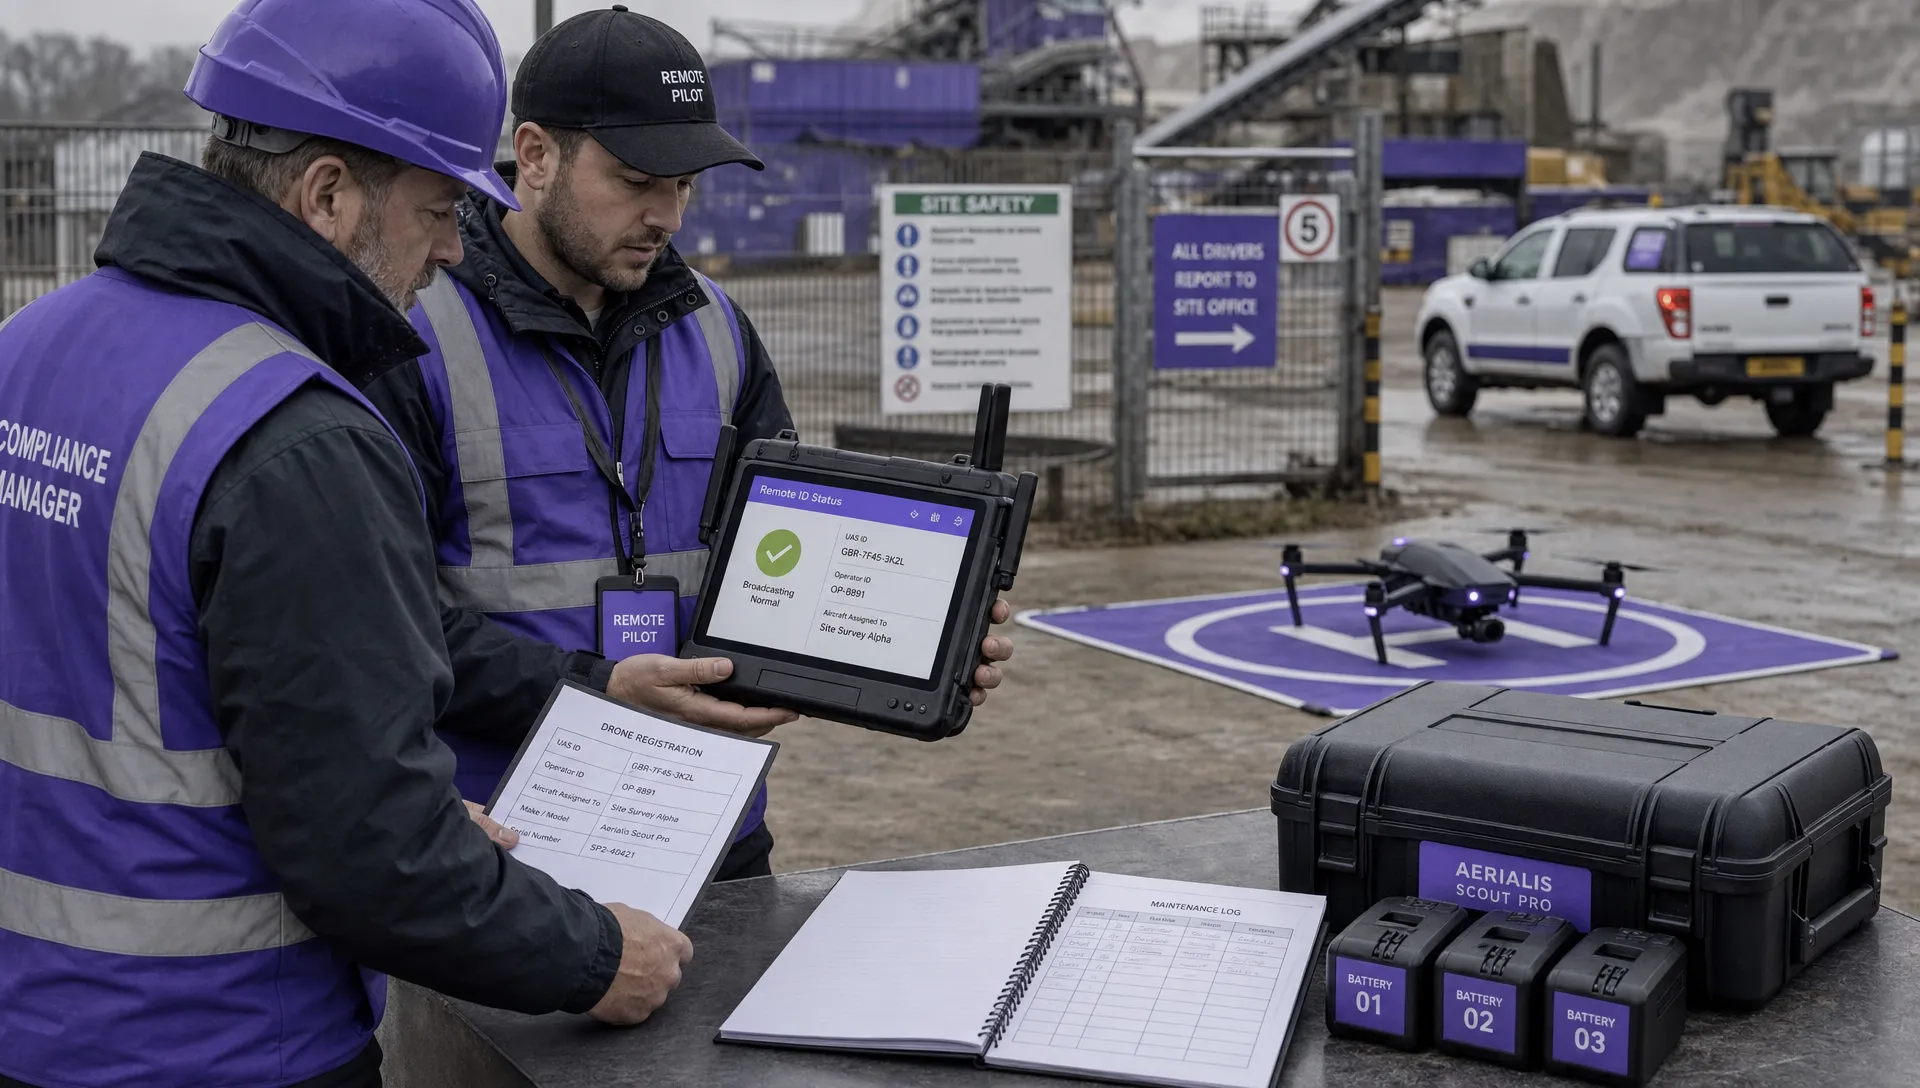 FAA Remote ID Rule Explained for Commercial Pilots →
 Drone Legal Requirements for Commercial Operations →
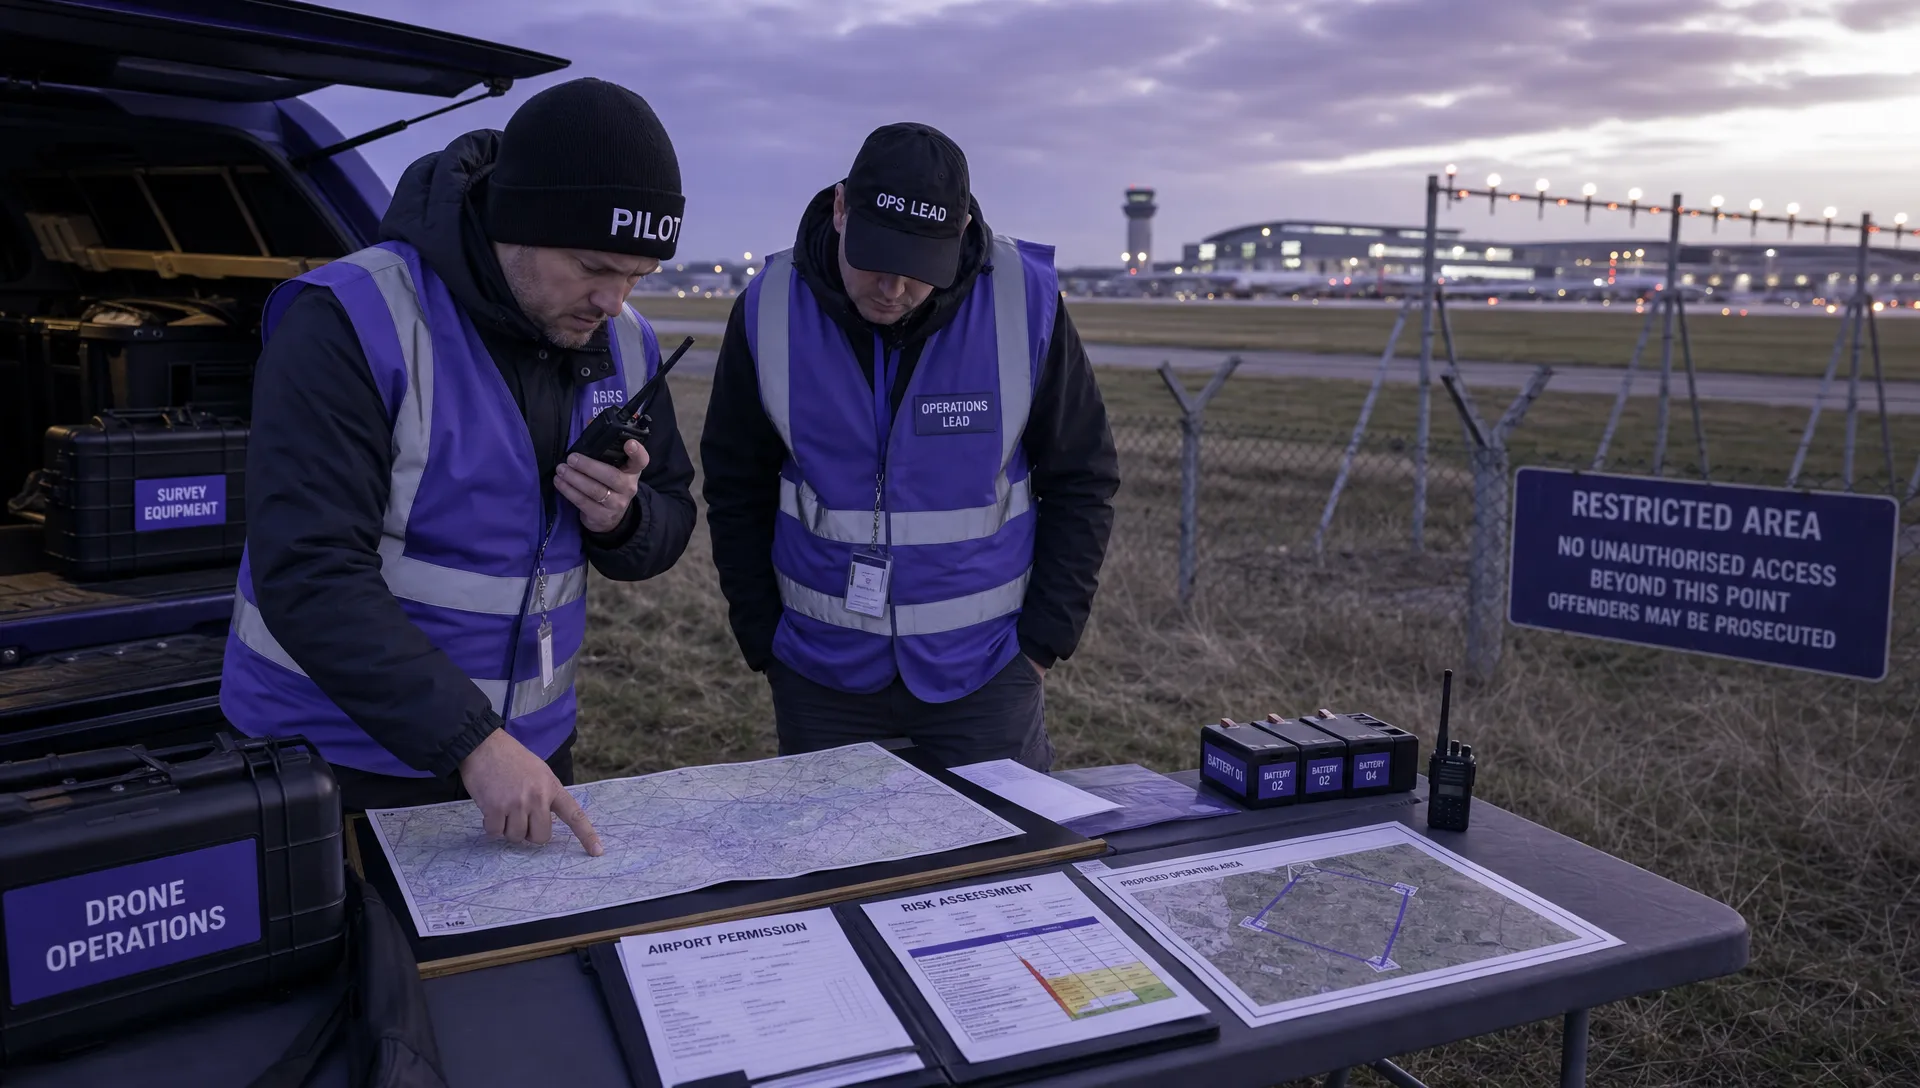 Drone Near Airport Rules Explained for Safer Planning →
 International Drone Regulations Every Global Team Should Know →
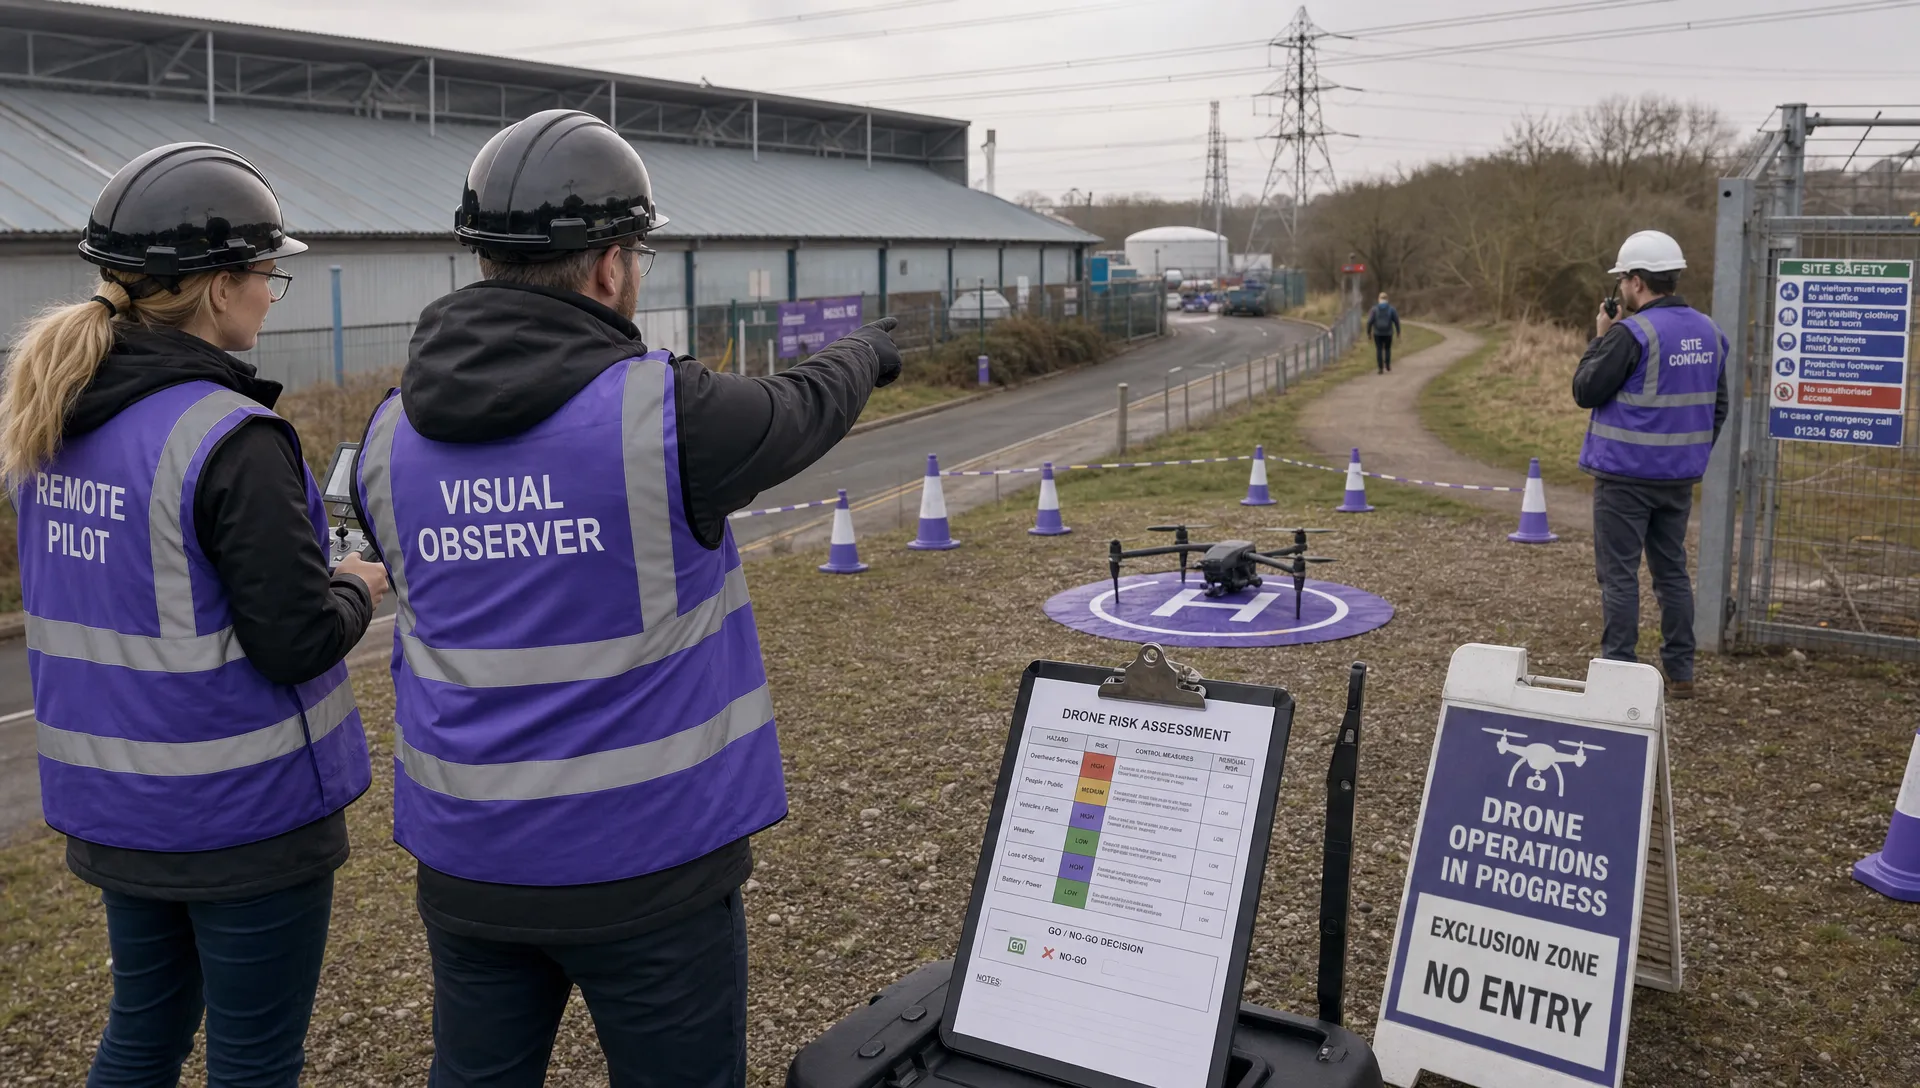 Drone Flight Risk Assessment Example for Safer Missions →
 Beyond Visual Line of Sight Explained for Operators →
 How BVLOS Drone Operations Change Commercial Workflows →
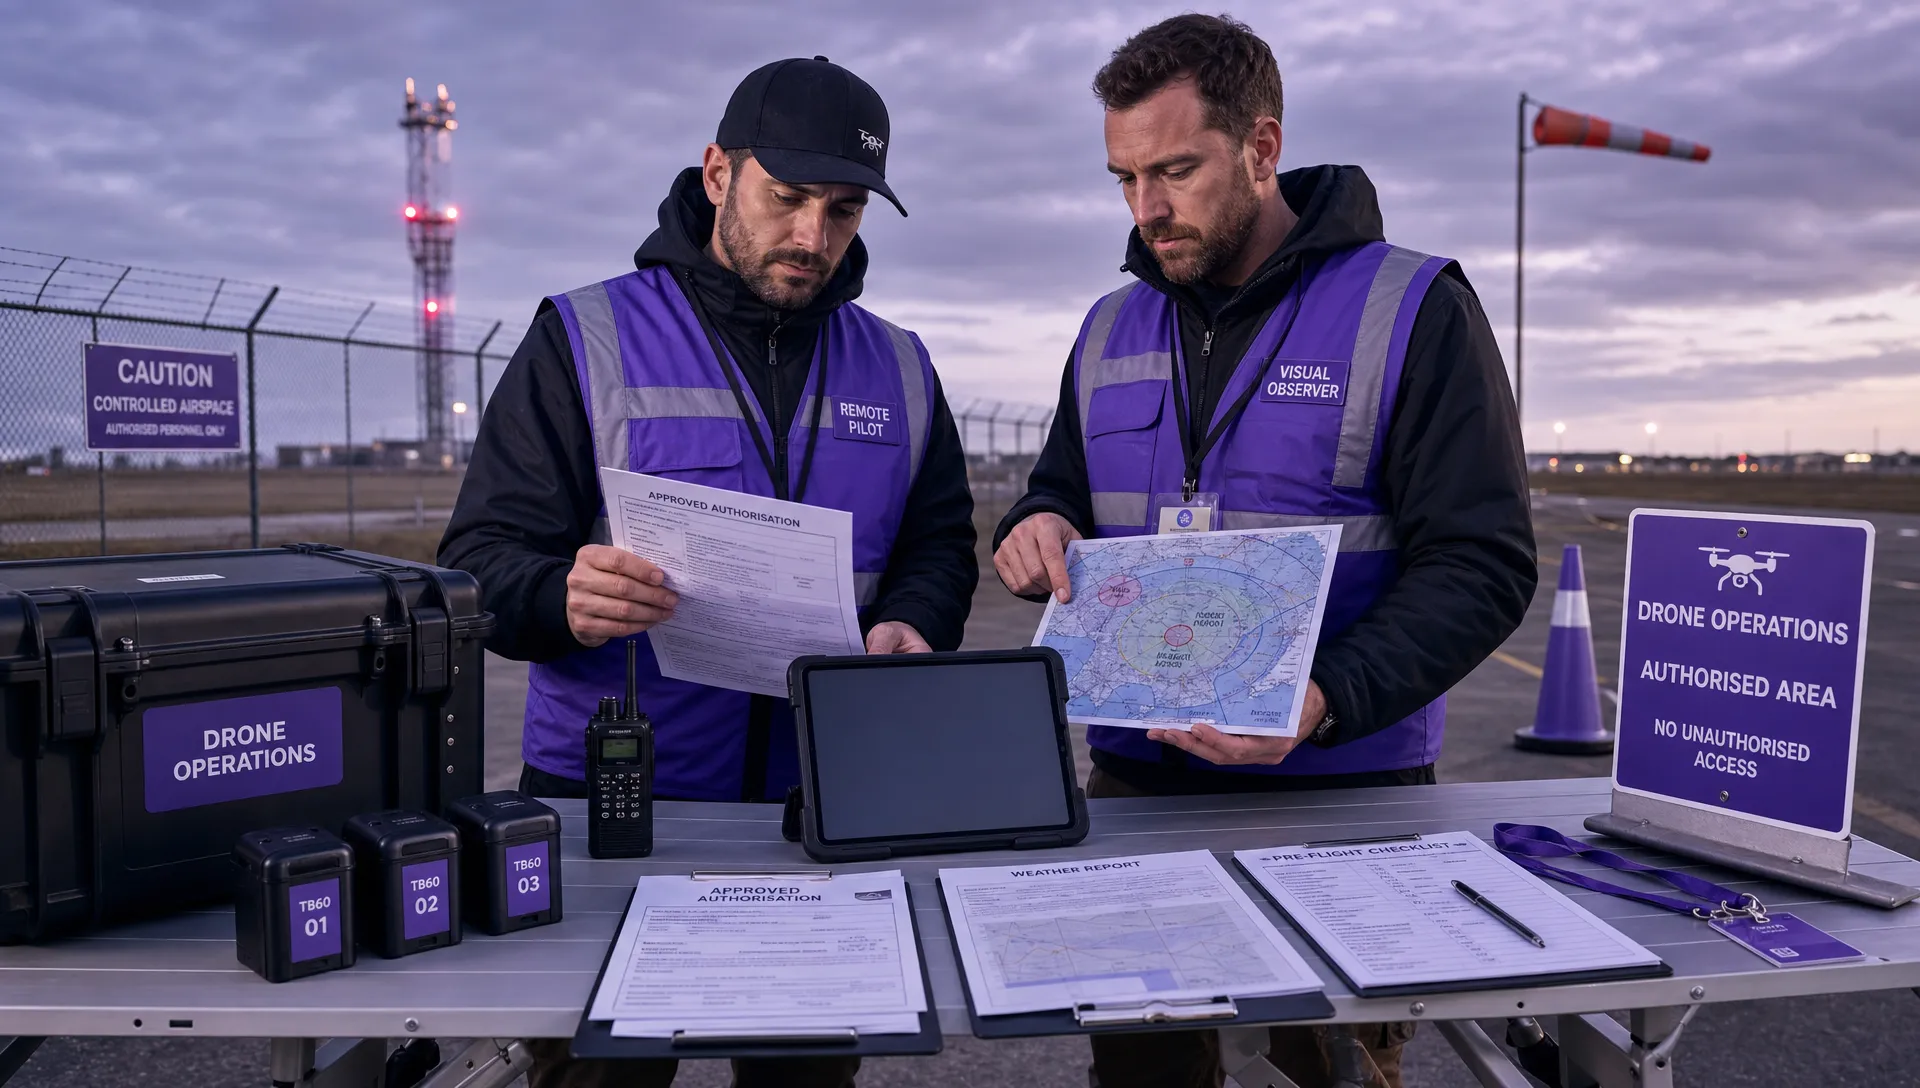 FAA Drone Rules Every Commercial Pilot Should Know →